
Pluggable Authentication#
Voxel51 v1.6.0 introduces Pluggable Authentication that provides the Central Authentication Service (CAS). CAS is a self-contained authentication system that stores users, organizations, and memberships in MongoDB, so user data is immediately consistent across Voxel51, and it may run in environments without egress to the internet. CAS provides a UI, REST API, and JavaScript (JS) Hook mechanism to manage Voxel51 user data and authentication.
CAS authenticates users through an identity provider. Unless the deployment is air-gapped, users sign in through the Auth0 provider Voxel51 configures for it, which connects to SAML and other enterprise identity providers. Air-gapped deployments configure their own OpenID Connect (OIDC) or OAuth2 identity provider in CAS, as described in Identity Providers.
Upgrading From Legacy Mode#
Voxel51 v2.26.0 removes legacy authentication mode, in which Auth0 stored
users and organization membership, along with the FIFTYONE_AUTH_MODE setting,
which is now ignored. On its first start after the upgrade, CAS imports the
organization’s Auth0 members, with their roles and groups, into MongoDB. Users
keep signing in through Auth0.
When several Auth0 accounts share an email address, CAS imports one of them and
saves the others in the users.legacy_migration_duplicates collection of the
CAS database.
Super Admin UI#
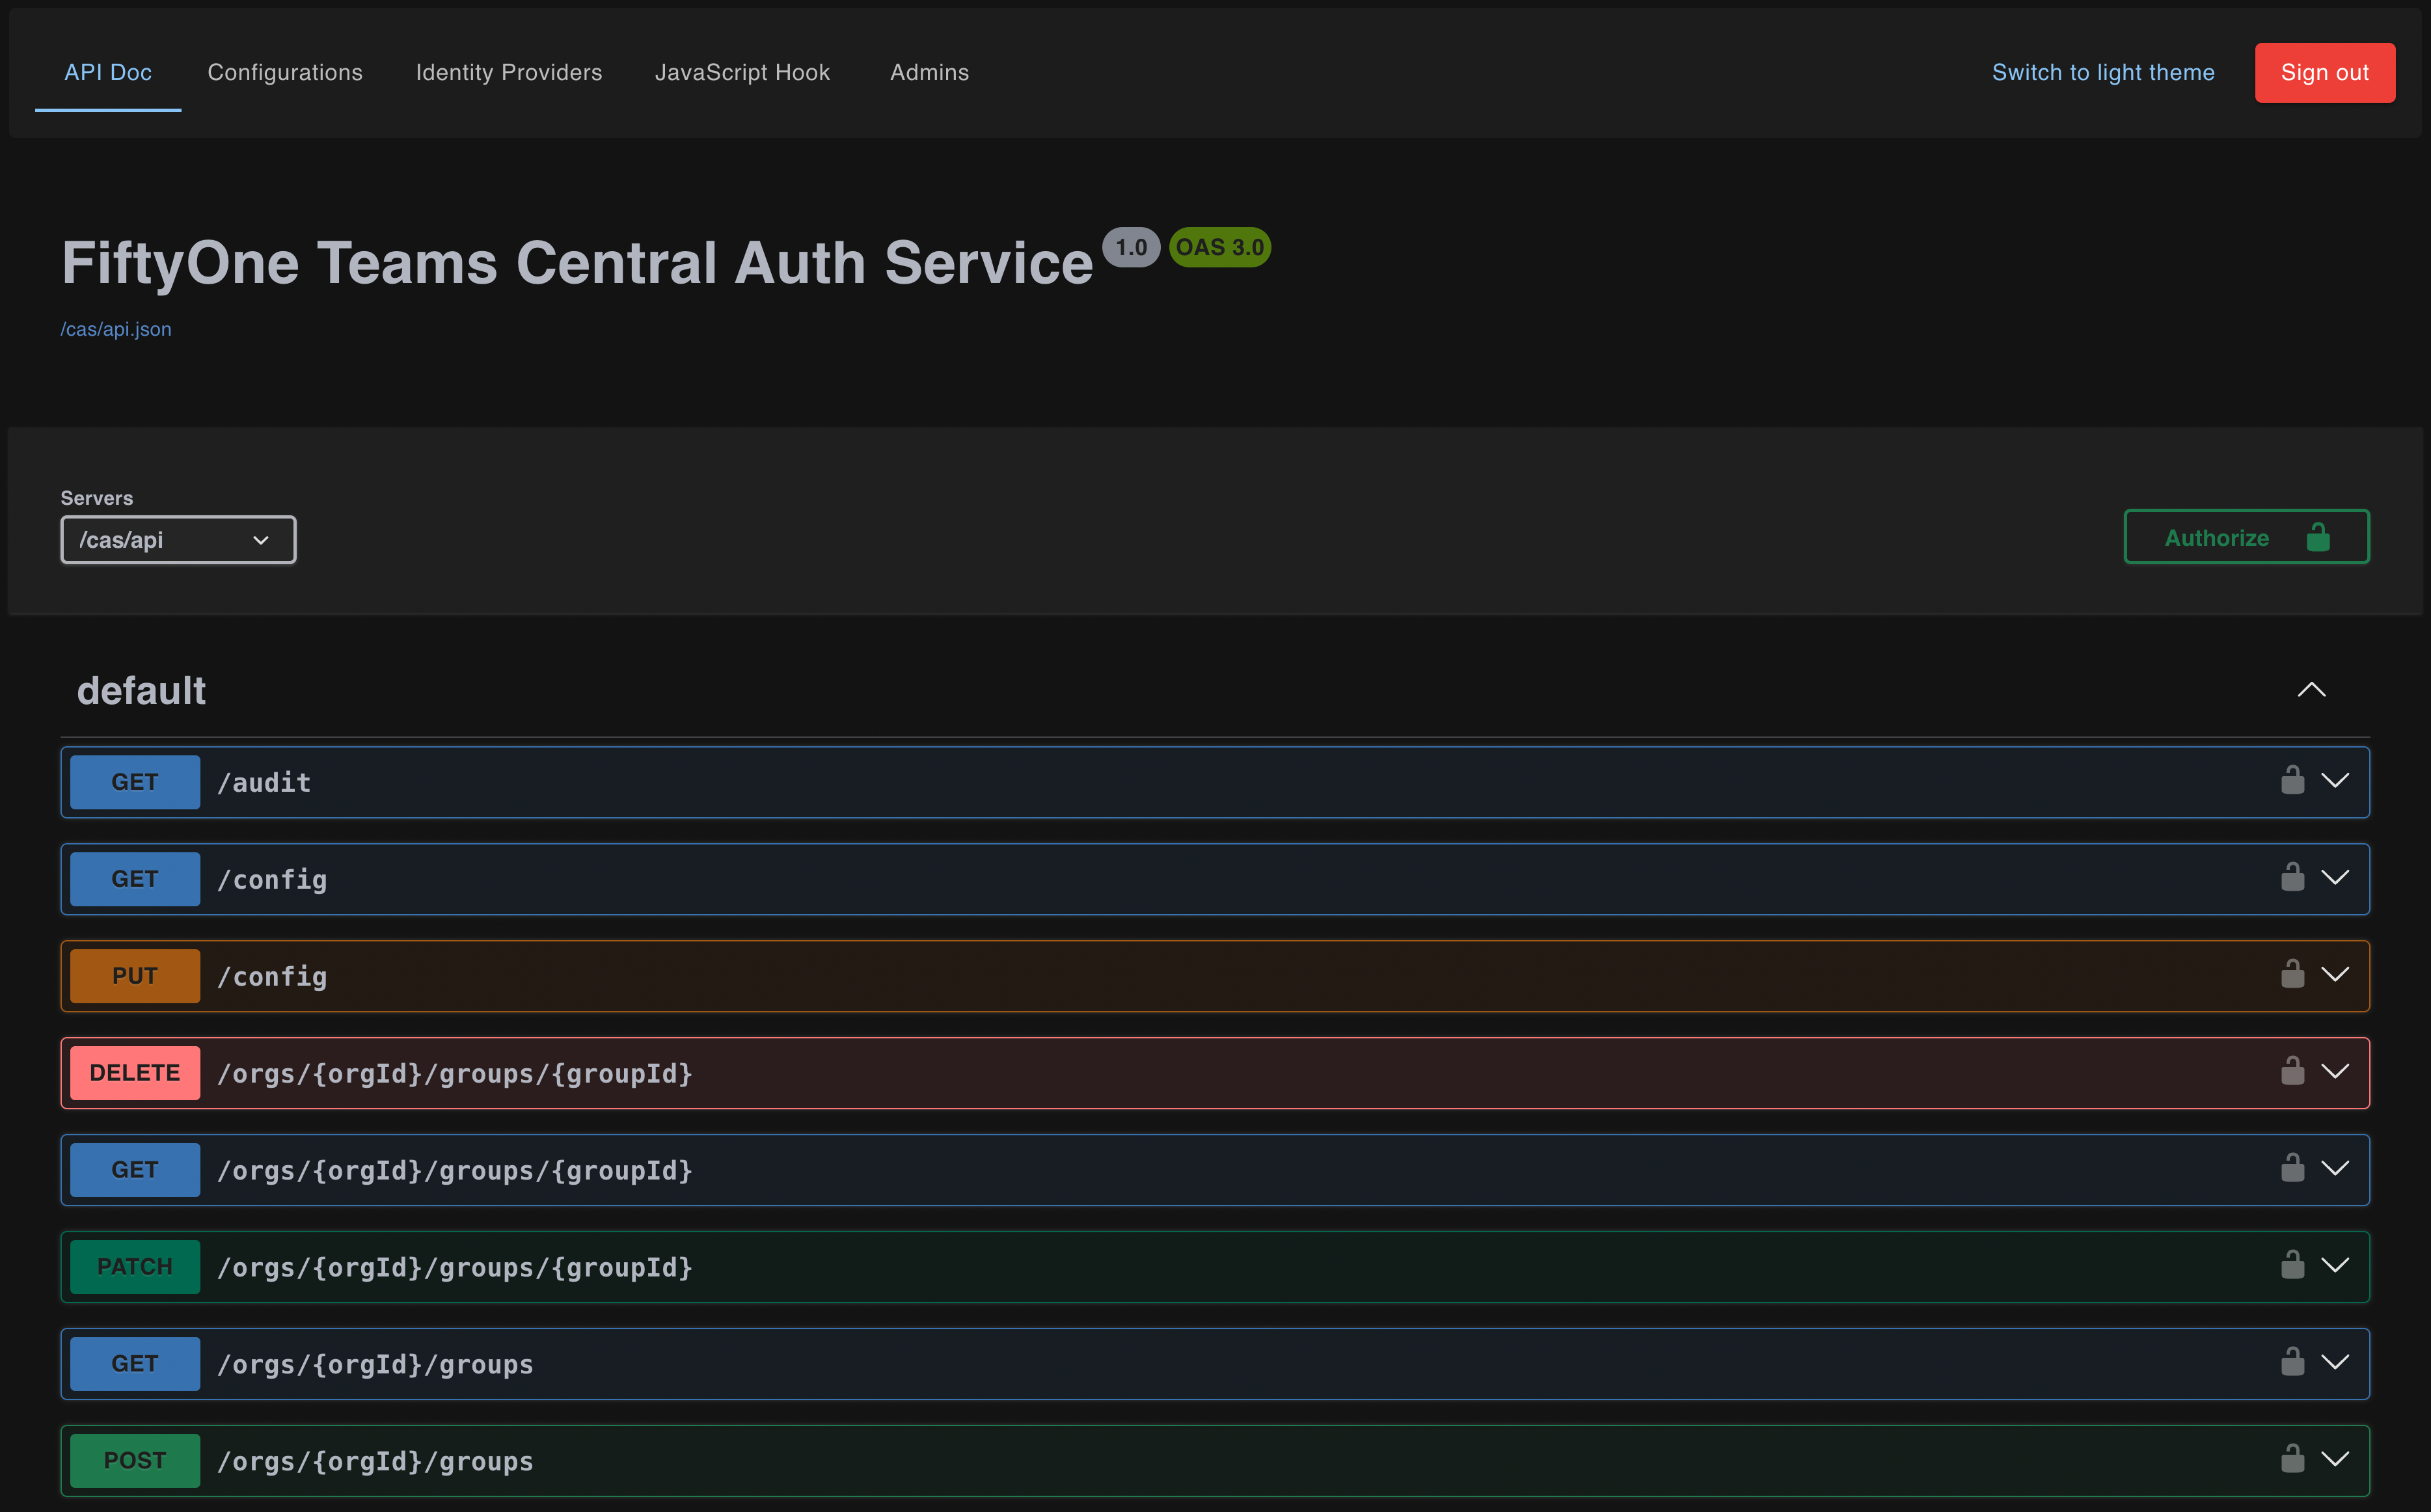
The Super Admin UI contains Voxel51 deployment wide configurations. When logging into Voxel51 as an admin, you are in the context of an organization. Settings are scoped by organization and only apply to that organization. The Super Admin UI allows you to administer all organizations and global configurations (Identity Providers, Session timeouts, and JS hooks).
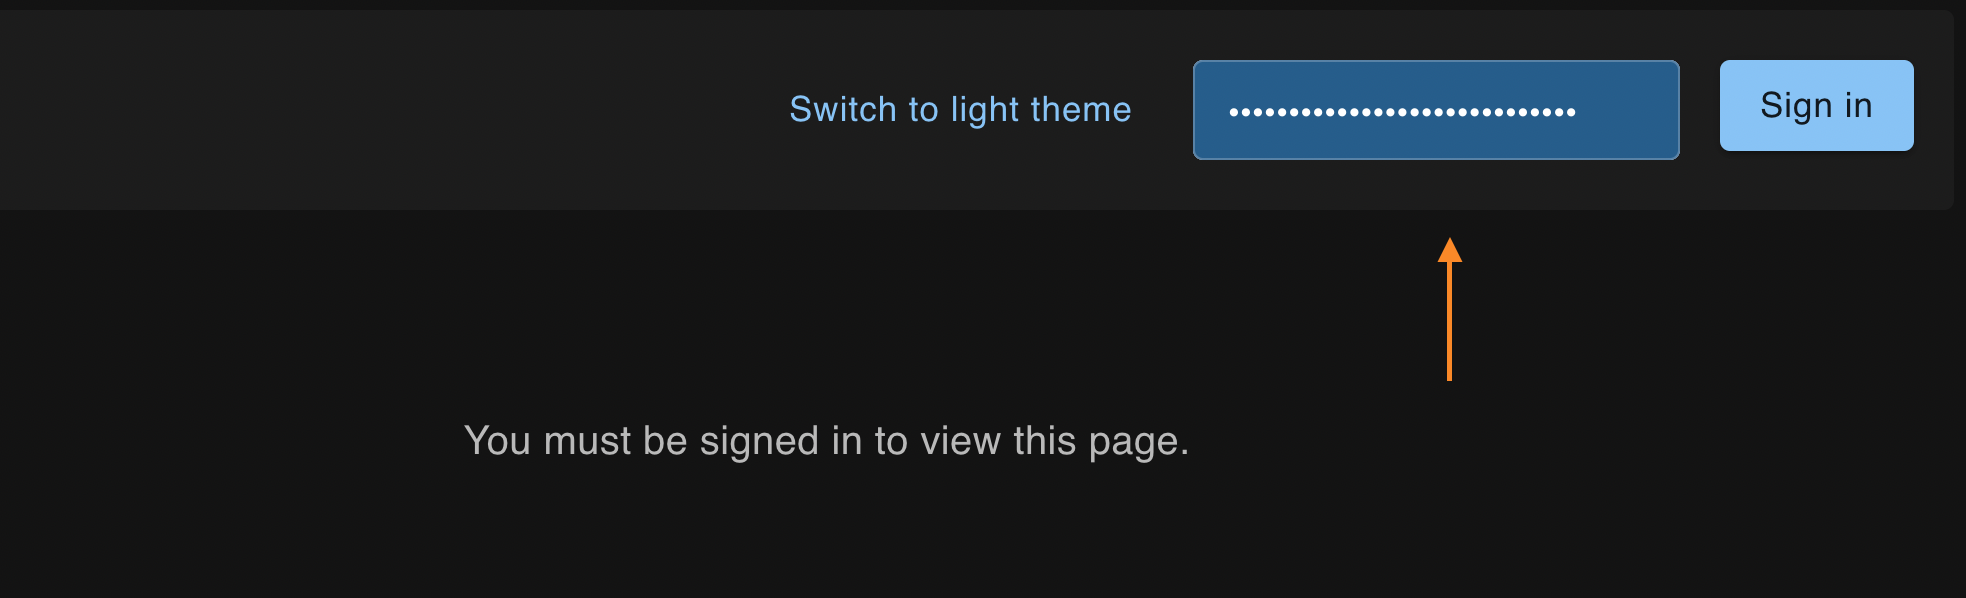
To log in to this application, navigate to
https://<YOUR_FIFTYONE_TEAMS_URL>/cas/configurations and enter the
FIFTYONE_AUTH_SECRET in the top right of the page.
NOTE: The value of
FIFTYONE_AUTH_SECRETshould be set prior to installation or upgrade.
New User Invitations#
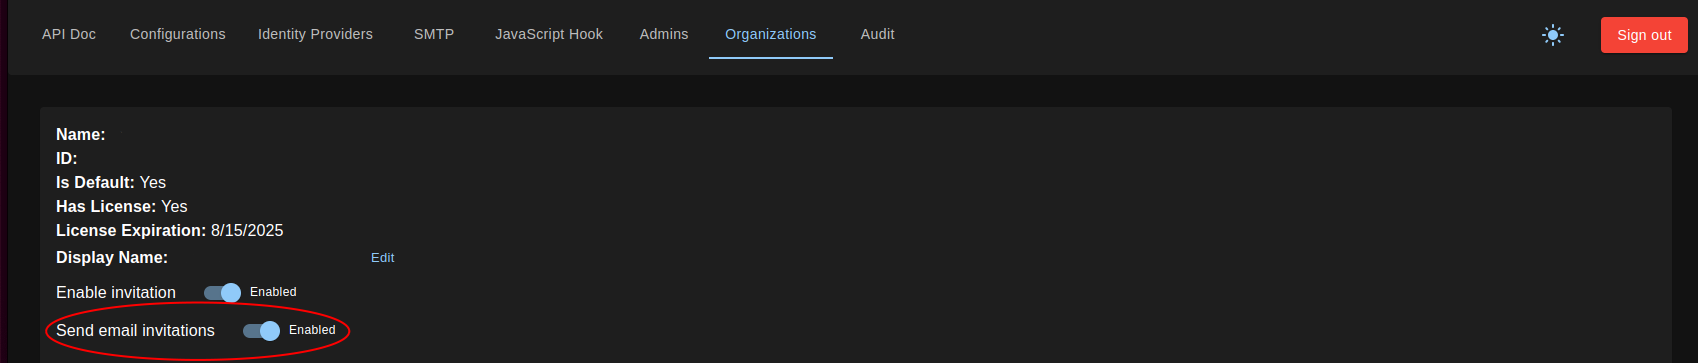
As of Voxel51 2.1.0, onboarding new users can be done via invitation links. As of Voxel51 2.26.0, invitations are enabled by default. To turn them off, toggle “Enable invitation” off in the Organizations section of the Super Admin UI.

This allows creating invitation links that can be manually sent to users. When those users click the links, they will be added to the Organization and prompted to log in.
As of Voxel51 2.2.0, these invitation links can be automatically sent via an email through a configured SMTP server, without the need for any external connection beyond the SMTP server itself.
NOTE: Unless the deployment is a Managed Deployment, users must provide their own SMTP server. This functionality provides a way to authenticate and communicate with your existing mail server.
To do so, “Send email invitations” must be toggled on in the Organizations section of the Super Admin UI
To configure your SMTP connection, navigate to the SMTP section of the Super Admin UI
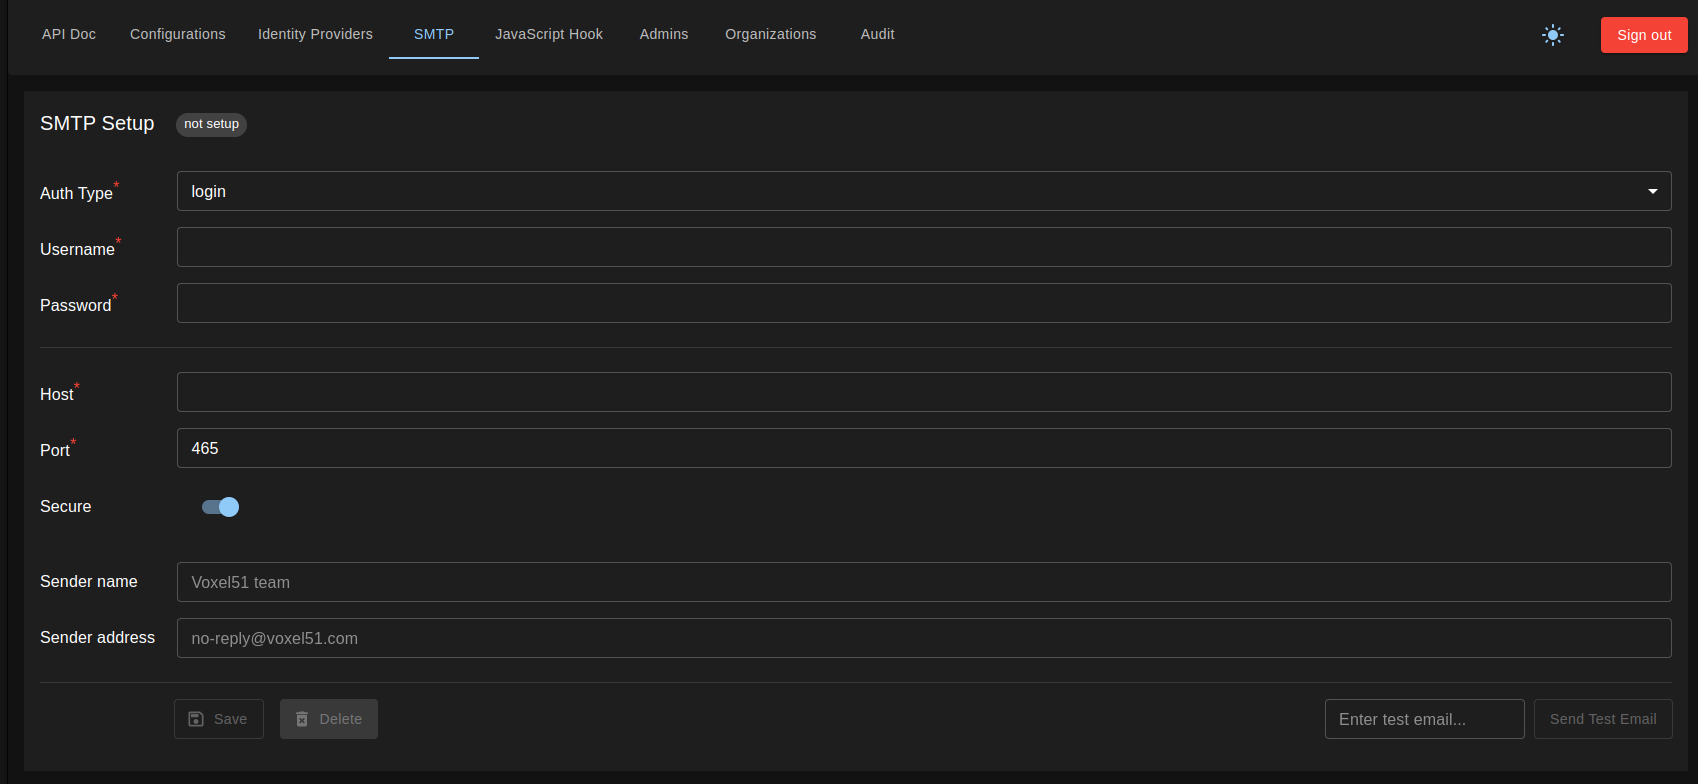
A notification at the top of the menu will inform if an SMTP configuration is already saved. Currently, only one SMTP configuration can be saved per Organization.
Select the appropriate type of authentication for your SMTP server and fill out the associated fields. When you save the configuration, Voxel51 will do a preliminary check to ensure that the SMTP server is reachable at the host provided. The configuration will not save otherwise.
Additionally, users can enter a valid email address and click Send Test Email to test the connection.
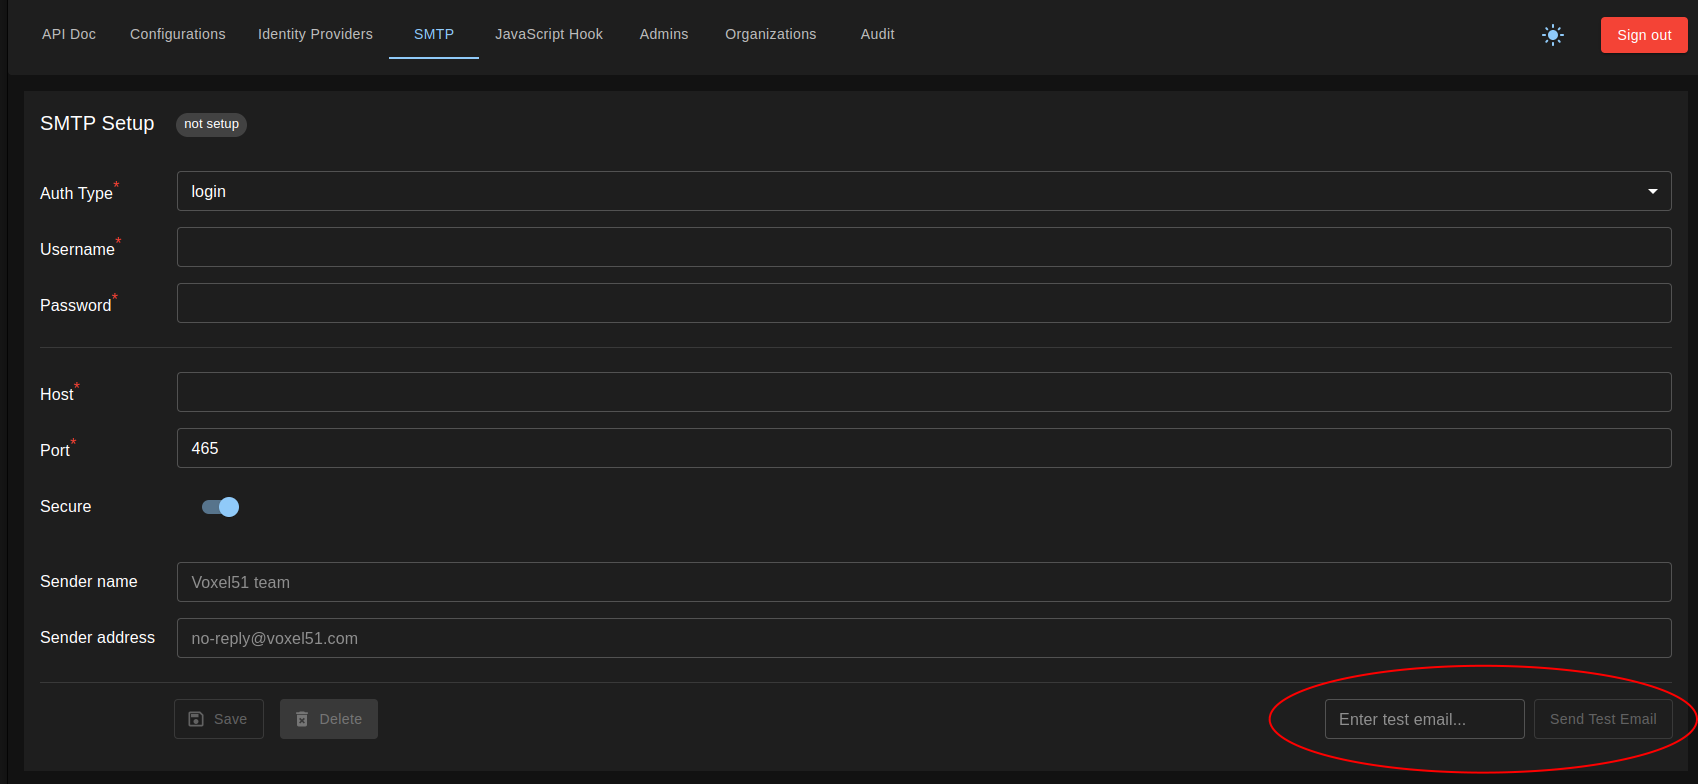
NOTE: Emails and an SMTP connection are not required to use invitations. Invitation links can still be generated and manually distributed without an SMTP configuration.
Identity Providers (IdP)#
Custom identity providers are supported in air-gapped deployments only. Use the CAS REST API or Super Admin UI to configure Voxel51 to authenticate users via OIDC-compatible or OAuth2-compatible Identity Providers. Below is an example configuration for KeyCloak as an Identity Provider.
{
    "id": "keycloak-example",
    "wellKnown": "https://keycloak.dev.acme.ai/auth/realms/acme/.well-known/openid-configuration",
    "name": "KeyCloak",
    "type": "oauth",
    "authorization": {
        "url": "https://keycloak.acme.ai/auth/realms/acme/protocol/openid-connect/auth",
        "params": {
            "scope": "openid email profile offline_access"
        }
    },
    "clientId": "...",
    "clientSecret": "...",
    "issuer": "https://keycloak.dev.acme.ai/auth/realms/acme",
    "token": {
        "url": "https://keycloak.dev.acme.ai/auth/realms/acme/protocol/openid-connect/token"
    },
    "userinfo": {
        "url": "https://keycloak.dev.acme.ai/auth/realms/acme/protocol/openid-connect/userinfo"
    },
    "idToken": true,
    "style": {
        "logoDark": "https://images.com/keycloak.svg",
        "bg": "#47abc6",
        "text": "#fff"
    },
    "profile": "(e,l)=>(console.log({profile:e,tokens:l}),{id:e.sub,name:e.name,email:e.email,image:null})",
    "allowDangerousEmailAccountLinking": true
}
Getting Started#
Follow the steps below to add your first admin and sign in to the app.
Log in to the Super Admin UI by navigating to
https://<YOUR_FIFTYONE_TEAMS_URL>/cas/configurationsand entering theFIFTYONE_AUTH_SECRETin the top right of the page.(Air-gapped only) Add your identity provider
Click the “Identity Providers” tab at the top of the page, then click “Add provider”
Fill out the “Add identity provider” form, or click “Switch to advanced editor” to provide the full configuration as a JSON object
In the “Profile callback” field, map the user info your identity provider returns to the Voxel51 user’s
id,name,email, andimage, as theprofileof the example configuration does
Add an admin
Click the “Admins” tab
Click “Add admin” in the bottom left
Enter the user’s name and the email address they have in your identity provider, then click “Add”
Sign in to the app with that email address
Navigate to
https://<YOUR_FIFTYONE_TEAMS_URL>/datasets, which redirects you to the sign-in pageClick the button for your identity provider, or, outside air-gapped deployments, the provider Voxel51 configured for you, and sign in
Click the icon in the top right corner, then click “Settings”
Click “Users” on the left side and check that the user is listed as an admin
NOTE: Steps 3 and 4 can be done in either order when the user is able to sign in before being added: with an invitation, or when “Allow auto join” is checked on the identity provider, which gives them the organization’s default role. Adding a user who has already signed in as an admin changes their role to admin. Otherwise, a user who is not a member of the organization cannot sign in, so add the admin first.
Syncing with 3rd Party Directories (Open Directory, LDAP, and Active Directory)#
Below is an example of how to use JavaScript hooks to sync Voxel51 with a corporate directory (such as Open Directory, LDAP, or Active Directory) via an intermediary REST API or Identity Provider. The recommended setup is with OAuth/OIDC claims, however the example below illustrates a more intricate integration.
This example specifically addresses a scenario in which additional actions are
performed during the signIn trigger. This demonstrates how hooks can extend
beyond simple authentication to interact with external APIs and internal
services for complex user management and group assignment tasks. Here’s a
breakdown of the example:
// Example JavaScript hook implementation
async function Hook(context) {
    const { params, services, trigger } = context;
    const { user } = params;

    switch (trigger) {
        // Callback: user is trying to sign in
        case "signIn":
            // returning false will prevent user from signing in
            try {
                const groups = await getGroups();
                for (const group of groups) {
                    await addUserToGroup(group.name);
                }
            } catch (error) {
                console.error(error);
            }
            return true;
    }

    async function getGroups() {
        const { account } = params;
        const response = await services.util.http.get(
            `https://fiftyone.ai/list_groups/${user.id}`,
            { headers: { Authorization: `Bearer ${account?.access_token}` } },
        );
        return response.json();
    }

    async function addUserToGroup(groupName) {
        const orgId = "my_org_id";
        // Retrieve all existing groups
        const groups = await services.directory.groups.listGroups(orgId);
        // Find an existing group by name
        let group = groups.find((group) => {
            return group.name === groupName;
        });
        // If group does not exist, create a new group
        if (!group) {
            group = await services.directory.groups.createGroup(
                orgId,
                groupName,
            );
        }

        if (!group.userIds.includes(user.id)) {
            // Add signed-in user to the group and update the group
            const updatedGroupName = undefined;
            const updatedGroupDescription = undefined;
            const updatedGroupUserIds = [...group.userIds, user.id];
            const accessorId = undefined;
            await services.directory.groups.updateGroup(
                orgId,
                group.id,
                accessorId,
                updatedGroupName,
                updatedGroupDescription,
                updatedGroupUserIds,
            );
        }
    }
}
Context Object#
The context object provides information about the current operation, including parameters like the user’s details, and services (services) that offer utility functions and access to directory operations.
External API Integration#
getGroups: This function calls an external API to retrieve a list of groups to which the signing-in user should be added. It utilizes theservices.util.http.getmethod for making the HTTP request, demonstrating how external services can be queried within the hook.addUserToGroup: For each group retrieved from the external API, this function checks if the group exists in the organization’s directory. If a group does not exist, it is created, and then the user is added to it. This process involves querying and modifying the organization’s group directory, illustrating the hook’s capability to perform complex operations like dynamic group management based on external data.
Error Handling#
The try-catch block around the external API call and group manipulation logic ensures that errors do not prevent the user from signing in but are properly logged
Summary#
This hook example demonstrates a pattern for extending authentication flows in CAS with custom logic. By integrating with an external API to fetch group information and manipulating the organization’s group memberships accordingly, it showcases the flexibility and extensibility of hooks in supporting complex, real-world authentication and authorization scenarios.
REST API#
You can view the REST API Documentation by logging into the Super Admin UI (see
above) or by directly visiting https://<YOUR_FIFTYONE_TEAMS_URL>/cas/api-doc
Configuration#
| Setting | Type | Default | Description |
authentication_providers
|
Array
|
[]
|
A list of definitions of OIDC and/or OAuth providers. |
authentication_provider.profile
|
String (parseable to JS function)
|
null
|
When provided this function is called to map the external user_info to the internal fiftyone user/account. |
session_ttl
|
Number
|
300
|
Time in seconds for sessions to live after which users will be forced to log out. Must be greater than 120 seconds to support refreshing of user session using refresh token. |
js_hook_enabled
|
Boolean
|
true
|
When set to False, configured JavaScript hooks will not be invoked. |
js_hook
|
String (parseable to a single JS function)
|
null
|
JavaScript hook which is invoked on several CAS events described in JS Hooks section below |
skipSignInPage
|
Boolean
|
false
|
When set to True, sign in page with identity provider choices will be skipped when only one identity provider is configured |
JavaScript Hooks#
This documentation outlines the JavaScript hook implementation for the Central Authentication Service (CAS). As a CAS superuser, you are able to define JavaScript functions that integrate with various authentication flows within CAS, customizing the authentication processes.
Overview#
JavaScript hooks allow superusers to programmatically influence authentication flows, including sign-in, sign-up, JWT handling and customization, redirection, and session management. This document describes the available hooks, their triggers, expected return types, and contextual information provided to each hook.
Example JavaScript Hook#
// Example JavaScript hook implementation
async function Hook(context) {
    const { params, services, trigger } = context;

    switch (trigger) {
        // user is trying to sign in
        case "signIn":
            // returning false will prevent user from signing in
            return true;

        // JWT token is created for user session
        case "jwt":
            // custom payload returned will be merged with default payload
            return {};

        // user has logged out
        case "logout":
            // returning or throwing here does not affect the sign out flow
            break;

        // user is being redirected on sign in or sign out
        case "redirect":
            // user will be redirected to this URL on sign in or sign out
            return "/settings/accounts";
    }
}
Actionable Triggers#
| Trigger | Description | Return Type |
signIn
|
Invoked when a user signs in. If the hook returns false or error is thrown, sign-in will be prevented. | Boolean |
signUp
|
Invoked when a new user signs in for the very first time. If the hook returns false or an error is thrown, sign-in will be prevented and a user/account will not be created. | |
jwt
|
Invoked when JWT is created (on signIn, signUp, refresh token). The returned object will override payload of default JWT payload. If an error is thrown, the session will be expired and user will be redirected to sign-in | Object | undefined |
redirect
|
Invoked post signIn or signOut. The user will be redirected to the URL/Path returned from the hook. | String (URL) |
session
|
Invoked when a request for a session (on signIn, signUp, refresh token) is received. |
Event-Only Triggers
| Trigger | Description |
signOut
|
Invoked when a user signs out. |
createUser
|
Invoked when the adapter is asked to create a user. |
linkAccount
|
Invoked when an account is linked to a user. |
JavaScript Hooks Contextual Parameters
| Parameter | Description | Available in Triggers |
token
|
The payload of a JWT token. |
signIn, signUp, jwt, session, signOut, linkAccount, createUser
|
user
|
The signed-in user object. |
signIn, signUp, jwt, linkAccount
|
account
|
The account from an identity provider. |
signIn, signUp, jwt, linkAccount
|
profile
|
The profile from an identity provider. |
signIn, signUp, jwt, linkAccount
|
isNewUser
|
True if a user is signing in for the first time. |
jwt
|
trigger
|
Specifies the current trigger event. |
jwt
|
Session
|
The session object. |
session
|
services
|
Provides access to various services. | all |
Services
| Service | Description |
services.util.http
|
Provides get, post, put, and delete functions for making HTTP requests from a JS Hook.
|
services.userContext
|
Object containing information about the user performing the current action. |
services.directory
|
|
services.directory.users
|
The UserService - providing methods for interacting with the directory of users.
|
services.directory.groups
|
The GroupsService - providing methods for interacting with the directory of groups.
|
services.config
|
The ConfigService - providing methods for reading and writing the AuthenticationConfig.
|
services.util
|
|
services.directory.orgs
|
The OrgsService - providing methods for interacting with the directory of organizations.
|
services.webhookService
|
Experimental |
process.env['MY_ENV_VAR']
|
Syntax for reading environment variables in a JS Hook. |