Step 3: Analyze and Approve Predictions#
Your Auto Labeling run has completed, and label predictions are ready for review. You will now evaluate and verify auto-generated labels using FiftyOne’s exploration tools.
Review Interface#
When your run status changes to In Review, the Auto Labeling panel displays an interface with two tabs: Review and Approval. Think of this like a shopping cart workflow: you browse labels in the Review tab, adding ones you want to keep to your approval queue. Labels you approve become part of your ground truth dataset, while labels you reject are deleted from the dataset entirely.
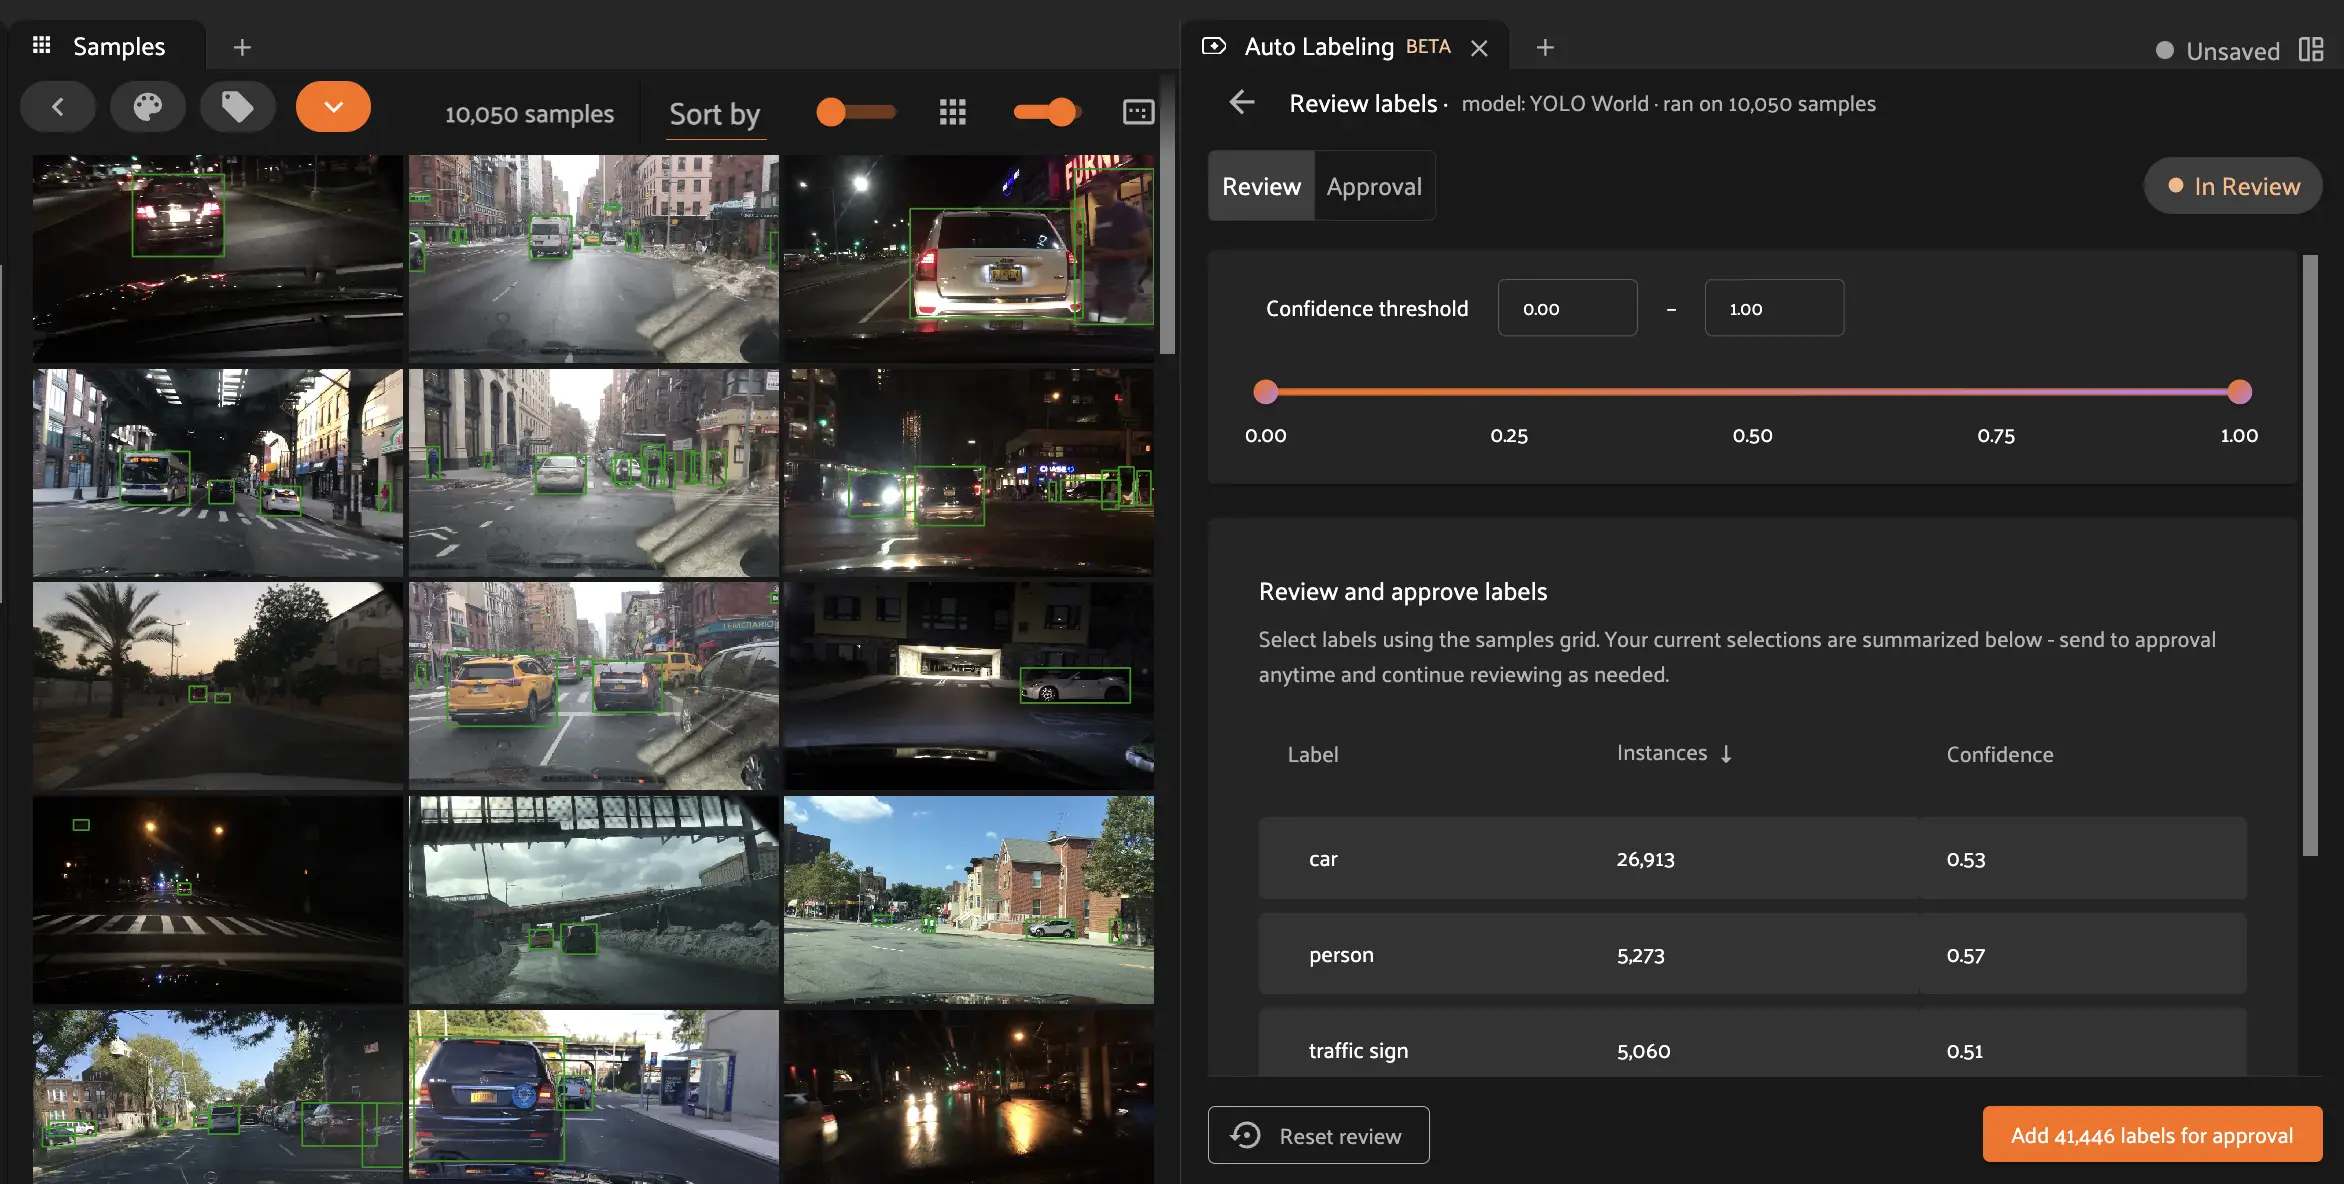
Note the confidence slider and the label table in the Auto Labeling panel. The confidence slider lets you show only samples containing labels within the minimum and maximum thresholds specified. The label table shows you the count for each predicted class across your samples, along with the average confidence for that class. Selecting an entry in the table only shows samples with that predicted class.

Also notice that the default view shows each sample once with all predicted detections on the sample. When evaluating object detections, it can be more useful to analyze and approve each label as individual samples. This can be done through patches views, described below.
Compute and View Patches#
The FiftyOne App provides a patches view button that allows you to take any Detections field in your dataset and visualize each object as an individual patch in the image grid.
In the toolbar above the sample grid, select Patches > Labels > yolow_detections. You’ll notice the sample grid will now show one image per bounding box label.

Batch High-Confidence Samples For Approval#
From here we can then try to find high-confidence true positives. Adjust the slider so the minimum confidence threshold is 70%.

Then, in the filtered sample grid, select 10 samples that you visually recognize as having correct label predictions for car.
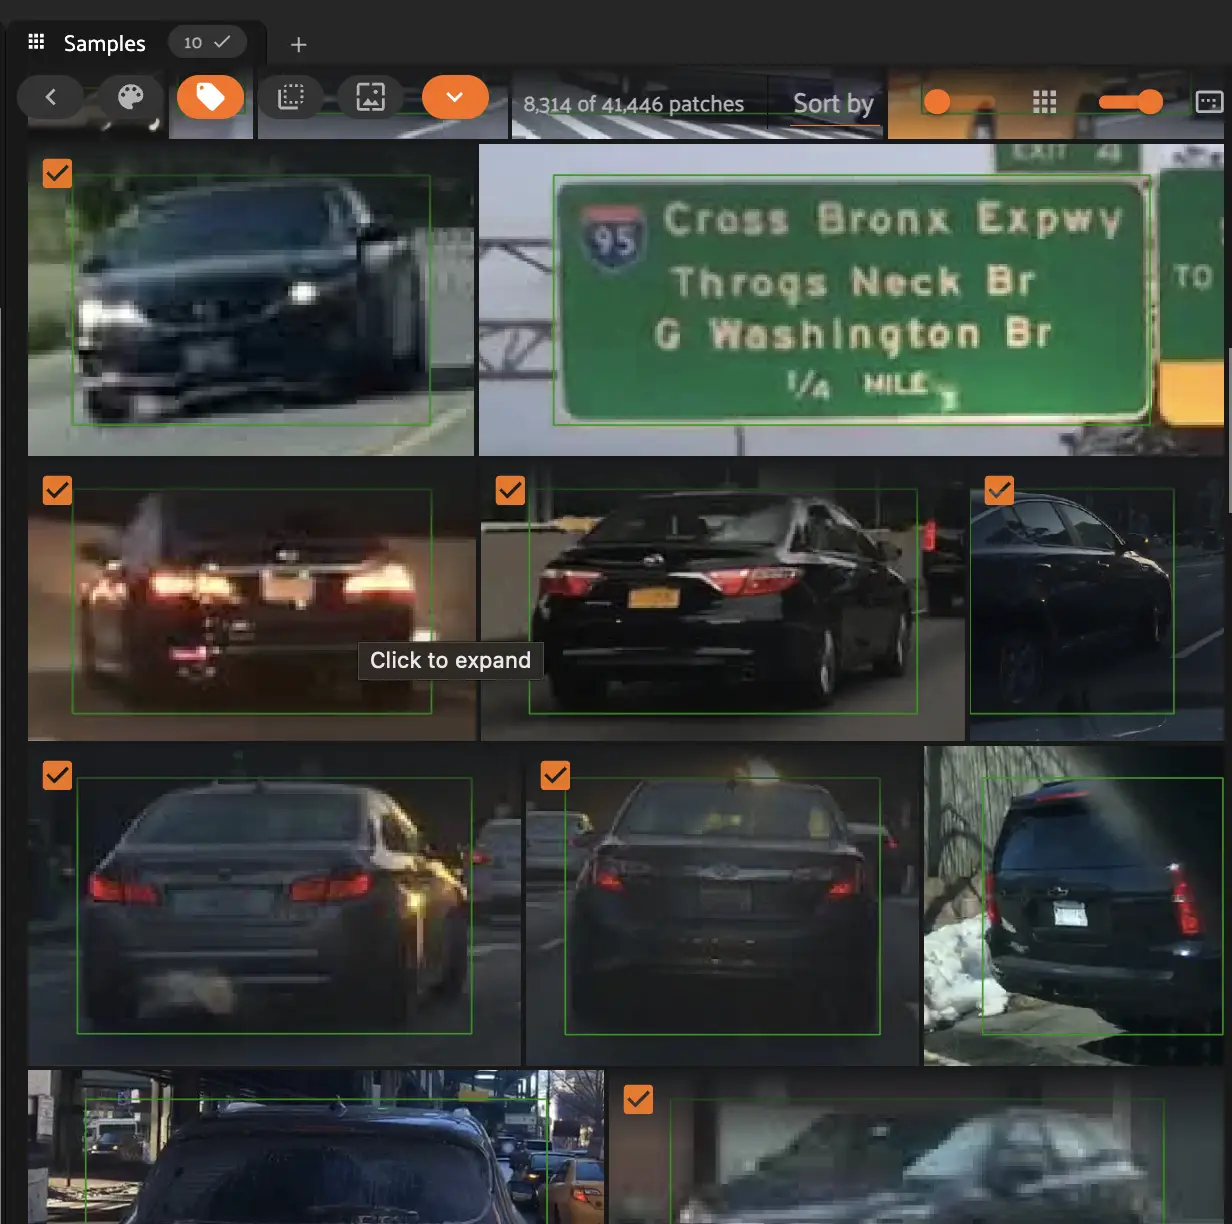
Finally, in the Auto Labeling panel, click Add 10 labels for approval.

Those 10 labels are now available in the Approval tab. You (or a team member) can later approve the labels. Leave them as marked for approval for now (don’t give the final approval yet).

Next Steps#
You’ve now explored your auto labeled samples and marked some for approval. In the next section, you will compute and visualize patch embeddings to root out false positives and mark samples in need of human correction.
Click Next to proceed to Step 4: Visualize embeddings.