Auto-Labeling#
Auto-Labeling is a feature built into the FiftyOne Enterprise App which allows you to automatically generate classification, detection, and instance segmentation labels for your samples using state-of-the-art models.
Auto-Labeling is powered by delegated operations, enabling you to perform Auto-Labeling in the background using your existing GPU infrastructure.
How it works#
- Configure Auto-Labeling
Tailor the run configuration to the specific needs of your dataset and task. Choose your models, define your classes of interest, and provide optional model configuration.
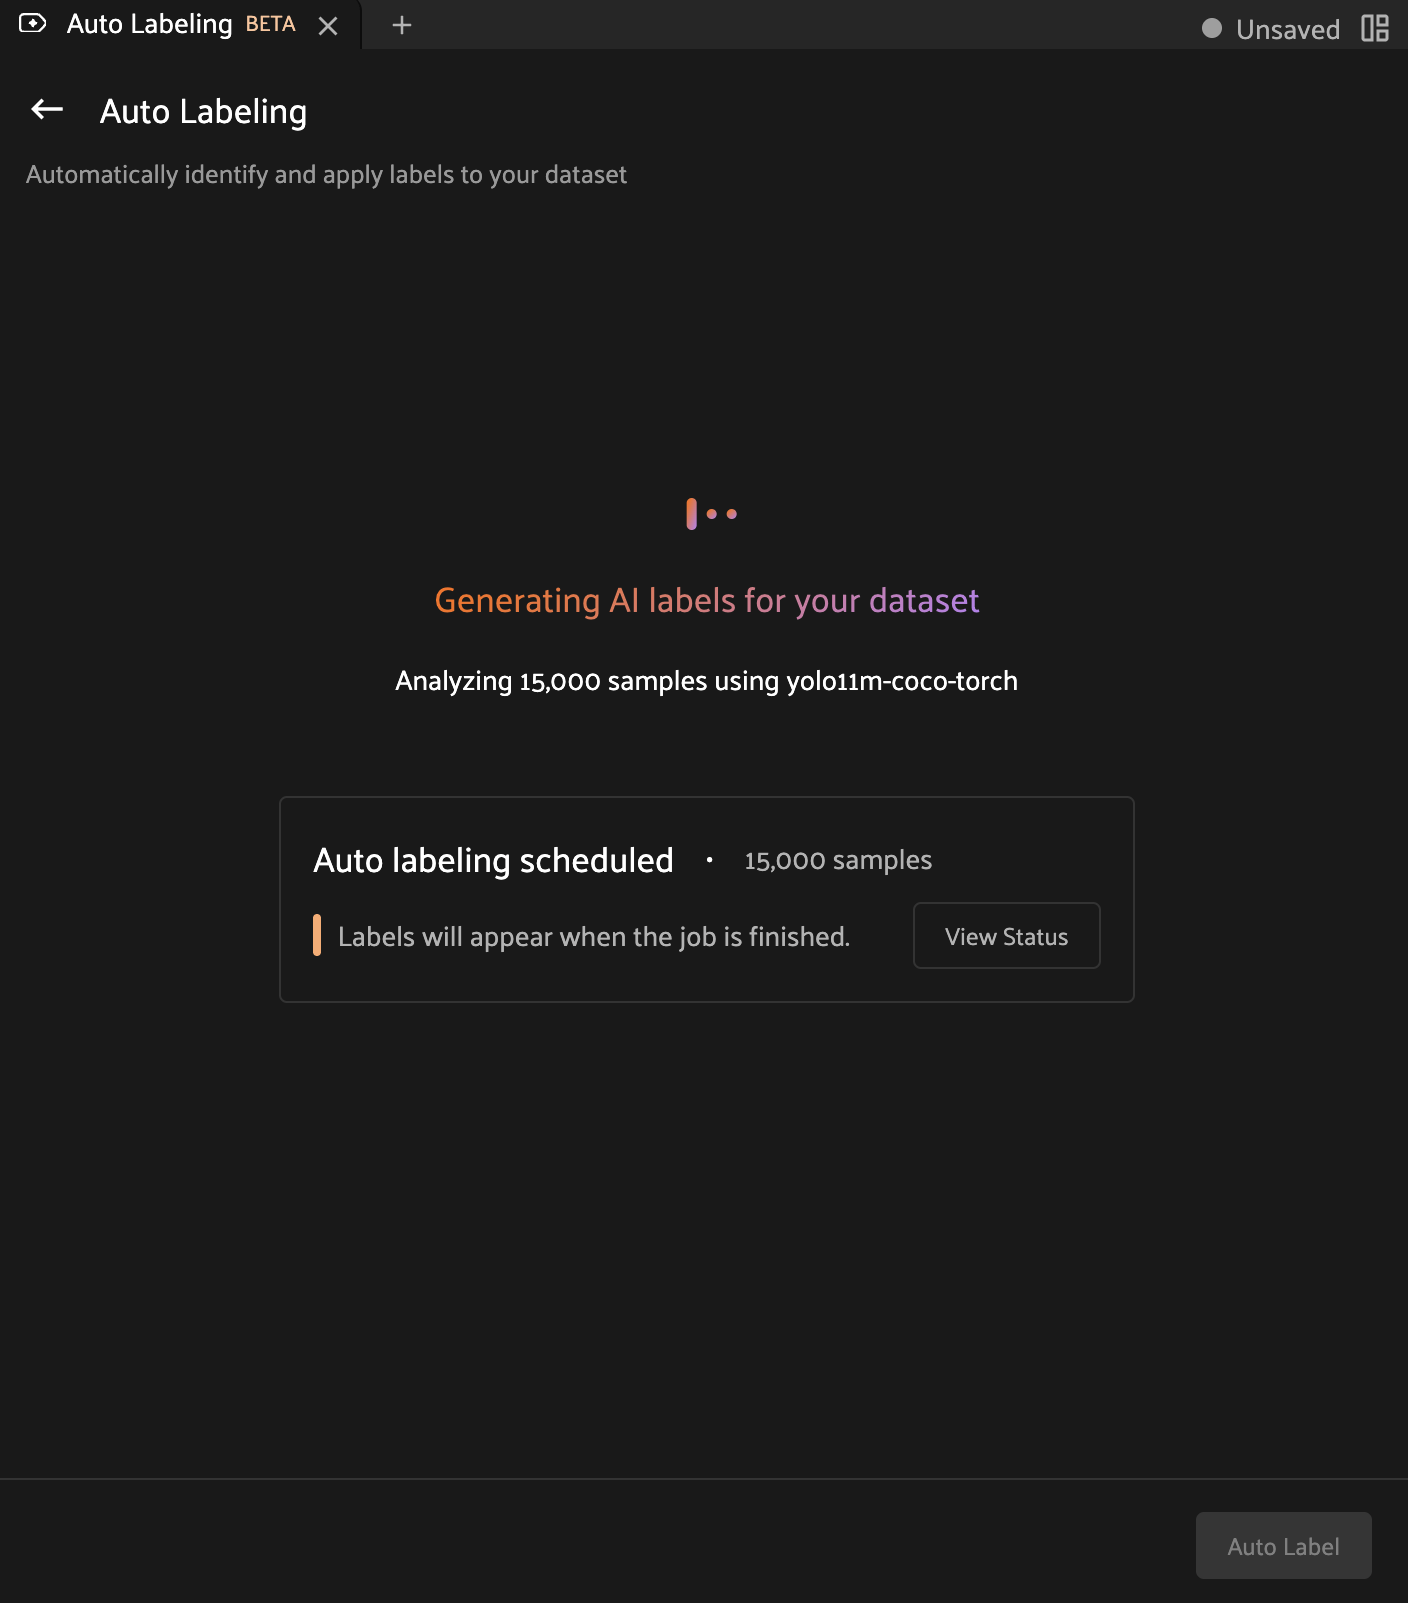
- Generate labels
Run Auto-Labeling using a configured orchestrator. Your Auto-Labeling configuration will be executed in the background, and the Auto-Labeling panel will automatically update as label generation progresses.
- Review generated labels
Use the Auto-Labeling panel alongside the samples grid to interactively review the generated labels. Leverage standard sample and label filters, model confidence thresholds, and tools like the embeddings visualizer to identify high-quality labels. Labels which are approved are added to your samples, and unapproved labels are automatically discarded.
The science behind the labels#
Our Auto-Labeling process produces results comparable to human-provided annotation. Continued model and process improvements contribute to enhanced generation and validation capabilities.
For more information on Auto-Labeling performance, review the Auto-Labeling whitepaper.
User Guide#
Getting started#
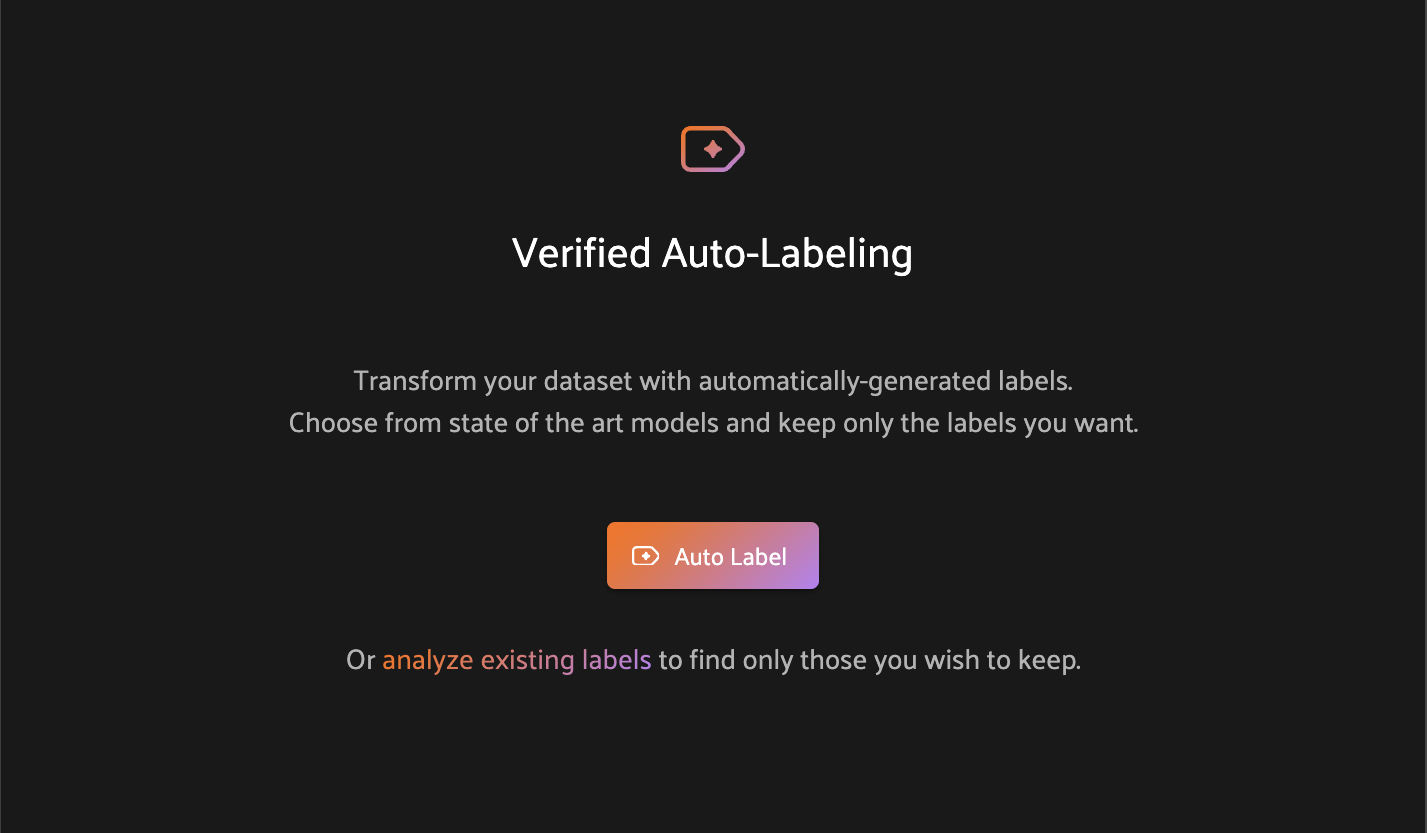
To get started with Auto-Labeling, simply open the panel by selecting Auto Labeling from the new panel menu above the sample grid.
Note
Auto-Labeling currently supports image and 3D datasets. For other media types, the Auto-Labeling panel will be disabled for the dataset.
Note
Since Auto-Labeling modifies samples in the dataset, the panel is only available to users with edit permissions on the dataset.
The Auto-Labeling experience is specific to each dataset, meaning your Auto-Labeling runs will exist in isolation from other datasets.
Viewing Auto-Labeling runs#
If you or your team members have run Auto-Labeling on the current dataset, the Auto-Labeling panel will display a list of all associated runs. If Auto-Labeling has not yet been used on the dataset, you can get started by clicking on the Auto Label button in the panel. Learn more about configuring a run.
Configuring an Auto-Labeling run#
The Auto-Labeling panel provides several configuration options to tailor the Auto-Labeling experience to your specific needs. Choose the samples you want to label, select appropriate models for the task, and provide optional model configuration.
Selecting target samples#
The first step in the configuration process is to identify the set of samples for which to generate labels.
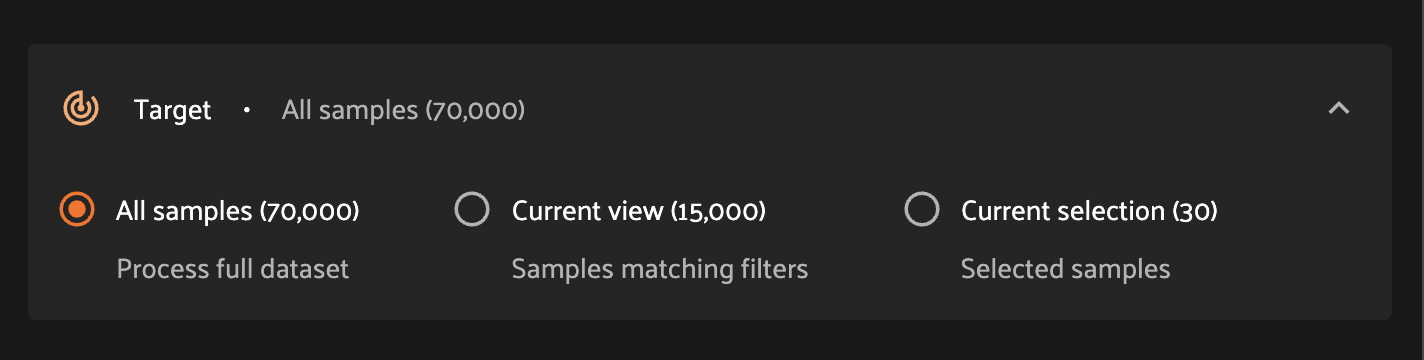
All samples - Auto-labeling will be run on each sample in the dataset.
Current view - Auto-labeling will be run on samples in the current view. Leverage standard app functionality to filter samples to the desired subset.
Current selection - Auto-labeling will be run on currently-selected samples. Use this option to experiment with label generation on a small number of samples, or select in bulk using a set of sample IDs.
Selecting models#
Task type#
The task type controls the type of label which will be generated.
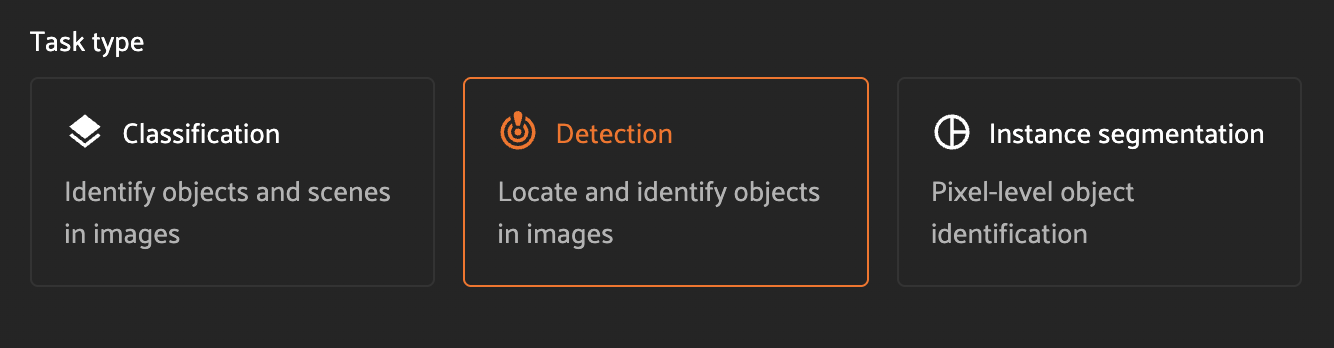
Classification - each sample will be augmented with a classification label from the set of configured classes.
Detection - each sample will be augmented with a list of detections from the set of configured classes.
Instance segmentation - each sample will be augmented with a list of detections from the set of configured classes. Each detection will include an instance segmentation mask.
Note
For detection and instance segmentation tasks, there is no upper bound on the number of detections which can be generated. We strongly recommend setting an appropriate threshold for the model confidence to reduce the number of low-quality labels. See run settings for more information.
Method#
For instance segmentation tasks, there are two logical operations: detection then segmentation. For this task type, you can choose to use a single model, multiple models, or even start with existing detections.
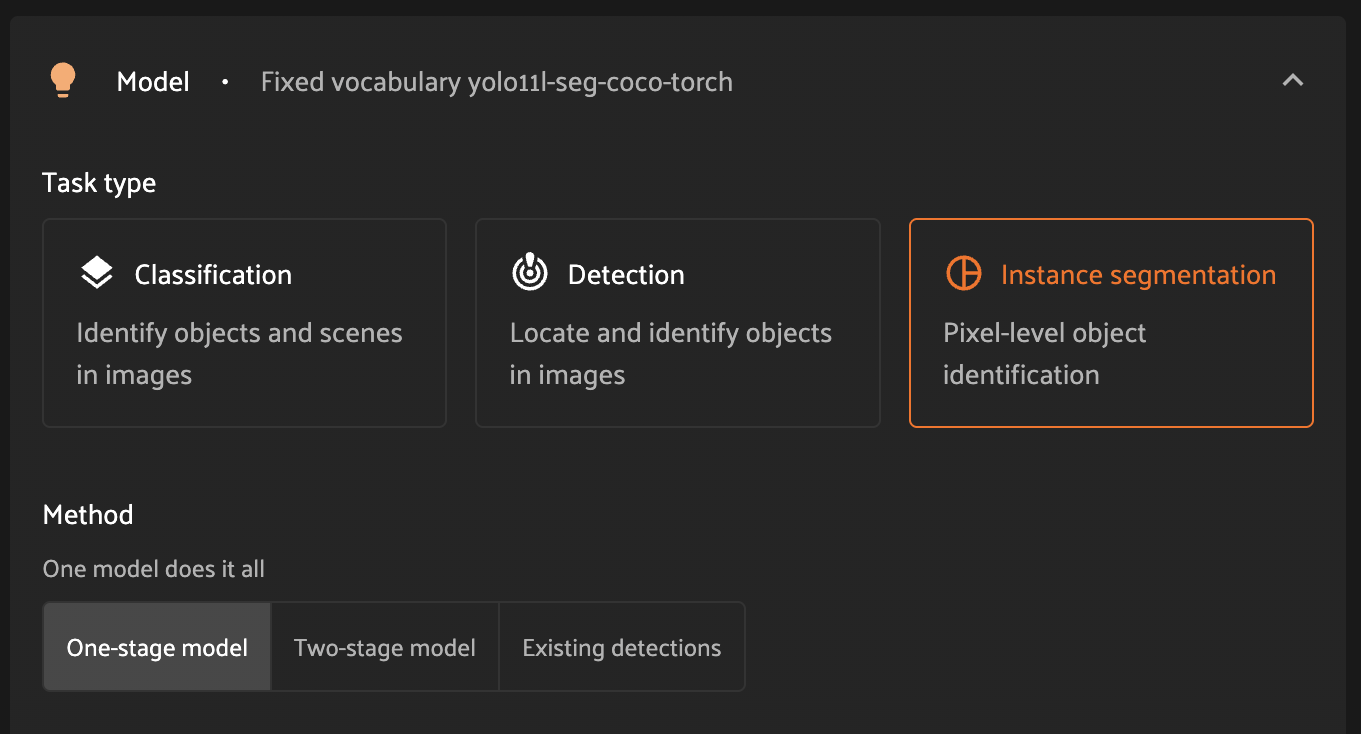
One-stage model - this option will allow you to select a single model which will be responsible for both detection and segmentation of each instance.
Two-stage model - this option will allow you to select a dedicated detection model alongside a dedicated segmentation model.
Existing detections - this option will leverage existing detections on your samples, and will enable you to select a model to use for segmentation. Once this option is selected, you will be presented with a dropdown view of eligible sample fields to choose from.
Note
This configuration option is only applicable for instance segmentation tasks.
Model type#
The model type controls whether a zero-shot or fixed-vocabulary model will be used for label generation.
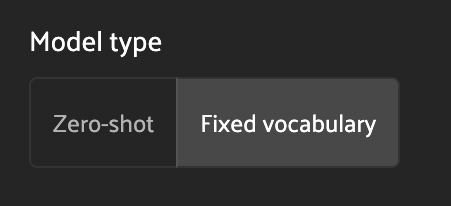
Zero-shot - zero-shot models are trained on a broad range of data, and can be prompted with arbitrary classes to generate labels.
Fixed vocabulary - fixed-vocabulary models are trained on a specific set of classes, most often from a specific dataset (such as COCO or ResNet). These models offer strong performance for known classes available for selection, but cannot be prompted with arbitrary classes.
Model#
The models available to you are automatically filtered based on the configuration provided in the task type, method, and model type controls.
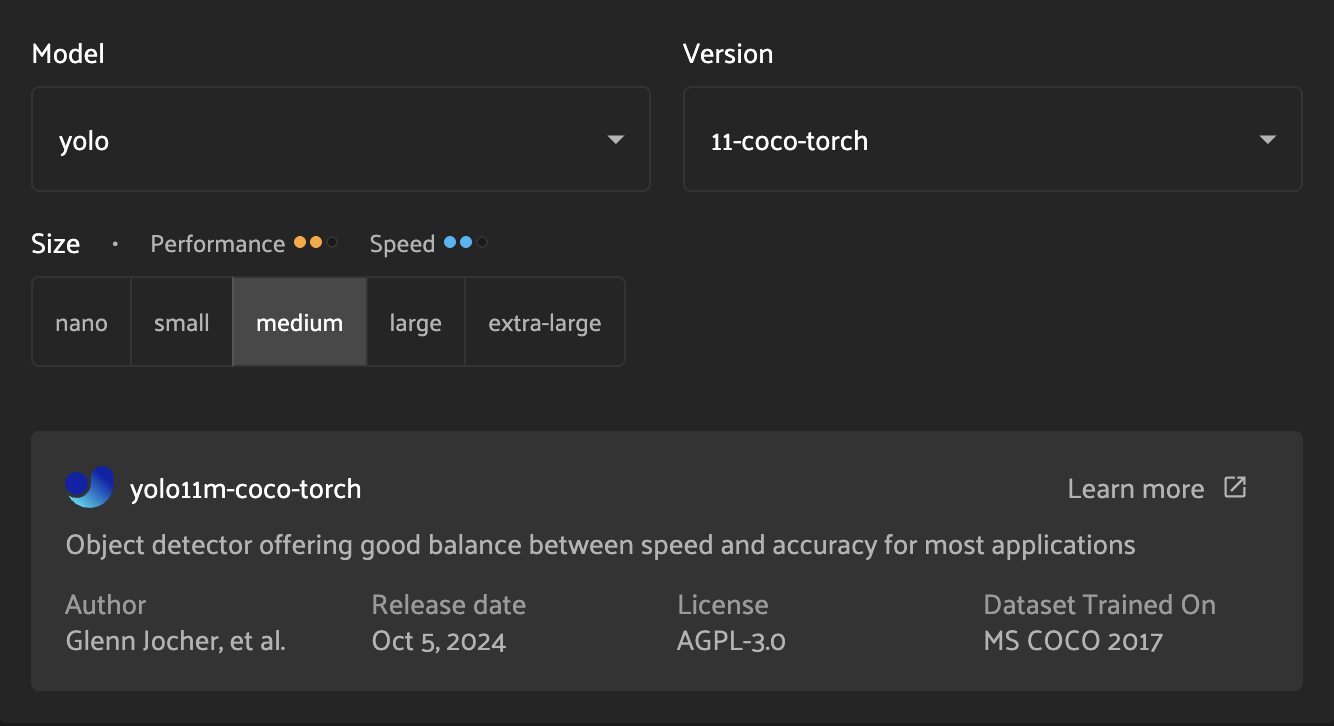
From the set of compatible models, you can select the model family (e.g. “yolo” or “segment-anything”), the model version (e.g. “11-coco-torch”), and the model size (e.g. “medium”).
For the currently-selected model, you are able to see additional metadata, including a brief description, author and license information, and a link to additional details.
The model metadata also includes approximate speed and performance metrics. These values (each a range from 1 to 3) indicate the model’s speed (inference time) and performance (inference accuracy) relative to other comparable models. Higher values indicate faster inference and improved accuracy, respectively.
Defining classes#
To tailor the Auto-Labeling process to your dataset, you can provide a specific set of classes for the models to consider.

For zero-shot models, you must provide at least one class. There is no upper bound on the number of classes you can provide.
For fixed-vocabulary models, you will be presented with a dropdown view of the model’s known classes. You can optionally select a subset of classes from the model’s vocabulary. If you do not select any classes, all classes in the model’s vocabulary will be used.
Run settings#
The run settings allow you to provide additional metadata to finish configuring the run.

Label field - the name of the field in which to store generated labels. This must be a new field. To use an existing field, see analyzing existing labels.
Minimum confidence in results - (optional) the minimum confidence threshold to be used in model inference. Any labels below this confidence will be excluded from the results. For some families of models, a default value will be set as recommended by the model provider.
Mask output location - (required for segmentation tasks) the file system
location where segmentation masks should be written. This will allow you to
browse all of FiftyOne’s configured filesystems, including any cloud storage.
Segmentation masks will be written to this location, and a reference to the
mask will be stored in the mask_path label attribute.
Run name - (optional) a human-friendly name for the Auto-Labeling run. This name will be shown throughout the Auto-Labeling panel, and can be changed at any time. If not provided, a unique identifier will be generated by the system.
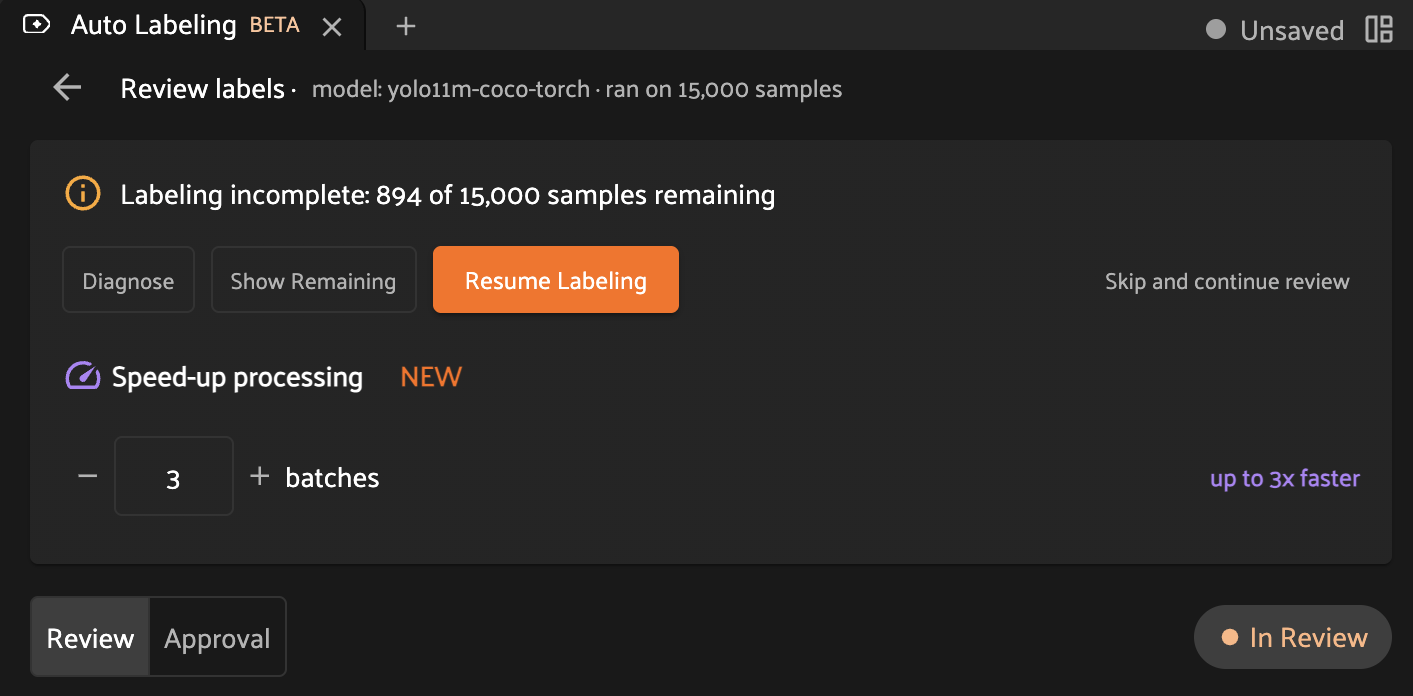
Speed-up processing - Auto-Labeling provides support for concurrent execution across multiple workers. Increasing this value will allow for Auto-Labeling to generate labels in parallel up to your maximum allowable concurrency.
Tracking Auto-Labeling progress#
While the associated delegated operation runs in the background, the Auto-Labeling panel will automatically update Auto-Labeling runs with new data as it becomes available. While an Auto-Labeling run has the Generating status, clicking on the run card will display metadata about the run and will include a link to view the delegated operation.
Clicking this link will allow you to view detailed progress information, including an estimated completion percentage.
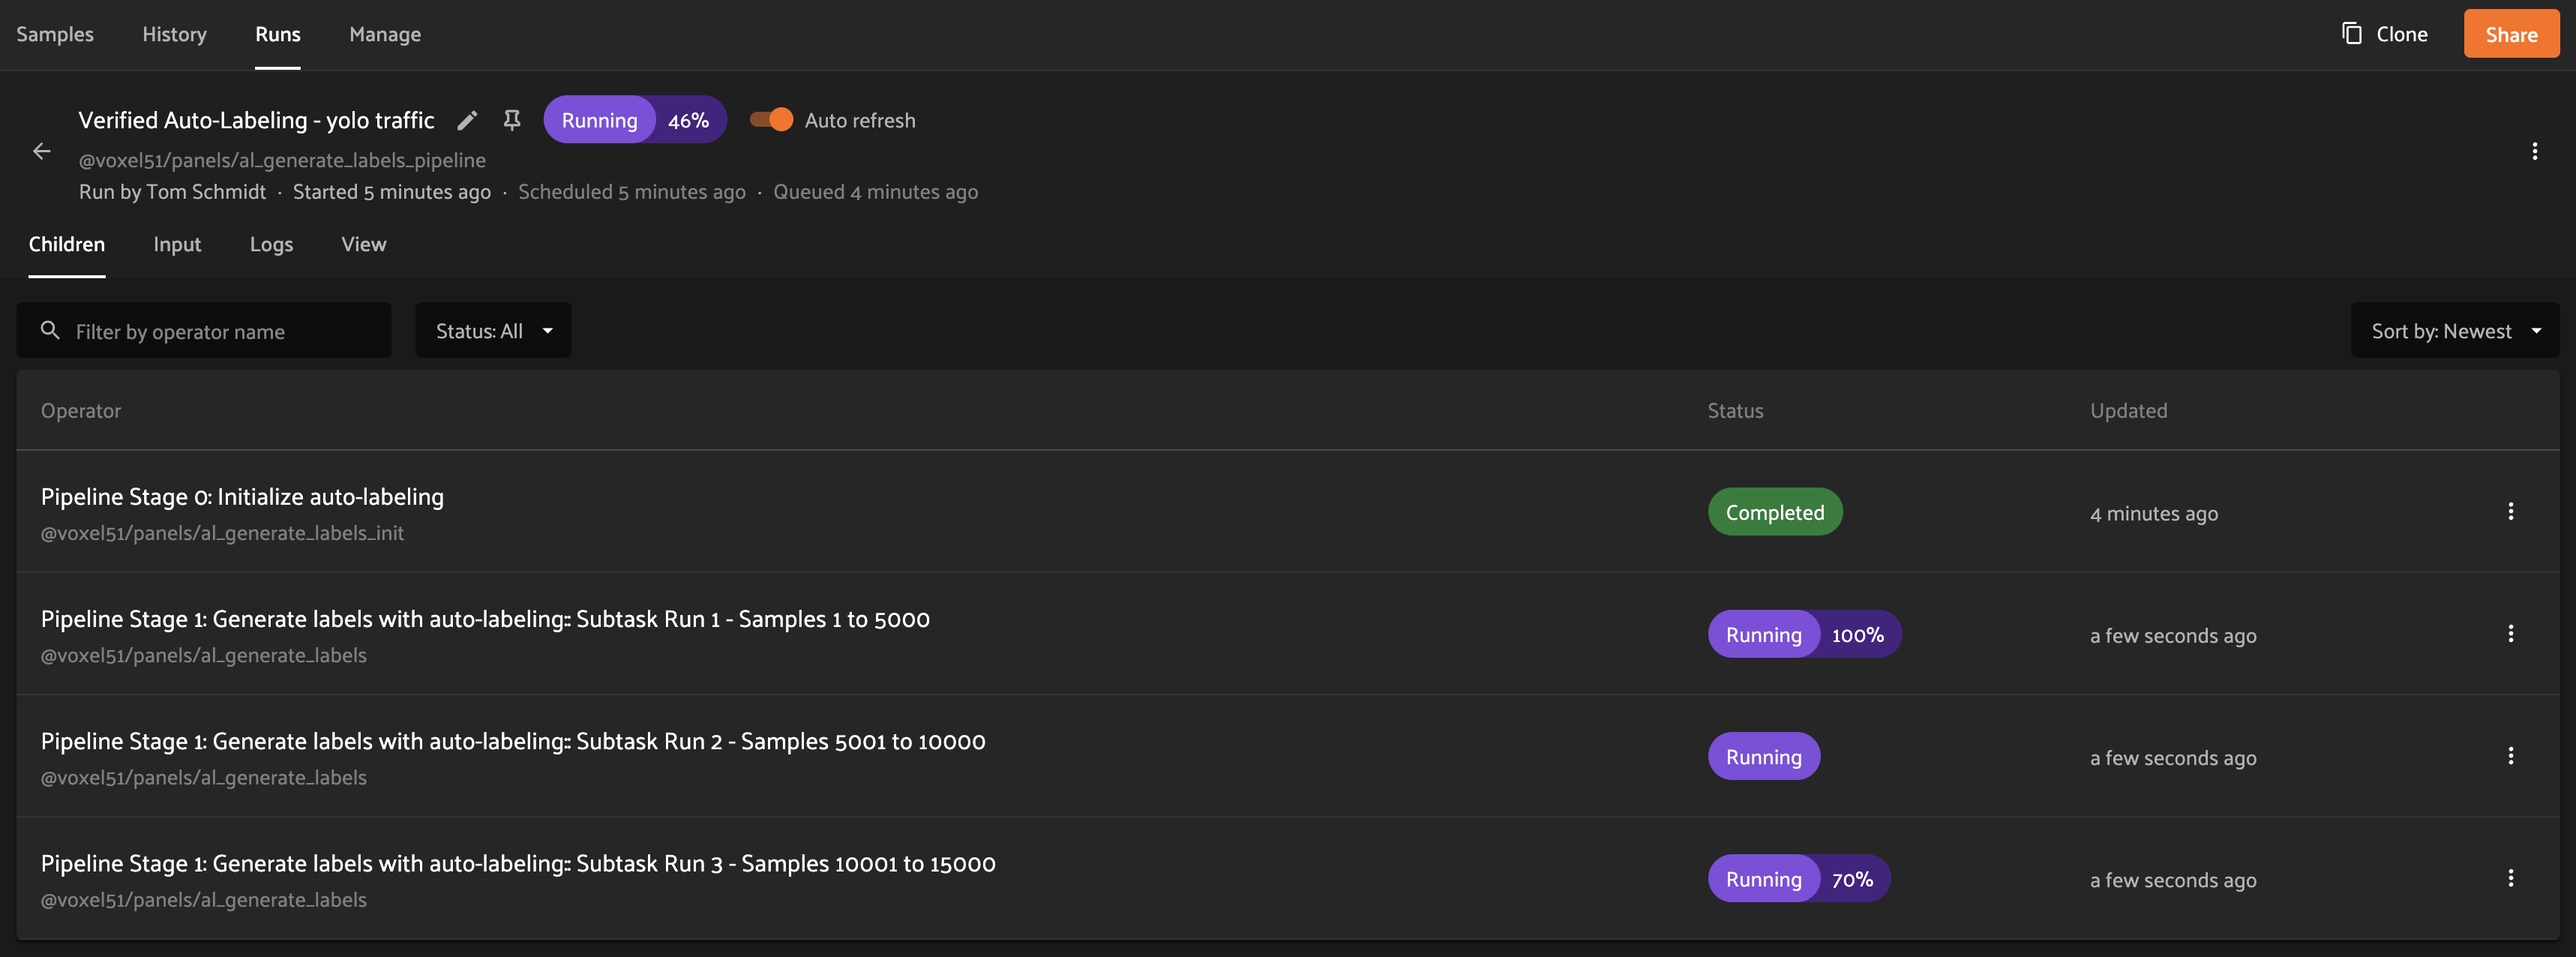
Once the delegated operation completes, the Auto-Labeling run will transition to the In Review status, at which point the generated labels can be reviewed and approved.
Analyzing existing labels#
Auto-Labeling can also be used to review the quality of existing labels in your dataset. To import existing labels, navigate to the Auto-Labeling home screen and click Analyze existing labels at the top of the panel.

Importing labels#
To import labels into the Auto-Labeling panel, simply select your label field from the dropdown menu. Auto-Labeling supports classification, detection, and instance segmentation fields.
Note
To import labels into VAL, at least one label instance is required to have
a confidence attribute defined on the label. This field should contain
floating-point value between 0 and 1.
Once you have selected the source field, click the Analyze labels button to start the import process. Once the import is complete, you can leverage the Auto-Labeling label review process to improve your annotation quality.
Anatomy of an Auto-Labeling run#

Run Status
An Auto-Labeling run can have one of the following statuses:
- Generating
The run has been scheduled for execution, or label generation is in progress. Read more about tracking Auto-Labeling progress.
- In Review
Label generation has completed, and the labels are ready for review. As long as the run is In Review, labels can be promoted for approval. Read more about reviewing generated labels.
- Approved
The Auto-Labeling run has gone through the label review process, and selected labels were added to the samples. This is a terminal state for an Auto-Labeling run; to generate and review additional labels, configure a new run.
- Error
The Auto-Labeling run encountered an error during label generation. Review the error message to determine next steps.
classes - the number of unique classes generated by Auto-Labeling.
labels - the total number of labels generated by Auto-Labeling.
Resuming a failed Auto-Labeling run#
In the event that an Auto-Labeling run fails or samples are not processed correctly, the Auto-Labeling panel offers the option to resume the run. After selecting this option, the Auto-Labeling panel will schedule a new delegated operation in which the Auto-Labeling process will continue from where it left off. Any samples for which labels have already been generated will be skipped, and the remaining samples will have labels generated.
If you don’t want to resume the run, you can dismiss the option by clicking Skip and continue review.
Reviewing generated labels#
Once your Auto-Labeling run is complete, it will enter the In Review status. Clicking on the run card will bring you to the label review screen.
While using this screen, you can continue to interact with the samples grid as you normally would. The Auto-Labeling system may apply additional filtering during the review process.
Note
Embeddings are a powerful way to measure the similarity of samples. Try using the embeddings visualizer to quickly find clusters of similar samples to aid in your review process!
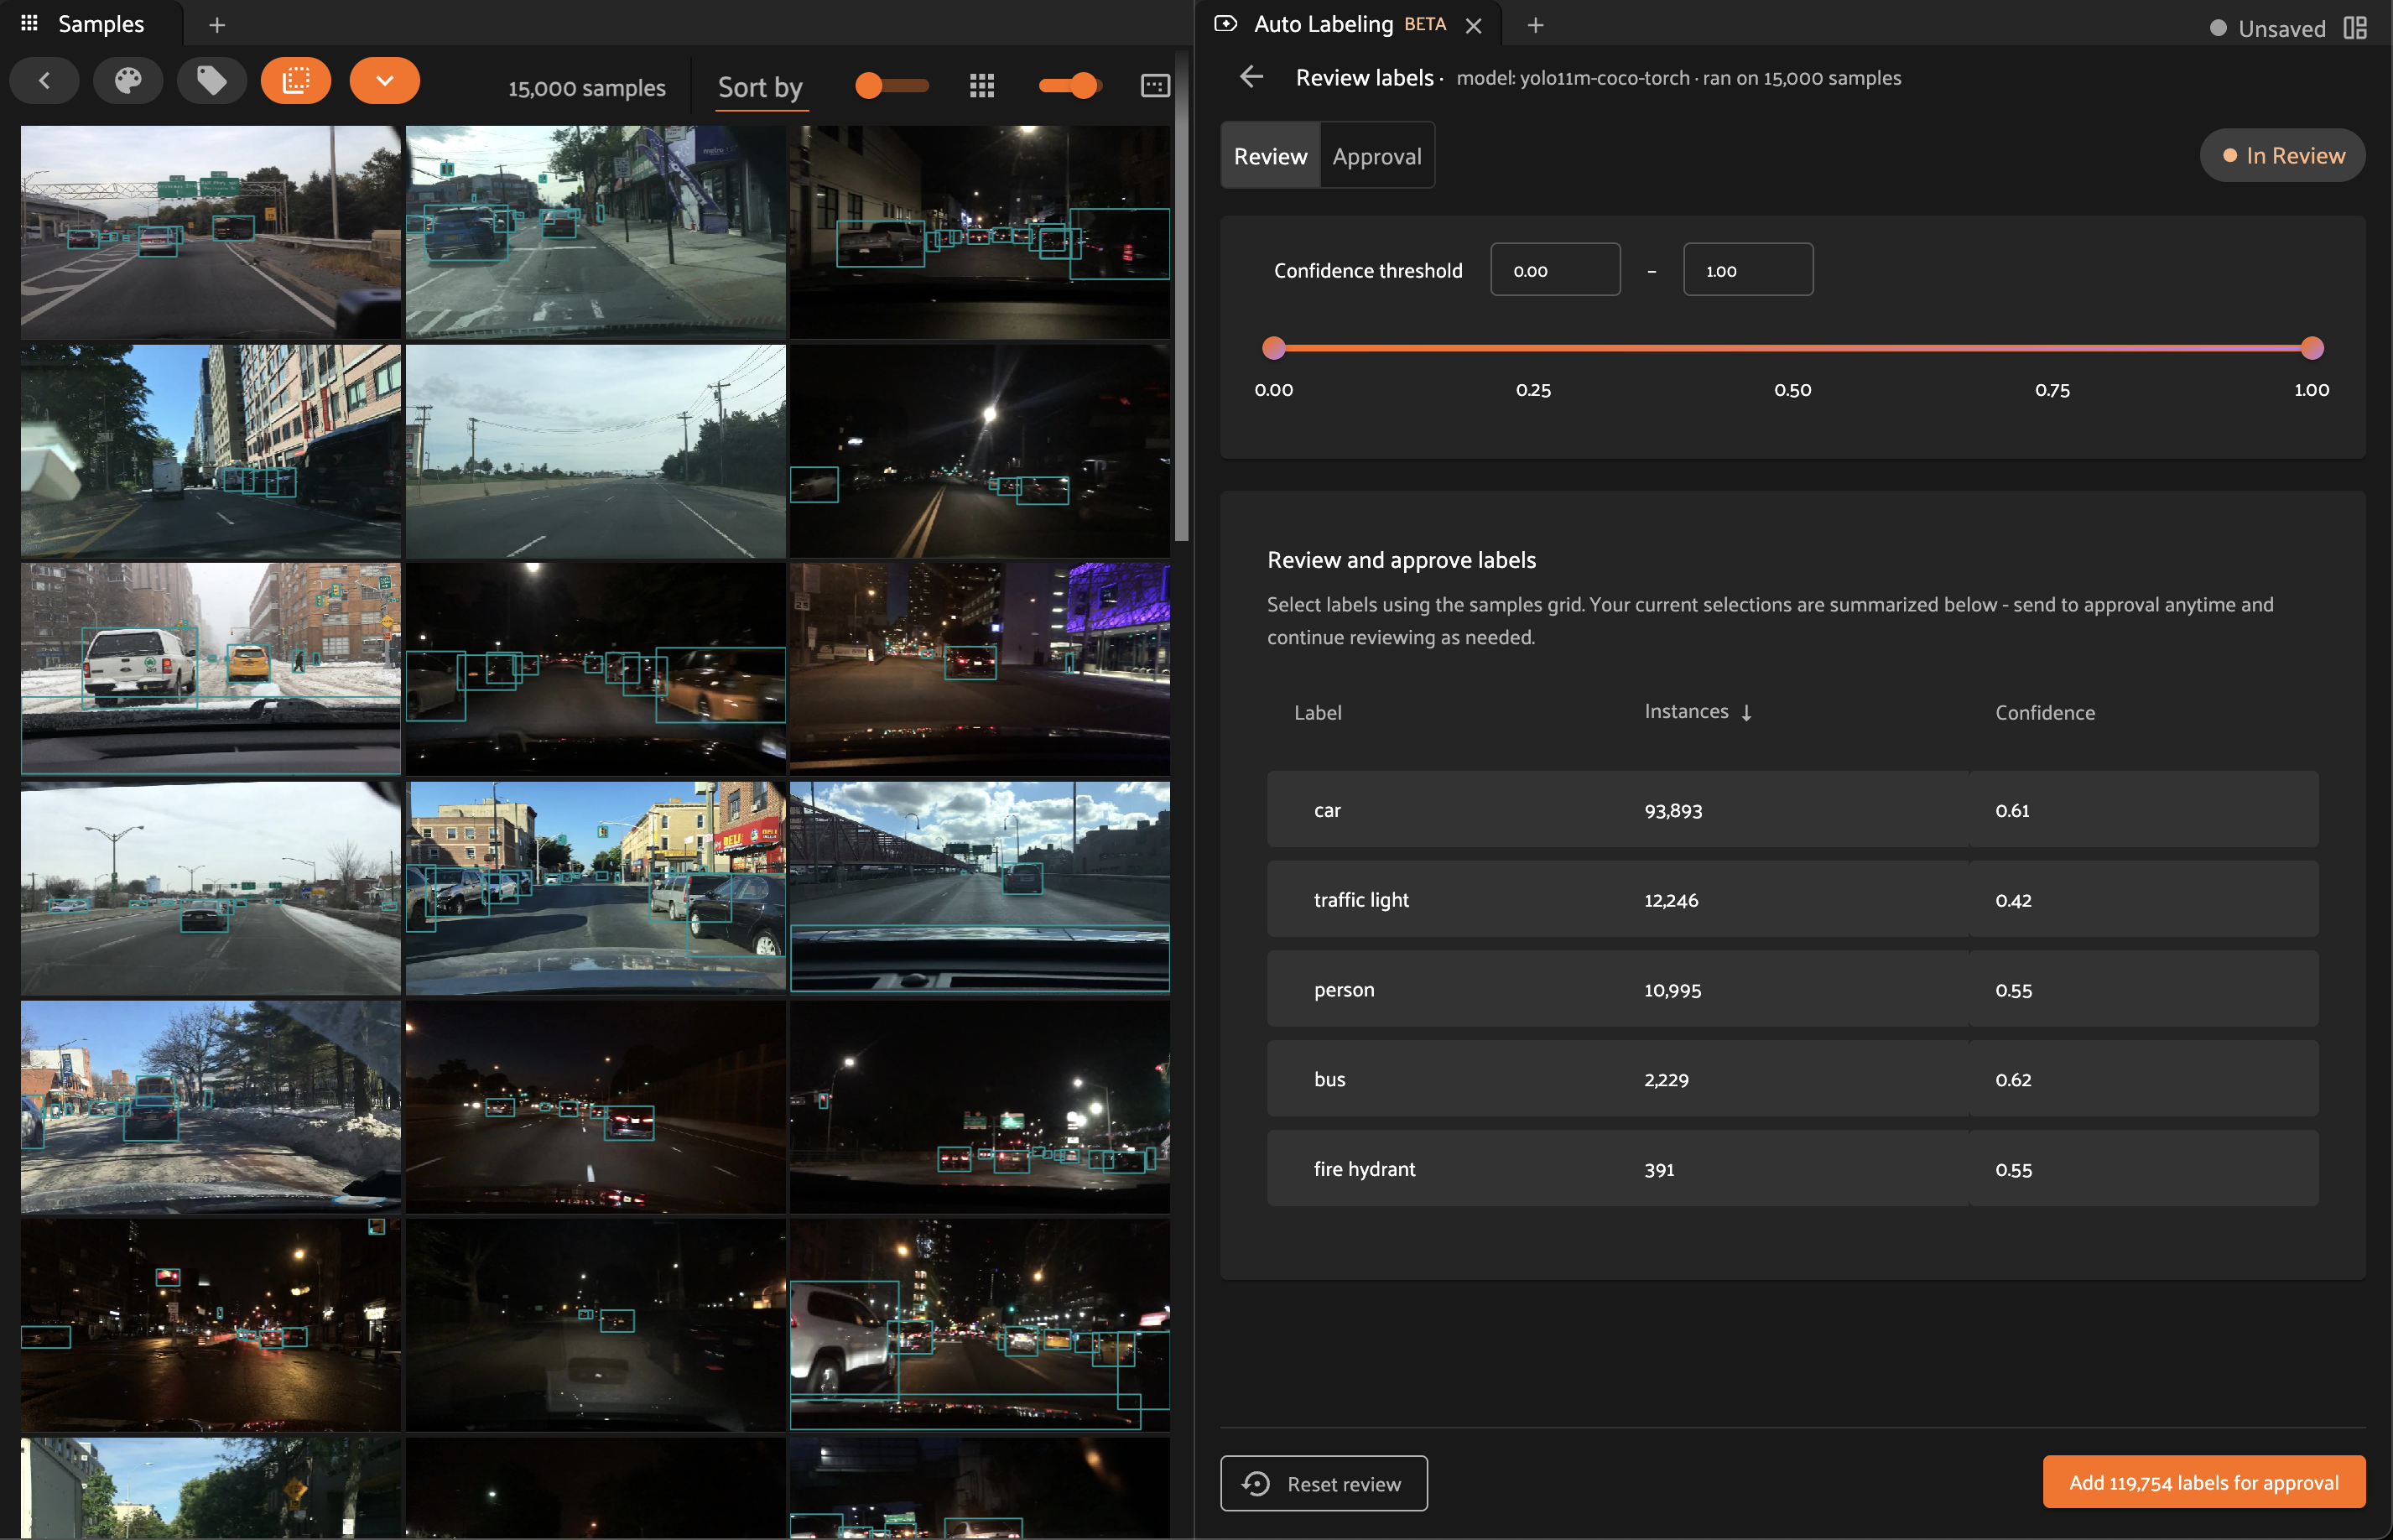
Review tab#
The review tab displays labels which have been generated, but not yet promoted for approval. In this view, you can use all of the standard app functionality to filter and analyze the labels produced by Auto-Labeling. Beyond the common app features, the Auto-Labeling panel provides additional controls to assist in your review.
Confidence threshold#
Each generated label includes a confidence score as produced by the underlying model during inference. The Auto-Labeling panel provides a slider (as well as numeric inputs) which allow you to filter labels by setting a minimum and maximum confidence threshold.
Note
Setting the minimum or maximum confidence in the Auto-Labeling panel is equivalent to setting the same confidence thresholds using the sidebar filters.
Filtering by model confidence provides a simple mechanism for identifying high-quality labels in bulk.
Label analysis table#
The Auto-Labeling panel includes a table which lists aggregate statistics for each label class.
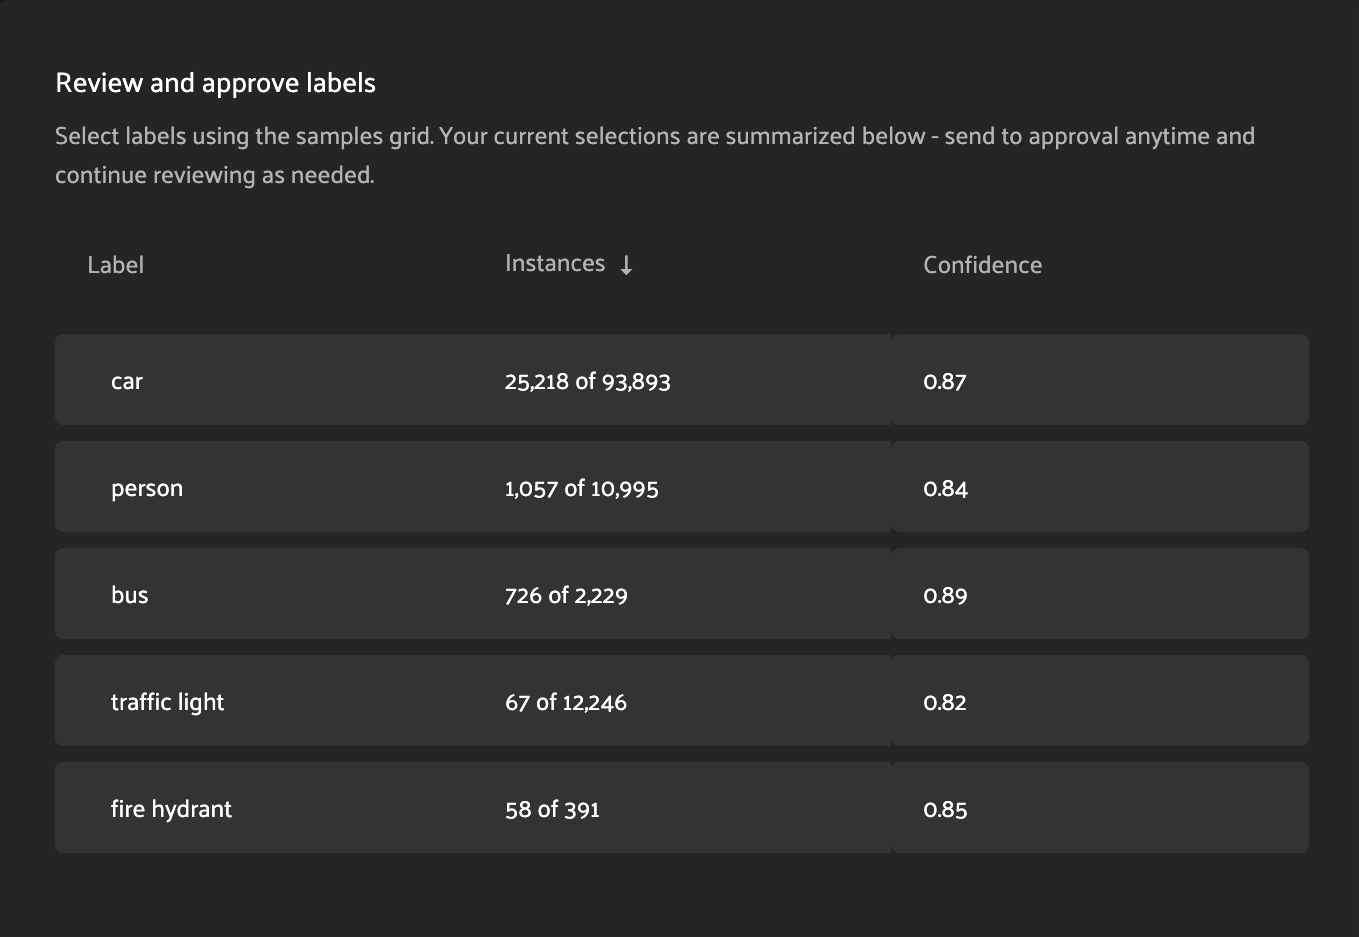
Label - the name of the label class.
Instances - the number of instances of this label class in the current view.
Confidence - the mean confidence of the class instances in the current view.
Clicking on a row in the label analysis table will filter the current view to contain only labels of the specified class. Clicking the selected row again will remove this filter and show all classes.
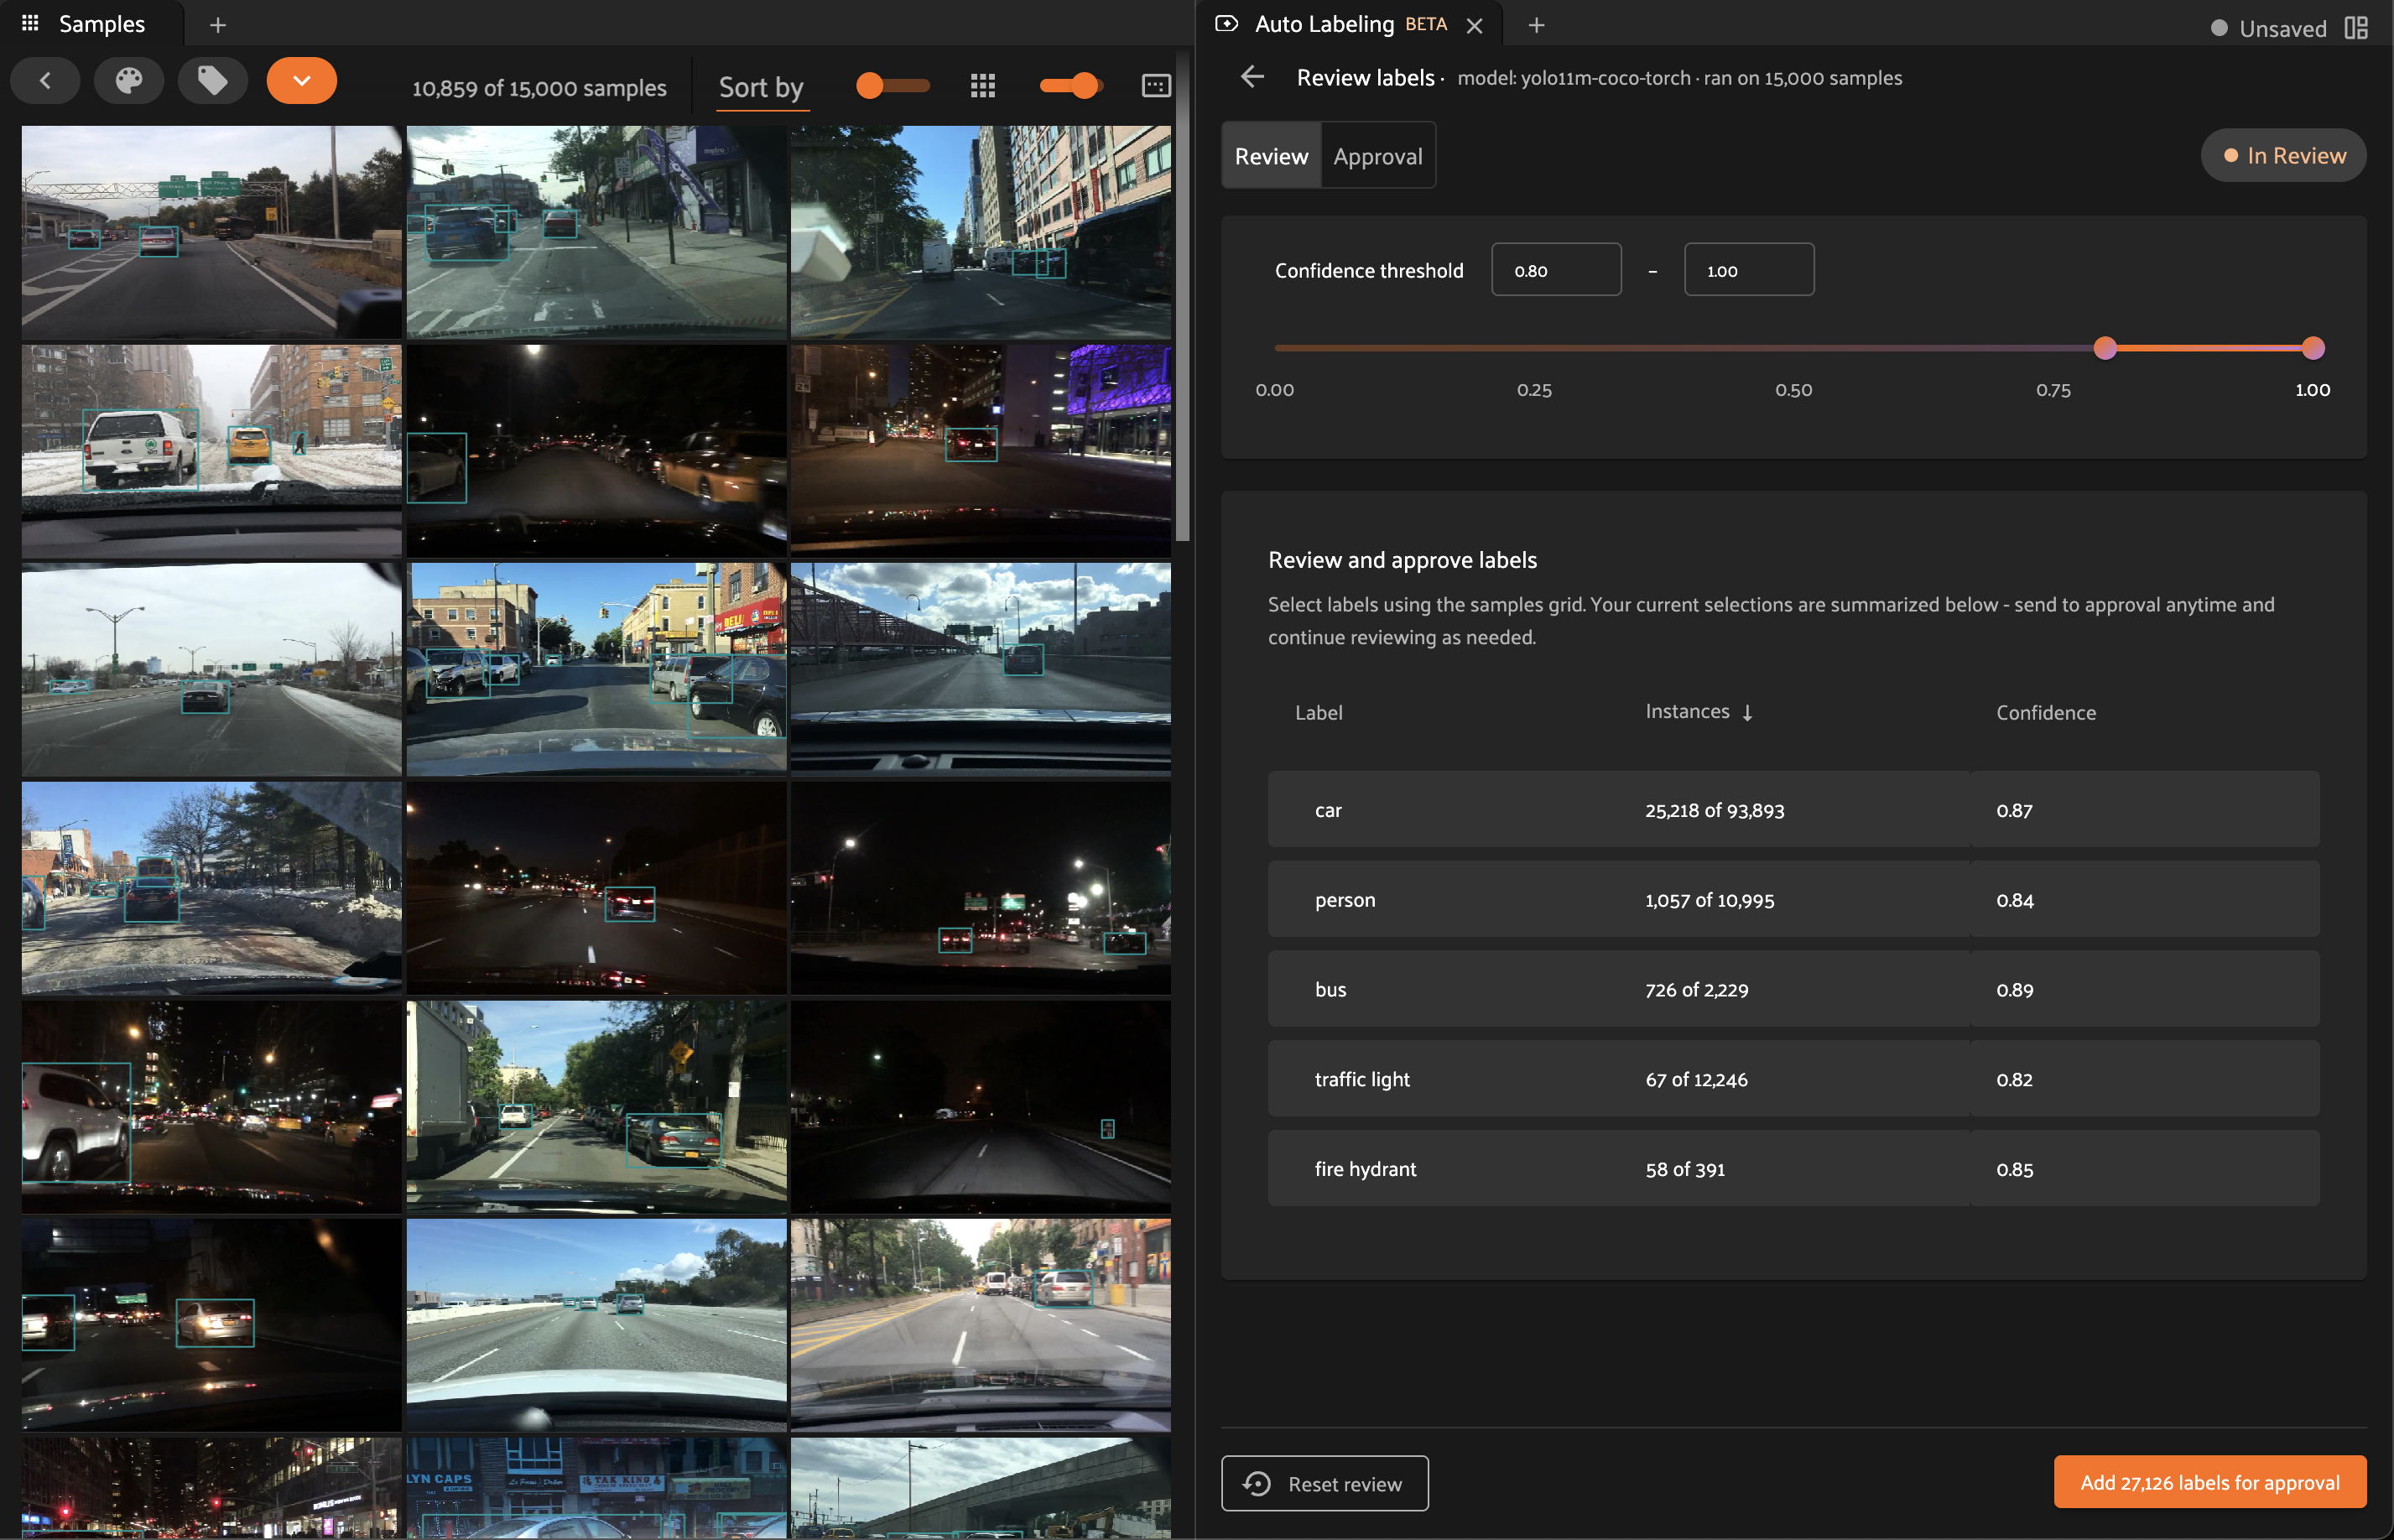
Note
If the current view contains a subset of the labels, the Instances column will read #current of #total. If you have specific samples selected, #current will reflect the labels contained within your selection.
For example, if the Instances column reads 21 of 100, this means that there are 21 instances of the class in the current view, and 100 total instances in the set of unpromoted labels. Labels which have already been promoted (visible in the approval tab) are excluded from these counts.
Promoting labels for approval#
As you explore the generated labels and identify high-quality instances, you can promote labels for approval by clicking the Add # labels for approval button at the bottom of the Auto-Labeling panel. This will designate the labels as ready for approval, and they will be removed from the review tab. Once they have been promoted, you can continue to select and promote additional labels in the same manner.

To view and manage promoted labels, navigate to the approval tab.
Note
Promoting labels for approval can always be undone from the approval tab.
Approval tab#
The approval tab displays all of the labels which have been promoted for approval. This tab offers three primary capabilities:
Undo all - clicking this button will return all promoted labels back to the review tab. This is the simplest way to “reset” the review process.
Undo (row-level) - clicking the undo button for a specific class will return all promoted labels for that class back to the review tab.
Approve # labels - clicking this button is a terminal operation for the Auto-Labeling experience. The following actions will occur:
All labels which have not been promoted will be deleted.
All labels which have been promoted will be added to the sample.
The Auto-Labeling run will transition to the Approved status.

Warning
Clicking the Approve # labels will effectively “close” the Auto-Labeling run. This action cannot be undone, and further label review will require a new Auto-Labeling run. Ensure that your review process is complete before taking this action.
Note
Prior to clicking Approve # labels, you can return to the label review process at any time by clicking on the Review tab.
Infrastructure Guidance#
Auto-Labeling makes use of state-of-the-art models, which are optimized to run with GPU resources available. While the provided models can run without GPUs, it is strongly recommended to provide GPU resources for the best experience. CPU-based workloads can be used for testing Auto-Labeling on a small number of samples.
Due to the compute requirements for model inference, Auto-Labeling is expected to run as a delegated operation on a configured orchestrator. The guidance in this section is targeted towards your orchestrator.
Infrastructure recommendations#
This section provides a summary of the recommendations in the following sections. For more information on these values, review the sections below.
Category |
Recommended value |
|---|---|
CPU |
4 vCPU |
GPU |
1 GPU |
Memory |
4 GB |
Shared memory ( |
1 GB |
Storage (model zoo dir) |
64 GB |
Note
These recommendations are for getting started with Auto-Labeling. If you have access to high-performance compute resources, increasing CPU, memory, and shared-memory configuration will generally yield improved model throughput.
CPU and memory#
In the context of Auto-Labeling, CPU and memory primarily facilitate fetching and loading sample data, inference pre-processing, and inference post-processing. The specific requirements will depend on the size and nature of your samples, but a moderate configuration with 2-4 vCPU and 4-8 GB of memory will be sufficient for many use cases. Increasing these values will improve pre- and post-processing overhead, but the majority of compute time is expected to be consumed by model inference itself, which should be executed on a GPU. See GPU resources for more information.
GPU resources#
Modern models are designed to run with GPU compute available. While most models are compatible with CPU-only workloads, performance will degrade significantly, and CPU and memory requirements will be much higher. To use Verified Auto-Labeling effectively, we strongly recommend allocating GPU resources to facilitate model inference.
Storage#
In order for models to run, the model must first be downloaded to an accessible filesystem. Auto-Labeling makes use of the FiftyOne model zoo directory for model storage. See FiftyOne’s configuration options for more information.
Models will be downloaded as needed, and will be reused if already present in the model zoo directory. The exact storage requirements will depend on the number and size of the models you select for Auto-Labeling, but 32-64GB of storage is sufficient to store all of the models available for Auto-Labeling.
Note
The model zoo directory is shared across FiftyOne. If you are already using models from the FiftyOne model zoo in other workflows, this may increase the storage requirements for the model zoo directory. Consult with your system administrator to determine whether there is sufficient storage.
FAQ#
Can I use my own model to generate labels?
Not yet. We currently offer a selection of models which are well-suited to Auto-Labeling. See model reference for more information.
Troubleshooting errors#
I see errors in my run relating to dataloaders, or processes exiting abnormally.
This is most often related to shared memory (shm) configuration. See our
infrastructure guidance
for more information.
Model reference#
Auto-Labeling supports a subset of models sourced from the FiftyOne model zoo. These models have been selected for their strong performance in Auto-Labeling.