|
|
|
|
Step 2: Adding Instance Segmentation to a FiftyOne Dataset#
We will explore how to enrich your dataset by adding instance segmentation predictions.
In this notebook, we’ll cover:
Using the FiftyOne Model Zoo to apply instance segmentation
Integrating predictions from a custom model (e.g., a model deployed via Intel Geti)
Using a Instance Segmentation Dataset#
For education purposes, use this link in Drive for downloading an upgraded dataset with 100+ annotated unique images.
Download the dataset with this Link and unzip in your work folder.
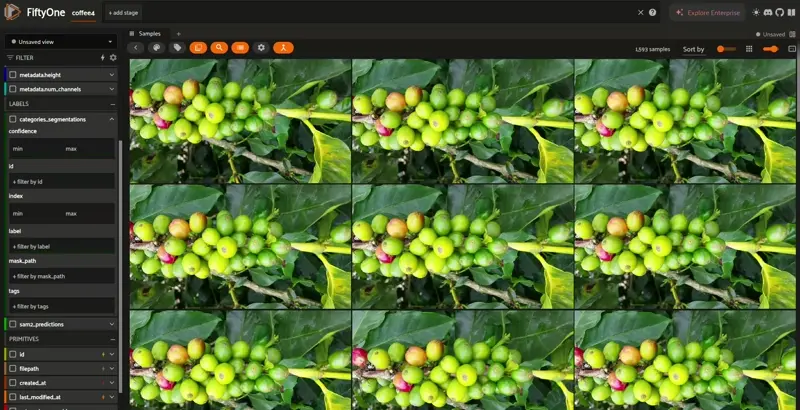
Let’s kick things off by loading the colombian_coffee-dataset_1600: (This is a new dataset, different from the one used in the last notebook.)
[ ]:
import fiftyone as fo
from fiftyone.utils.coco import COCODetectionDatasetImporter

dataset = fo.Dataset.from_dir(
    dataset_type=fo.types.COCODetectionDataset,
    dataset_dir="./colombian_coffee-dataset_1600",
    data_path="images/default",
    labels_path="annotations/instances_default.json",
    label_types="segmentations",
    label_field="ground_truth",
    name="coffe_1600",
    include_id=True,
    overwrite=True
)

view = dataset.shuffle()
session = fo.launch_app(dataset)
Loading predictions using SAM2#
With FiftyOne, you have tons of pretrained models at your disposal to use via the FiftyOne Model Zoo or using one of our integrations such as HuggingFace! To get started using them, first load the model in and pass it into the apply_model function.
Install SAM2 following the instuctions from this Repo. You can also jump to the next step of this tutorials to understand how SAM2 works with FiftyOne
[ ]:
!python -m pip install "sam2"
[ ]:
!pip install 'git+https://github.com/facebookresearch/sam2.git'
If you encounter any issues, please refer to the main SAM2 repository to verify the installation process Repo.
Now apply Segment Anything SAM2 from the FiftyOne Model Zoo. As you can see, some images in the dataset include ground truth annotations, but not all of them. With SAM2, we will apply segmentation across the entire dataset. (This could take around 1.5 hours)
[ ]:
import fiftyone.zoo as foz
model = foz.load_zoo_model("segment-anything-2-hiera-tiny-image-torch")

# Prompt with boxes
dataset.apply_model(
    model,
    label_field="sam2_predictions",
)
Alternatively, you can apply SAM only to the images that already have ground truth segmentations.
[ ]:
dataset.apply_model(
    model,
    label_field="sam2_predictions",
    prompt_field="ground_truth_segmentations",
)
This will execute SAM only for images in the segmentation category.
Loading predictions using a custom model (Intel Geti Example)#
Let’s now simulate the pipeline with a custom instance segmentation model. If you want to run the inference using the same example, please refer tho this example for your reference.
Assuming you’ve already set up inference with a model (e.g., via OpenVINO + Intel Geti SDK):
[ ]:
!pip install geti-sdk==2.10.*
Preparing the models for inference#
The Intel Geti SDK will be used to run inference with Intel Geti Models. The deployment folder of the best model must be downloaded and unzipped in the same folder as the project.
Download and unzip the model
Generating instance segmentation masks from polygons and bounding boxes#
This function extracts instance segmentation masks from polygon annotations, combining detection (bounding boxes) and segmentation (masks) in the same instance using fo.Detection.
Load Image – Reads and converts the image to RGB.
Process Annotations – Extracts polygon points, computes bounding boxes, and normalizes coordinates.
Generate Masks – Creates, crops, and resizes binary masks for each annotation.
Save & Return – Stores masks as temp files and returns
fo.Detectionobjects, ensuring the bounding box and mask belong to the same instance.
This enables accurate visualization and analysis in FiftyOne, preserving both object localization and shape details.
Useful for visualizing or processing segmentation data in FiftyOne.
[ ]:
import numpy as np
import cv2
import fiftyone as fo
from PIL import Image as PILImage
from tempfile import NamedTemporaryFile
from geti_sdk.deployment import Deployment
from geti_sdk.data_models.shapes import Polygon

def generate_mask_from_polygon_and_bboxes(sample, prediction):
    image = cv2.imread(sample.filepath)
    image = cv2.cvtColor(image, cv2.COLOR_BGR2RGB)
    img_height, img_width = image.shape[:2]
    print(f"Image size: {img_width}x{img_height}")
    detections = []
    for annotation in prediction.annotations:
        if isinstance(annotation.shape, Polygon):
            polygon_points = [(point.x, point.y) for point in annotation.shape.points]
            polygon_points = np.array(polygon_points, dtype=np.int32)
            label = annotation.labels[0].name
            confidence = annotation.labels[0].probability
            x, y, w, h = cv2.boundingRect(polygon_points)
            scaled_x = x / img_width
            scaled_y = y / img_height
            scaled_w = w / img_width
            scaled_h = h / img_height
            bounding_box = [scaled_x, scaled_y, scaled_w, scaled_h]
            mask = np.zeros((img_height, img_width), dtype=np.uint8)
            cv2.fillPoly(mask, [polygon_points], 255)
            cropped_mask = mask[y:y + h, x:x + w]
            mask_resized = cv2.resize(cropped_mask, (w, h), interpolation=cv2.INTER_NEAREST)
            print(f"Mask size: {mask_resized.shape} (expected: {h}x{w})")
            with NamedTemporaryFile(delete=False, suffix='.png') as temp_mask_file:
                mask_path = temp_mask_file.name
                cv2.imwrite(mask_path, mask_resized)
            detection = fo.Detection(
                label=label,
                confidence=confidence,
                bounding_box=bounding_box,
                mask_path=mask_path
            )
            detections.append(detection)
    return detections
For education purposes check what is happening in the first or last sample. Then you can apply this to the whole dataset
[ ]:
from openvino.runtime import Core

ie = Core()
devices = ie.available_devices

for device in devices:
    device_name = ie.get_property(device, "FULL_DEVICE_NAME")
    print(f"{device}: {device_name}")
[ ]:
# Update the folder path to match the location where the model was downloaded and unzipped
deployment_inference = Deployment.from_folder("geti_sdk-deployment_90")
deployment_inference.load_inference_models(device="CPU")
[ ]:
# Test on one image
sample = dataset.first()
image_path = sample.filepath
image_data = PILImage.open(image_path)
image_data = np.array(image_data)
prediction = deployment_inference.infer(image_data)
detections = generate_mask_from_polygon_and_bboxes(sample, prediction)
sample['predicted_segmentations_test'] = fo.Detections(detections=detections)
sample.save()
dataset.reload()
print(dataset)
print(sample)
📝 Tip: Replace prediction.objects with your real output structure and masks.
Run the prediction in the whole dataset#
This loop processes each sample in the dataset by loading the image, running inference using Geti SDK, and generating instance segmentation masks. The function extracts detections with both bounding boxes and masks, ensuring they belong to the same instance. These predictions are then stored in the sample under "predictions_model" using fo.Detections. Finally, the dataset is reloaded to reflect the updates.
[ ]:
# Iterate over the samples in the dataset
for sample in dataset:
    # Load the image as a NumPy array using PIL or OpenCV
    image_path = sample.filepath  # Path to the image file
    image_data = PILImage.open(image_path)
    image_data = np.array(image_data)  # Convert the image to NumPy array

    # Run inference on the sample (using Geti SDK's inference)
    prediction = deployment_inference.infer(image_data)

    # Generate the segmentation mask and detections using the annotations from the prediction
    detections = generate_mask_from_polygon_and_bboxes(sample, prediction)

    # Add the detections as predicted segmentations
    sample["predictions_geti_sdk"] = fo.Detections(detections=detections)

    # Save the updated sample
    sample.save()

# Reload the dataset to reflect the changes
dataset.reload()
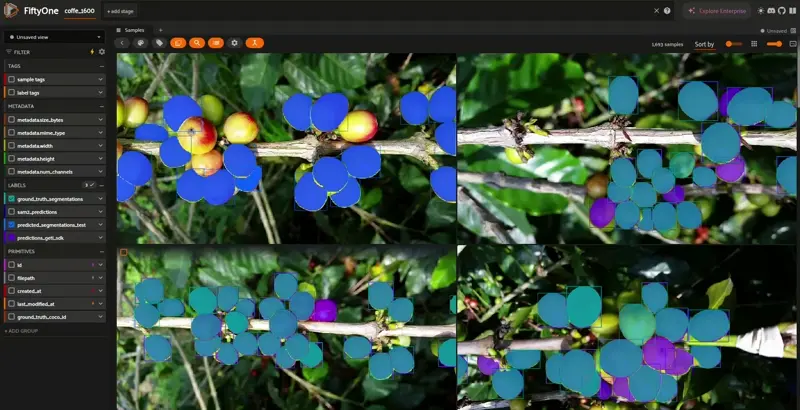
Compare Predictions in FiftyOne App#
Toggle between ground_truth_segmentations, sam2_predictions, and predictions_geti_sdk in the App to explore and compare different segmentations side-by-side!
[ ]:
session = fo.launch_app(dataset)