|
|
|
|
Building Annotation Workflows and Ontologies with FiftyOne#
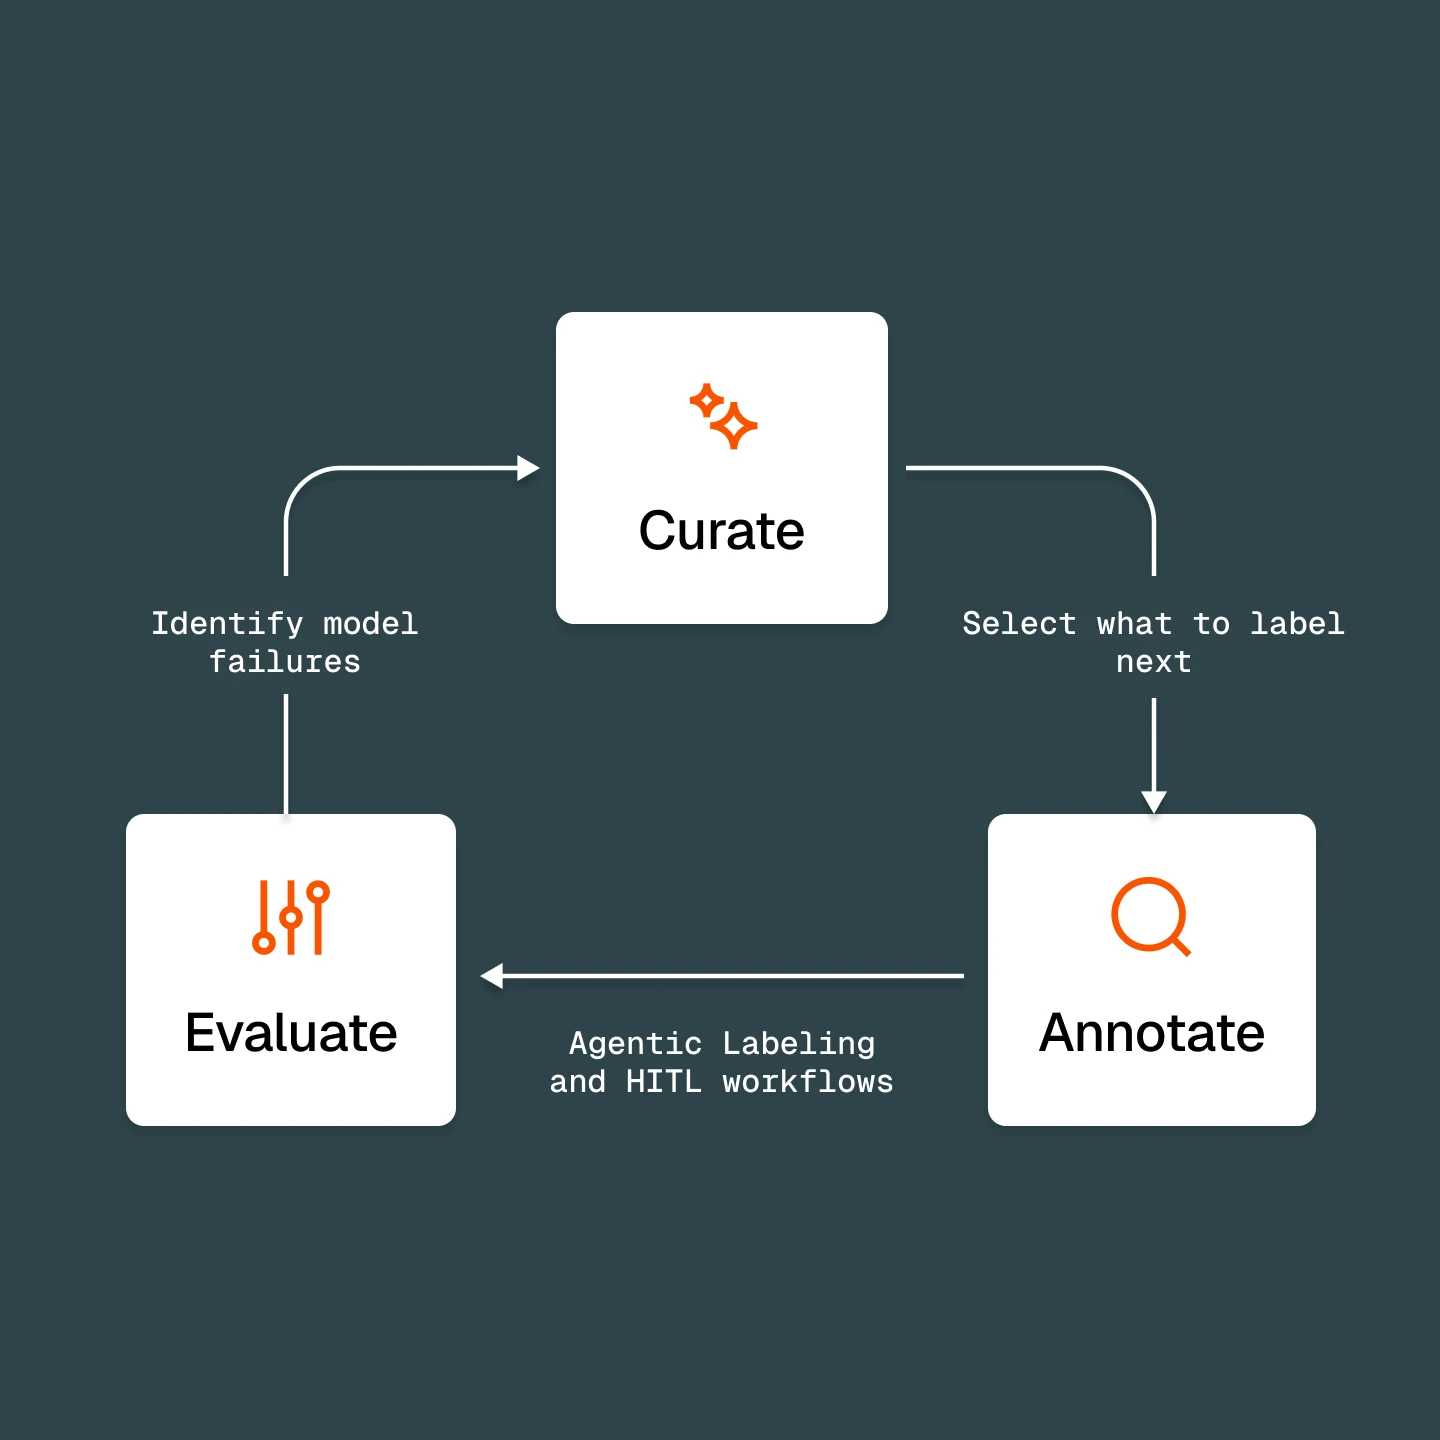
This tutorial builds a complete annotation loop in FiftyOne:
Curate — select what to label with embeddings, similarity, uniqueness, and zero-shot tagging
Annotate — define an ontology, route samples through a multi-stage workflow, then draft a first pass with an agent or zoo models
Review — rank labels by estimated error and fix the worst
Evaluate — score the model by scenario and feed failures back into the next curation pass
This tutorial uses FiftyOne Enterprise
Workflows, ontologies, and Agentic Labeling are FiftyOne Enterprise features, shown here through the App UI. The analysis steps — embeddings, similarity, uniqueness, mistakenness, evaluation, and zero-shot pre-labeling — also run in open-source FiftyOne.
Setup#
Install FiftyOne and the extras used below:
[ ]:
!pip install fiftyone fiftyone-brain umap-learn
# Optional, for the training step at the end:
# !pip install ultralytics
Connect to FiftyOne Enterprise#
Set these two variables before importing fiftyone (generate a key under Settings → API keys). Skip this cell to run open source against a local dataset.
[ ]:
import os

# Uncomment and fill in to target your FiftyOne Enterprise deployment:
# os.environ["FIFTYONE_API_URI"] = "https://<your-deployment>-api.fiftyone.ai"
# os.environ["FIFTYONE_API_KEY"] = "<your-api-key>"

import fiftyone as fo
import fiftyone.brain as fob
import fiftyone.zoo as foz
from fiftyone import ViewField as F
Load the example data#
Use the quickstart dataset (200 COCO images with ground_truth and predictions) from the FiftyOne Dataset Zoo as the running example. The agentic-labeling section later pulls in a second dataset from the Hugging Face Hub.
Enterprise datasets reference cloud media (
gs://,s3://) — point samplefilepaths at storage your deployment can read.
[ ]:
dataset = foz.load_zoo_dataset("quickstart")
dataset.persistent = True
print(dataset)
[ ]:
session = fo.launch_app(dataset)
Stage 1 — Curate: select what to label#
Decide what’s worth labeling before annotation starts.
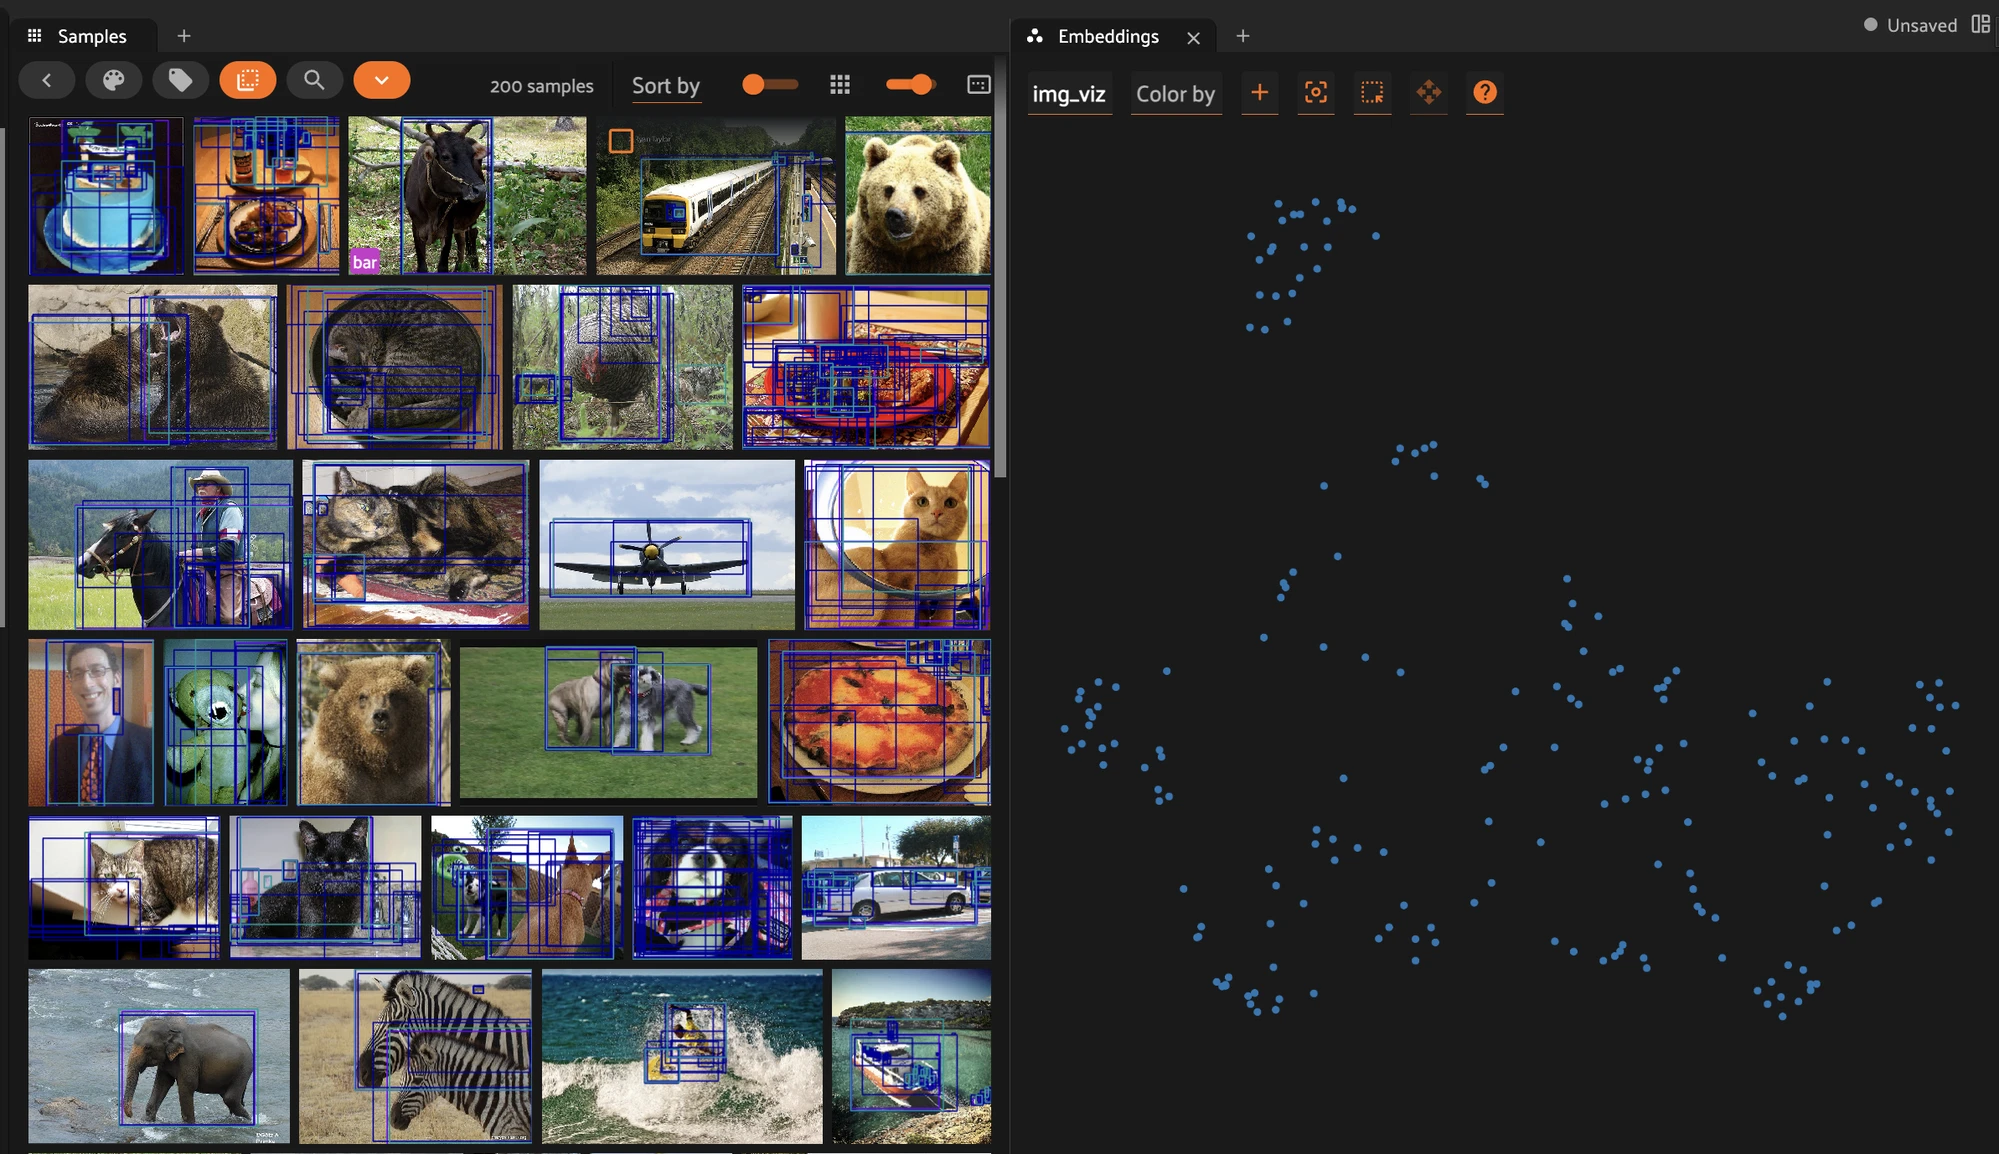
Visualize in embedding space#
Compute a 2D visualization, then open the Embeddings panel in the App.
[ ]:
fob.compute_visualization(
    dataset,
    model="clip-vit-base32-torch",
    method="umap",
    brain_key="img_viz",
)
session.view = dataset.view()
Score redundancy and coverage#
Rank by uniqueness and representativeness, and flag near-duplicates.
[ ]:
fob.compute_uniqueness(dataset)
fob.compute_representativeness(dataset, method="cluster-center")

# Most unique (least redundant) samples first
unique_view = dataset.sort_by("uniqueness", reverse=True)
print(unique_view.first().uniqueness)
[ ]:
# Flag near-duplicates so you don't pay to label the same thing twice
index = fob.compute_near_duplicates(dataset)
print(index.duplicates_view())
Search by text and similarity#
Build a similarity index, then query by natural language or by an example image.
[ ]:
fob.compute_similarity(
    dataset,
    model="clip-vit-base32-torch",
    brain_key="img_sim",
)

# Natural-language query
night_view = dataset.sort_by_similarity(
    "a photo taken at night", k=25, brain_key="img_sim"
)
[ ]:
# Few-shot: retrieve samples similar to an example you care about
query_id = dataset.first().id
similar_view = dataset.sort_by_similarity(query_id, k=25, brain_key="img_sim")
Auto-tag by metadata#
Tag each image as an indoor or outdoor scene with a zero-shot CLIP model — a field you can color the Embeddings panel by and slice evaluation on later.
[ ]:
# Zero-shot scene tagging with CLIP
scene_model = foz.load_zoo_model(
    "clip-vit-base32-torch",
    text_prompt="A photo of ",
    classes=["an indoor scene", "an outdoor scene"],
)
dataset.apply_model(scene_model, label_field="scene")
print(dataset.count_values("scene.label"))
Build the subset to annotate#
Save the most-unique samples as a saved view to send to annotation.
[ ]:
to_annotate = dataset.sort_by("uniqueness", reverse=True).limit(10)
dataset.save_view("to_annotate", to_annotate, overwrite=True)
print(dataset.load_saved_view("to_annotate"))
Stage 2 — Annotate: ontologies, workflows, and model-assisted labeling#
Define a shared ontology, route the curated view through a multi-stage workflow, and speed up the first pass with models — so annotators verify rather than draw from scratch.
Define an ontology in code, apply it in the App#
An ontology is your shared label schema — classes, attributes, and a taxonomy. Define it once in code, then apply it to a field in the App so every annotator gets the same classes and attributes. Conditional attributes (when=...) appear only when relevant.
[ ]:
ontology = fo.AnnotationOntology(
    name="coco-objects",
    description="Common object classes for the quickstart (COCO) dataset",
    attributes=[
        fo.AttributeSpec(name="occluded", type="bool", component="checkbox"),
        fo.AttributeSpec(name="truncated", type="bool", component="checkbox"),
        fo.AttributeSpec(
            name="pose",
            type="str",
            component="dropdown",
            values=["standing", "sitting", "lying"],
            # Only show this attribute for person labels
            when=fo.WhenEquals(field="label", value="person"),
        ),
    ],
)
ontology.save()
print(fo.list_ontologies())
The ontology SDK writes to the database directly, so run it with a direct database connection (not API mode).
Now apply it in the App, click by click:
Open the dataset, then open the field schema editor (the schema/settings control).
Click the field you want to govern — here ground_truth.
In Edit field schema, turn the Ontology toggle on.
Open the Chosen ontology dropdown and select coco-objects.
Click Save.
Every annotation task on that field now offers exactly the classes and attributes you defined in code.
Manage annotation with multi-stage workflows#
FiftyOne Enterprise. The Annotate tab turns your curated saved view into a managed, multi-stage labeling effort — assign stages, track progress per task, and automatically loop rejected work back to annotators. Follow it click by click.
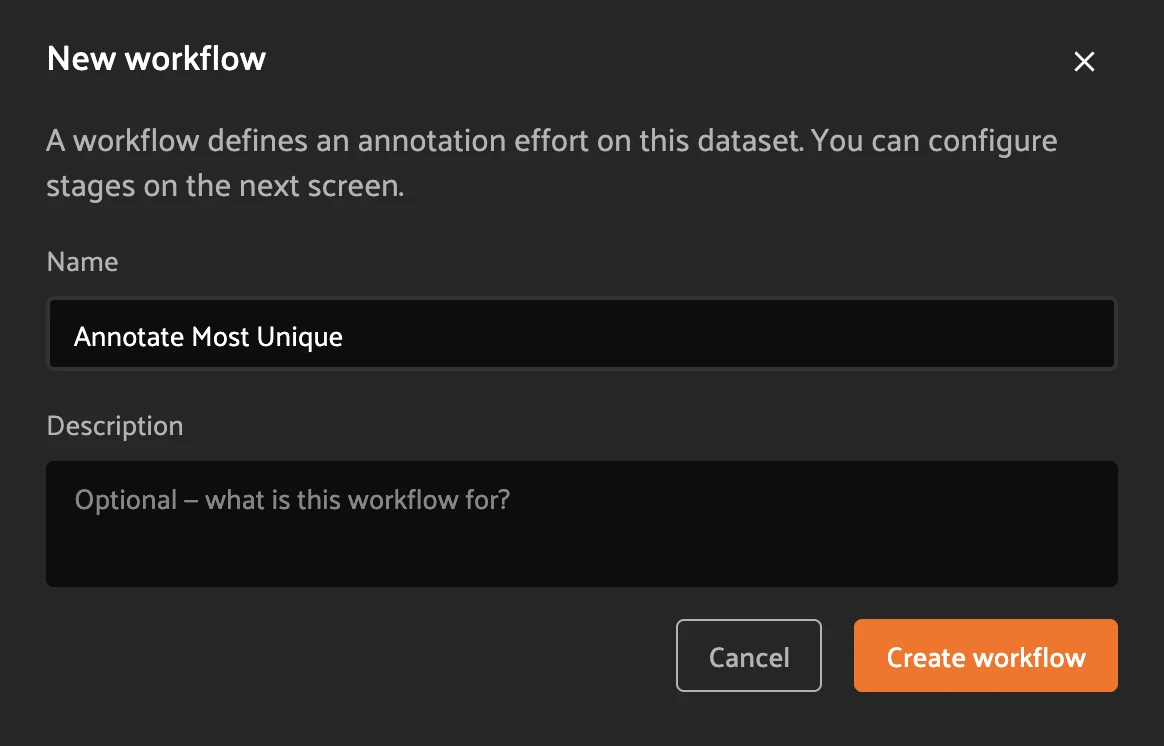
Step 1 — Create a workflow. Open the Annotate tab. Click + New workflow (top right). In the dialog, type a Name (for example, Annotate Most Unique), optionally add a description, and click Create workflow.
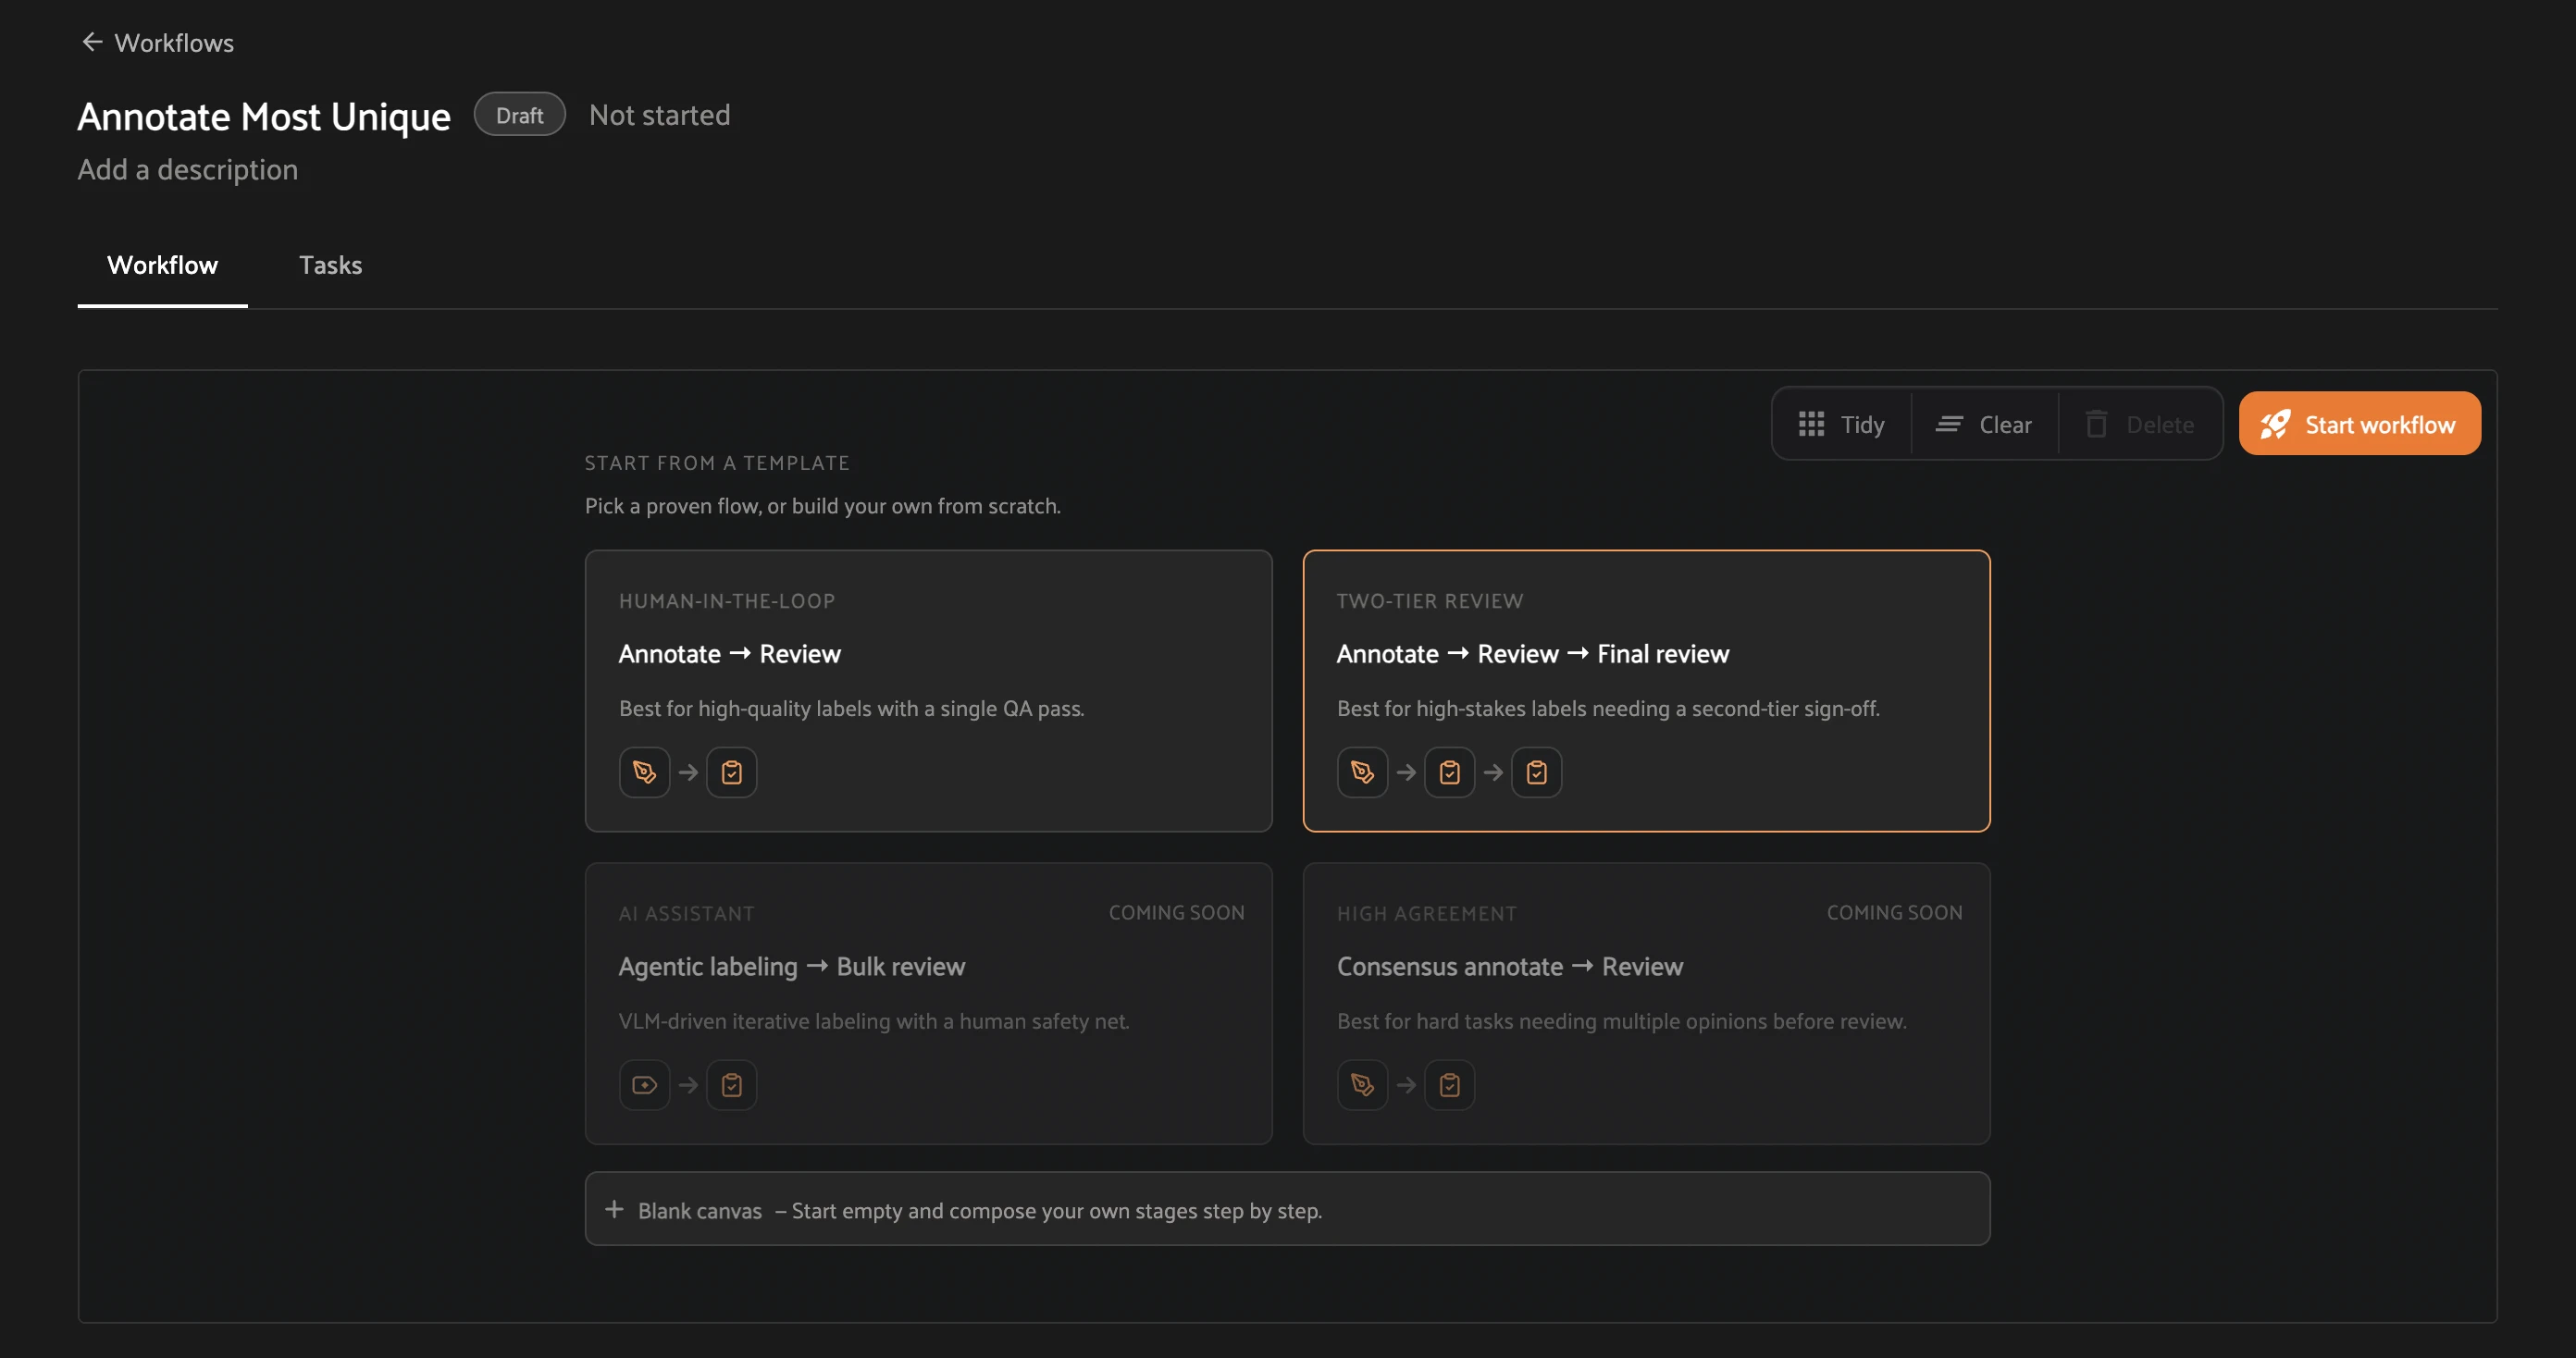
Step 2 — Pick a template. On the next screen, under Start from a template, click a card to add its stages to the canvas:
Human-in-the-loop — Annotate → Review (one QA pass).
Two-tier review — Annotate → Review → Final review (a second sign-off). Click this one for the rest of the walkthrough.
Or click + Blank canvas to add stages yourself.
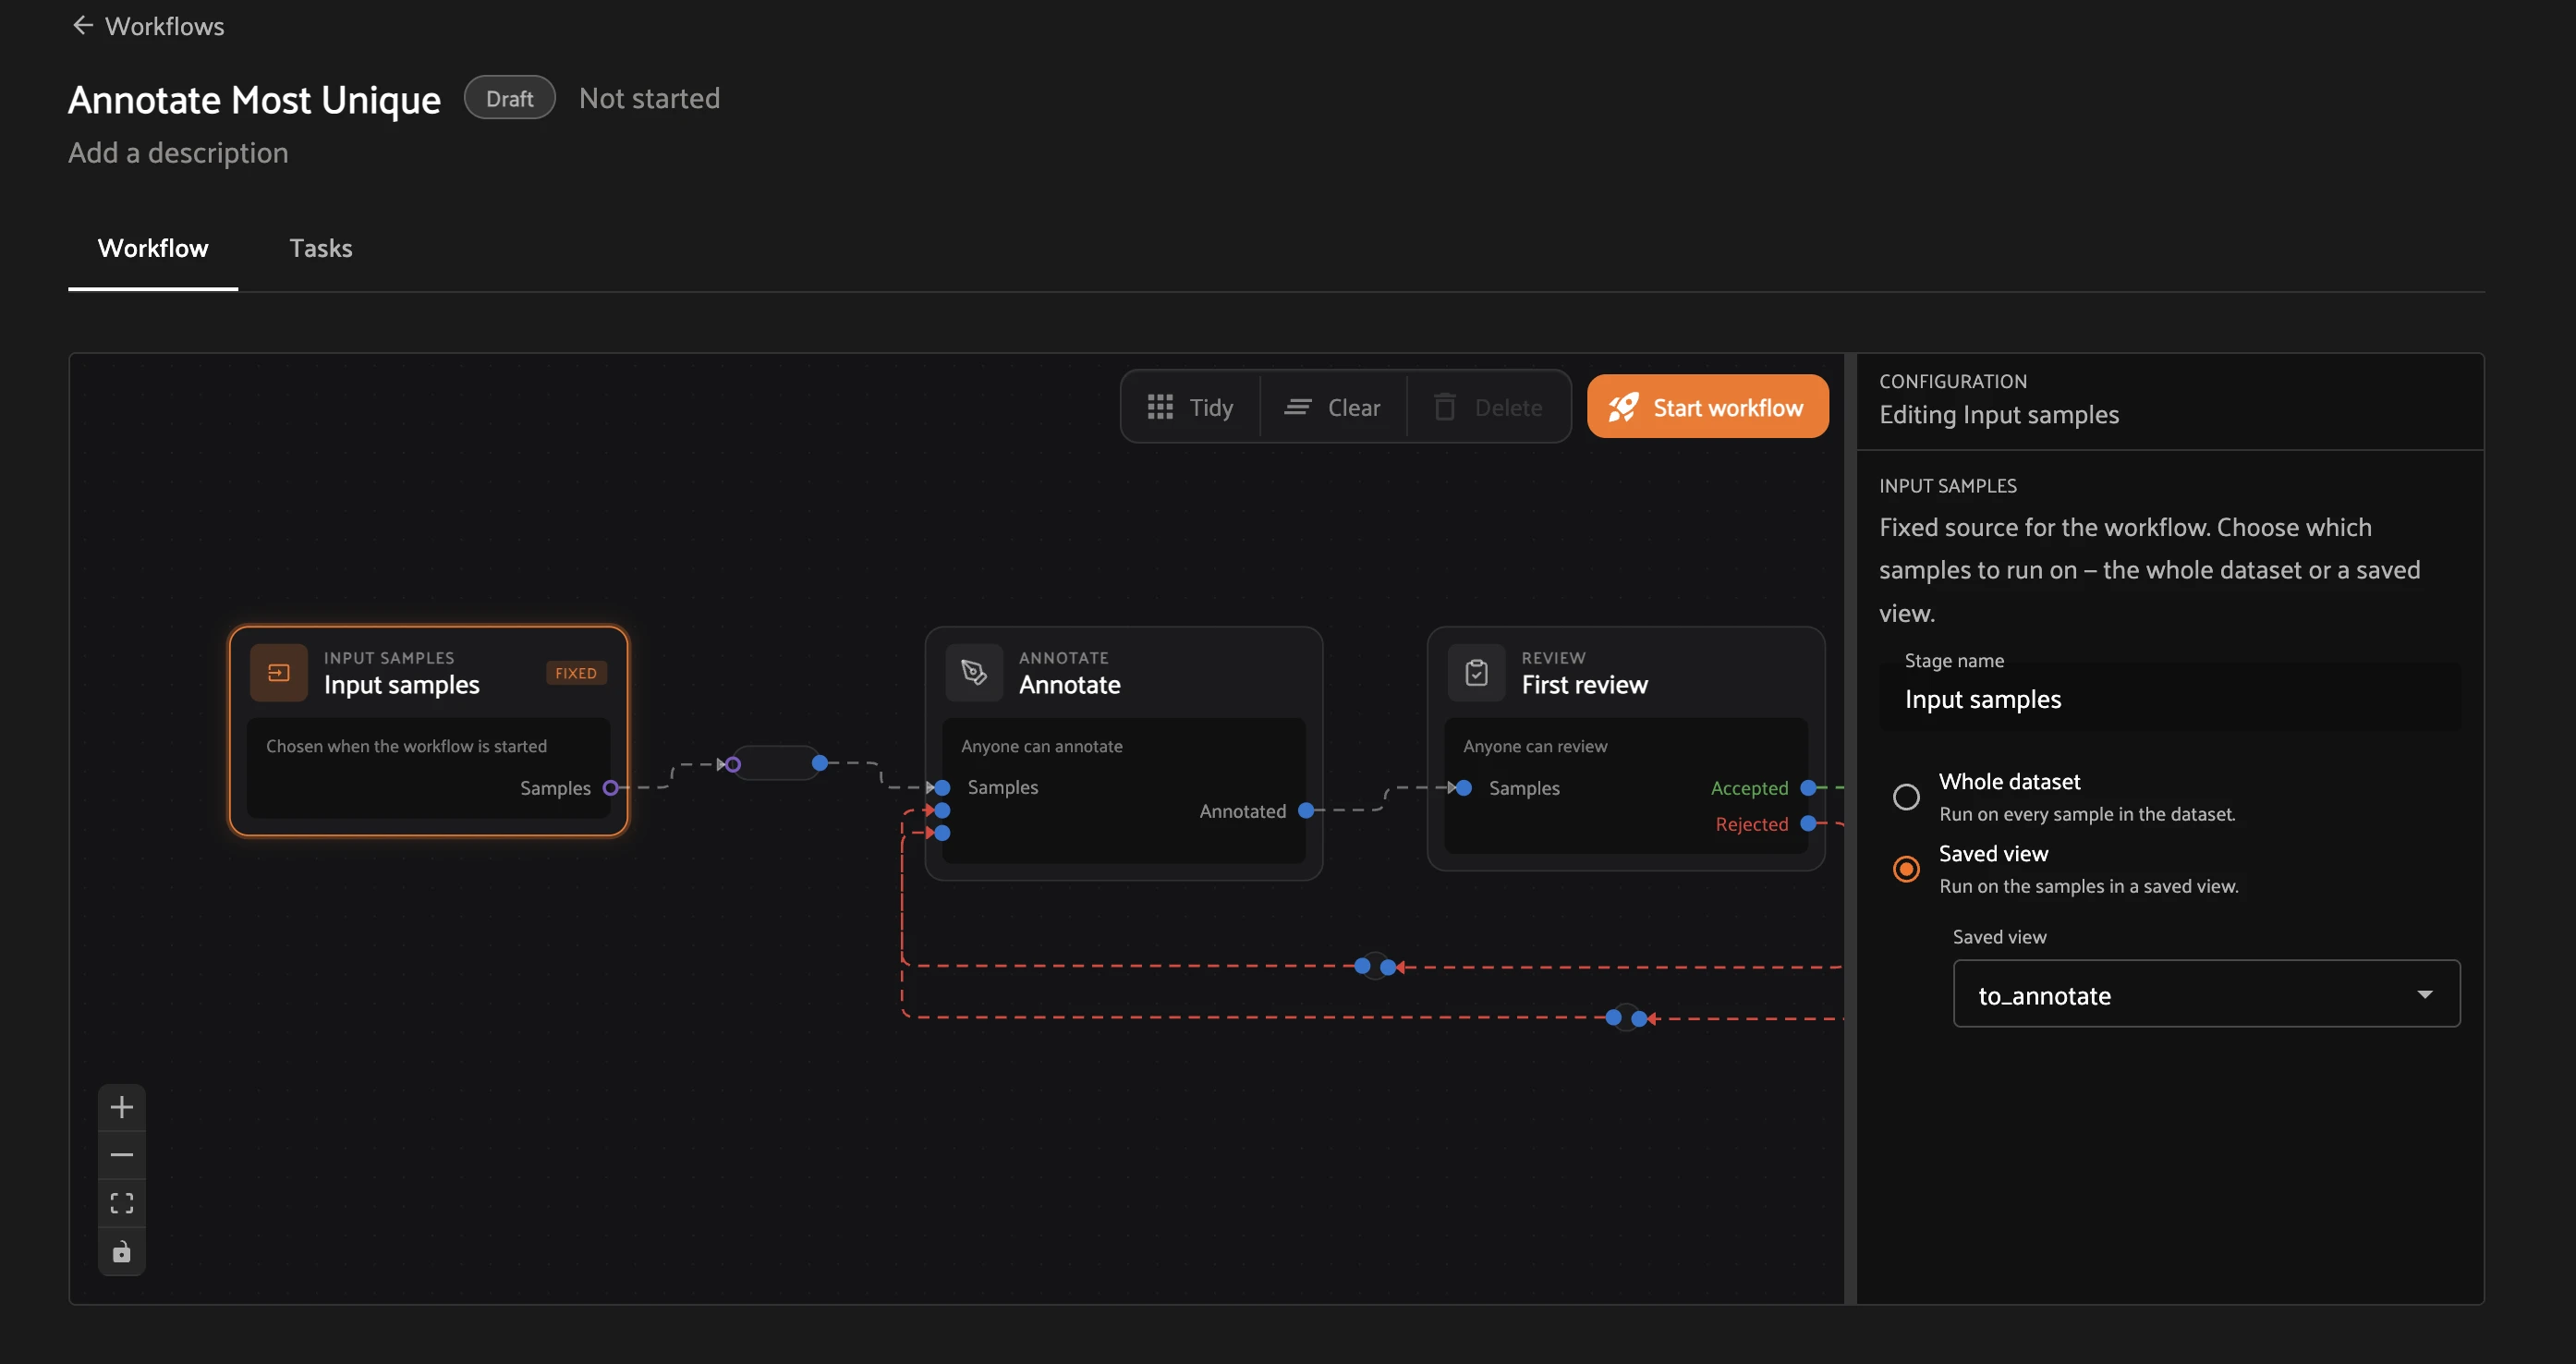
Step 3 — Point it at your data and start. On the canvas, click the Input samples node. In the Configuration panel on the right, select Saved view, then choose to_annotate from the dropdown (or pick Whole dataset). The dashed red Rejected → Annotate edges are already wired by the template, so rejected samples will loop back. Click Start workflow (top right).
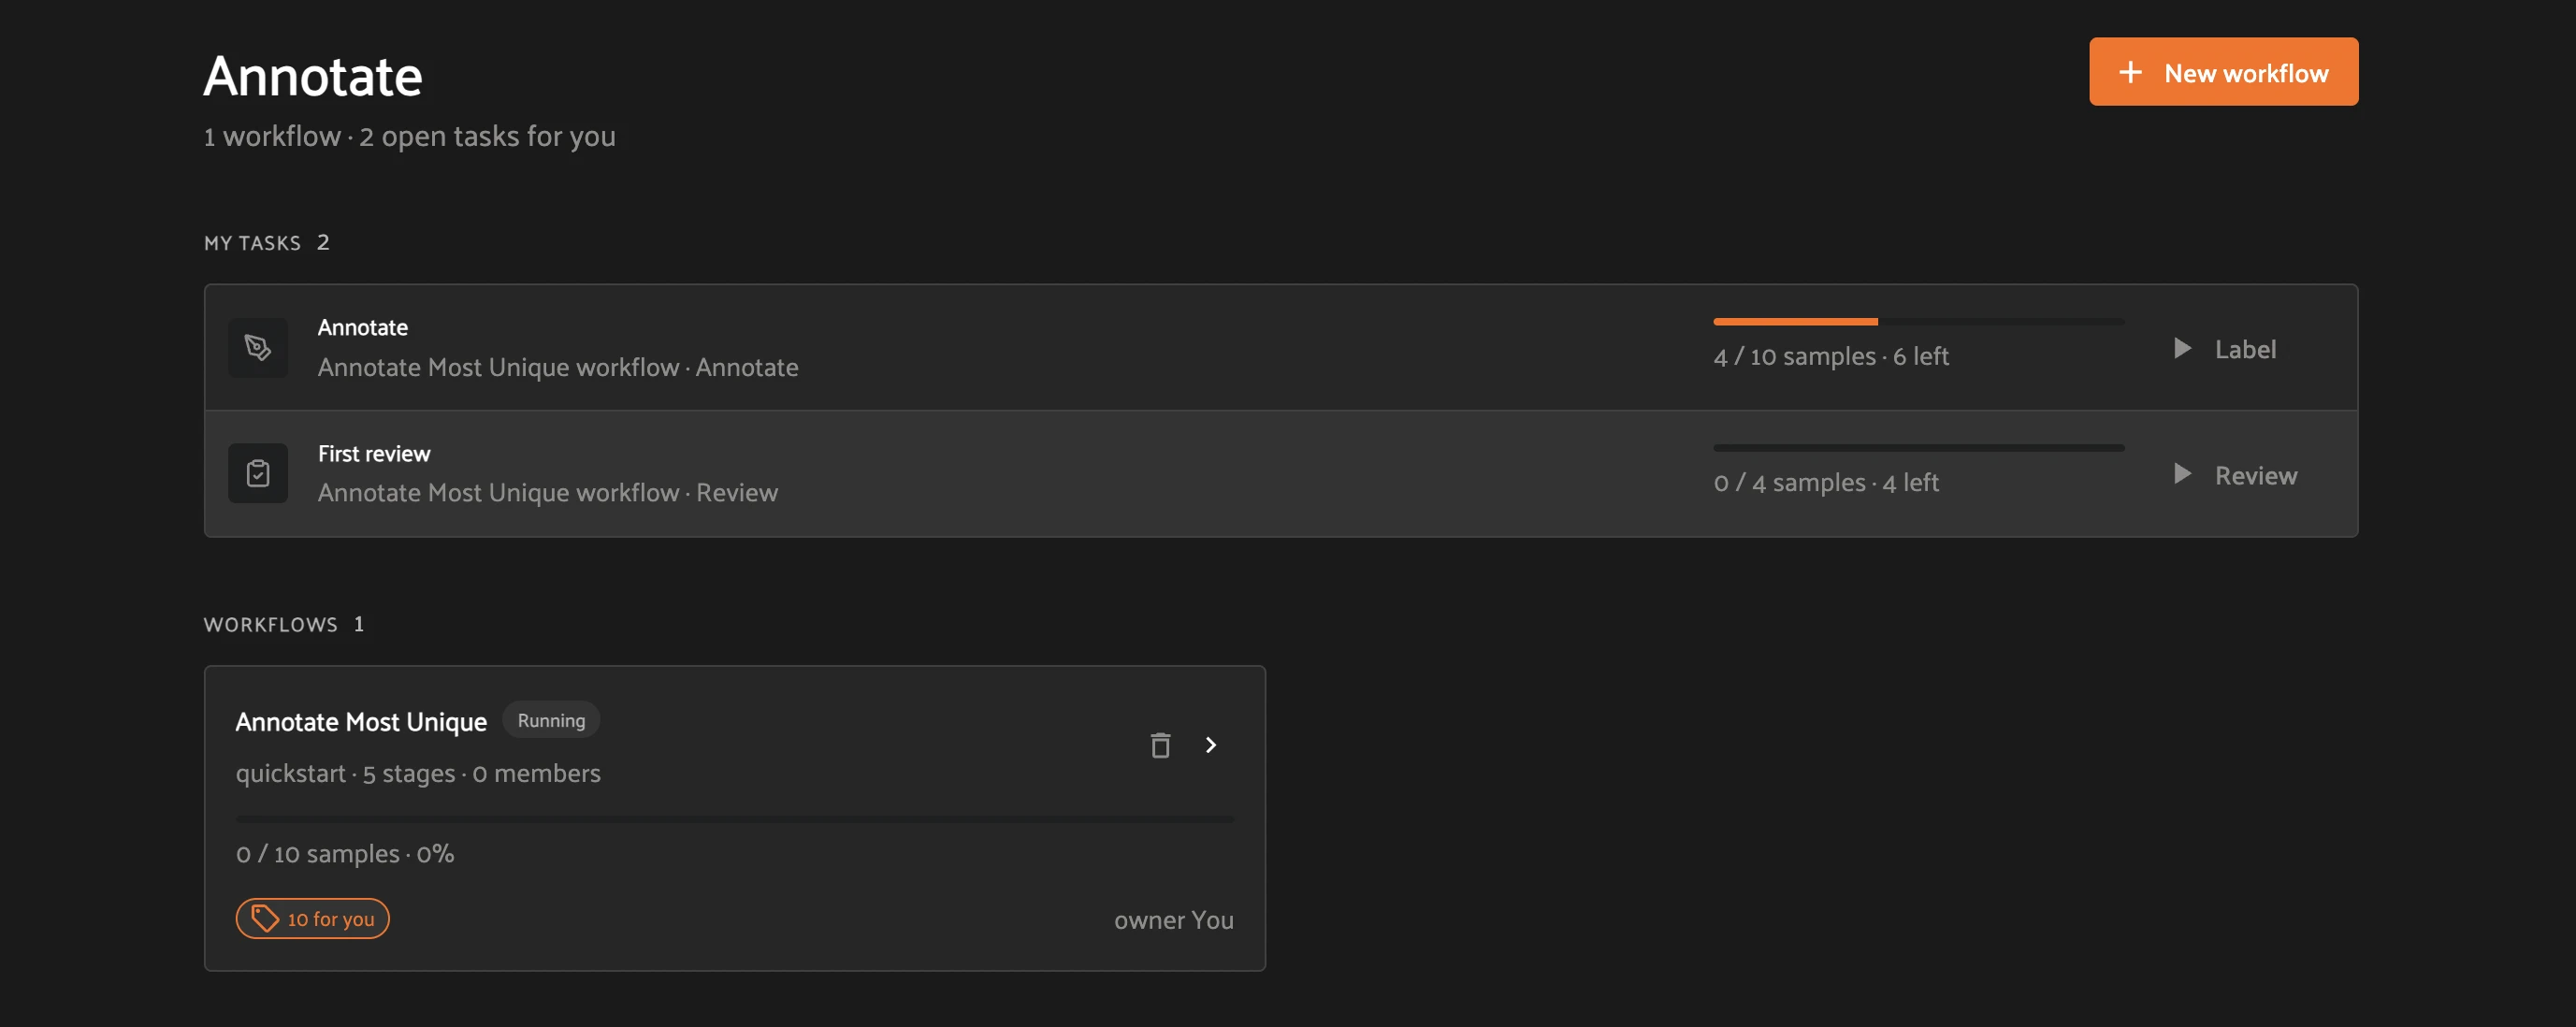
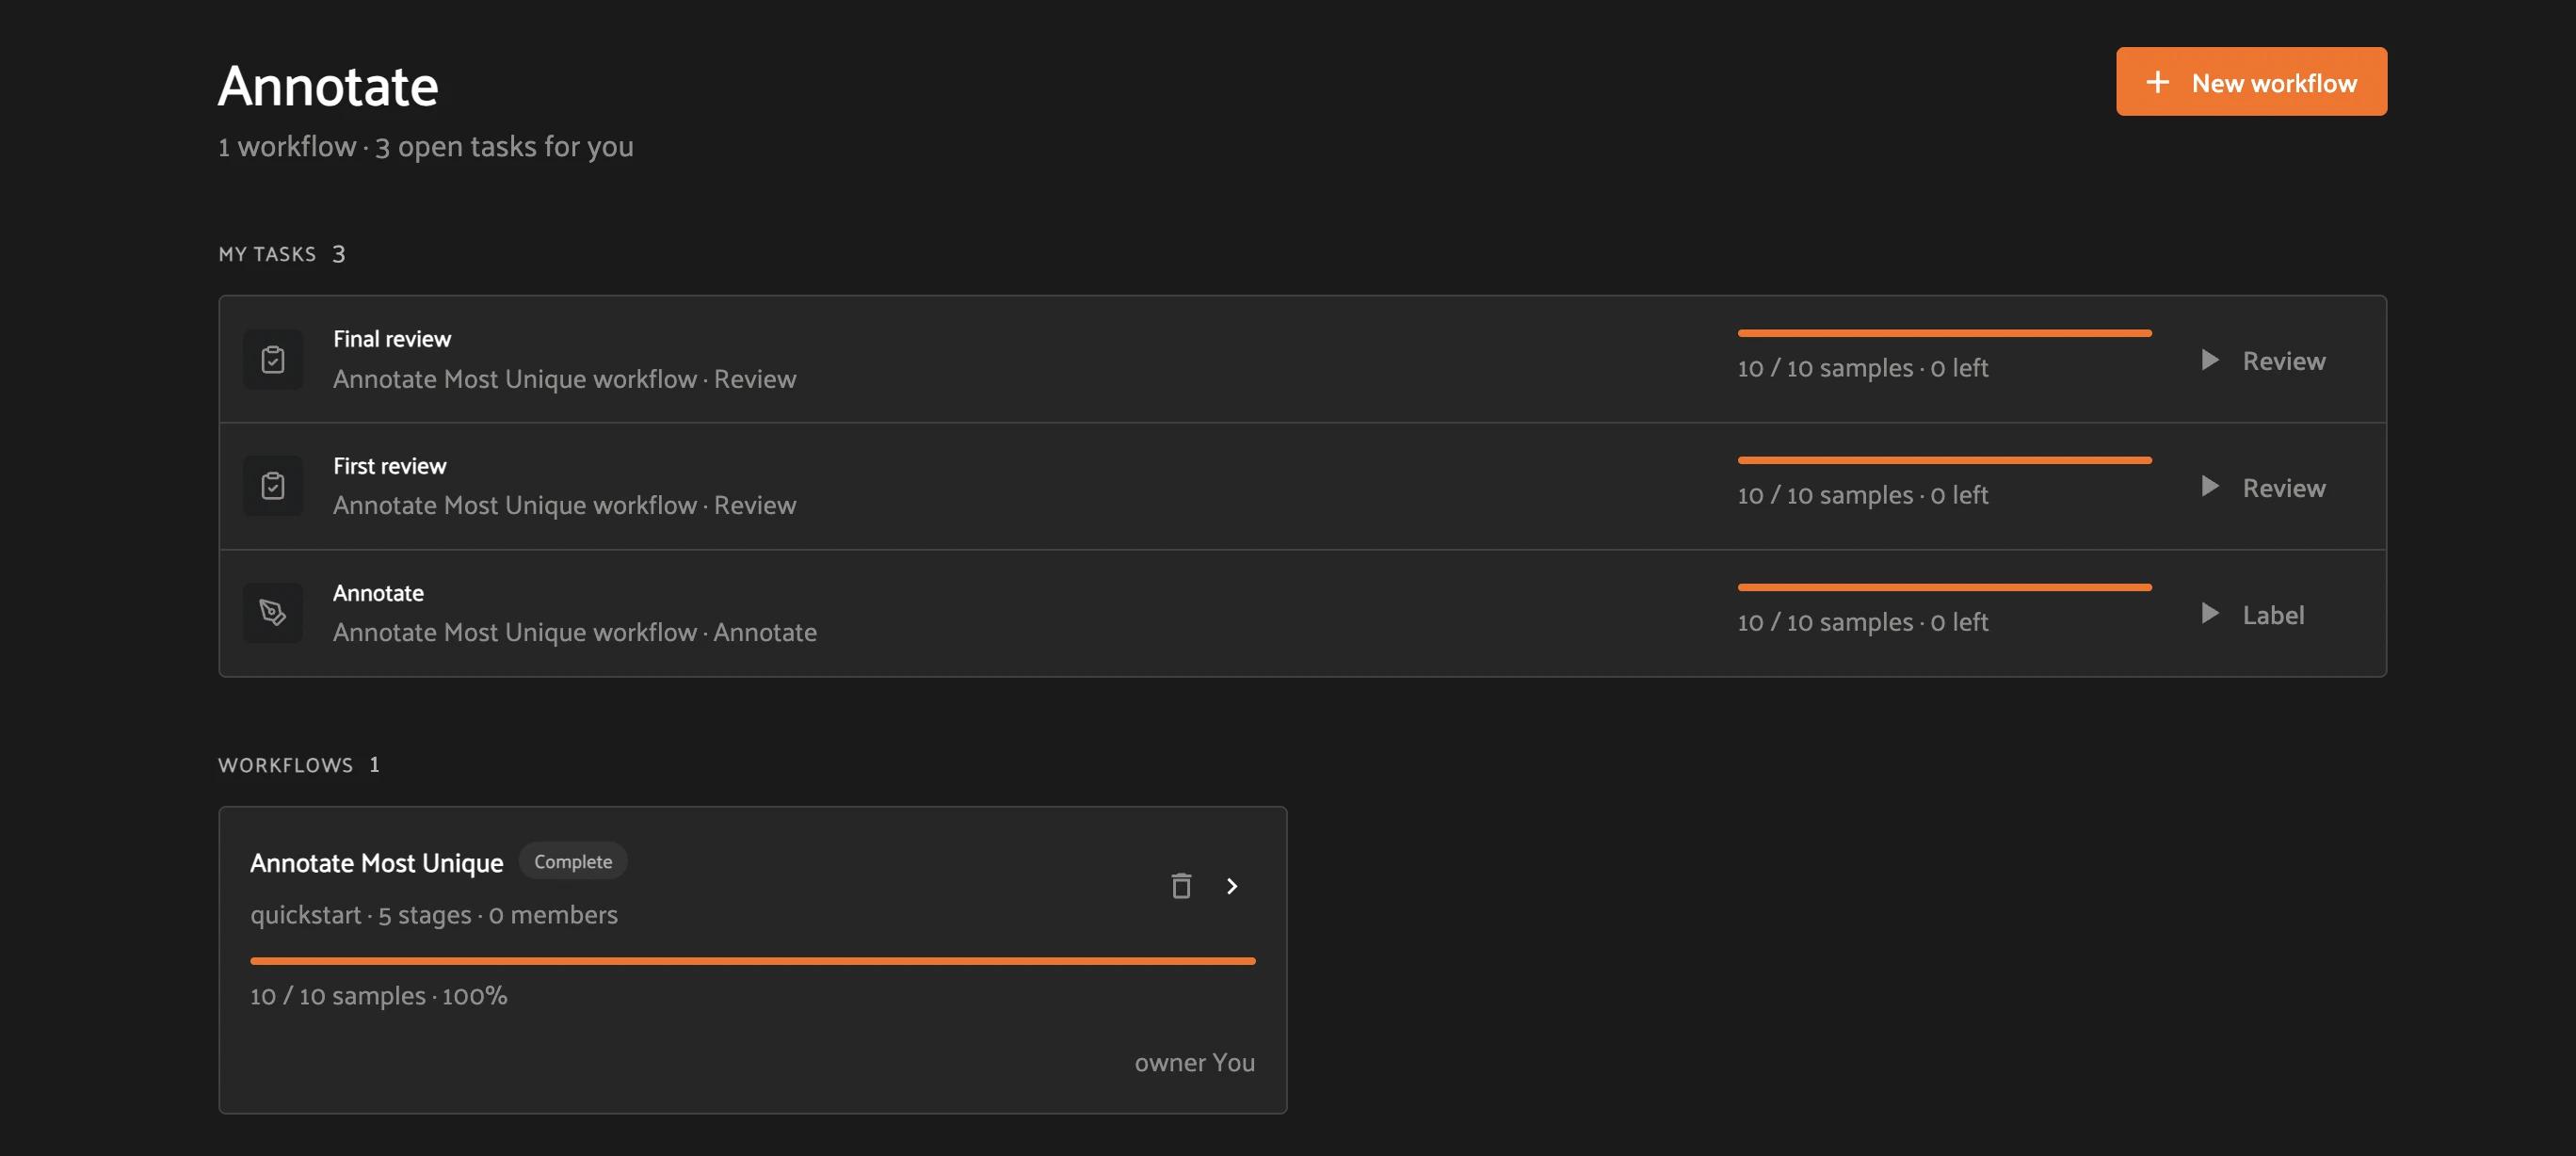
Step 4 — Open your task queue. Starting the workflow generates tasks and returns you to the Annotate tab. Under My tasks, each stage assigned to you shows its progress (for example, 4 / 10 samples · 6 left) and an action button — Label for annotate stages, Review for review stages. The workflow now shows as Running.
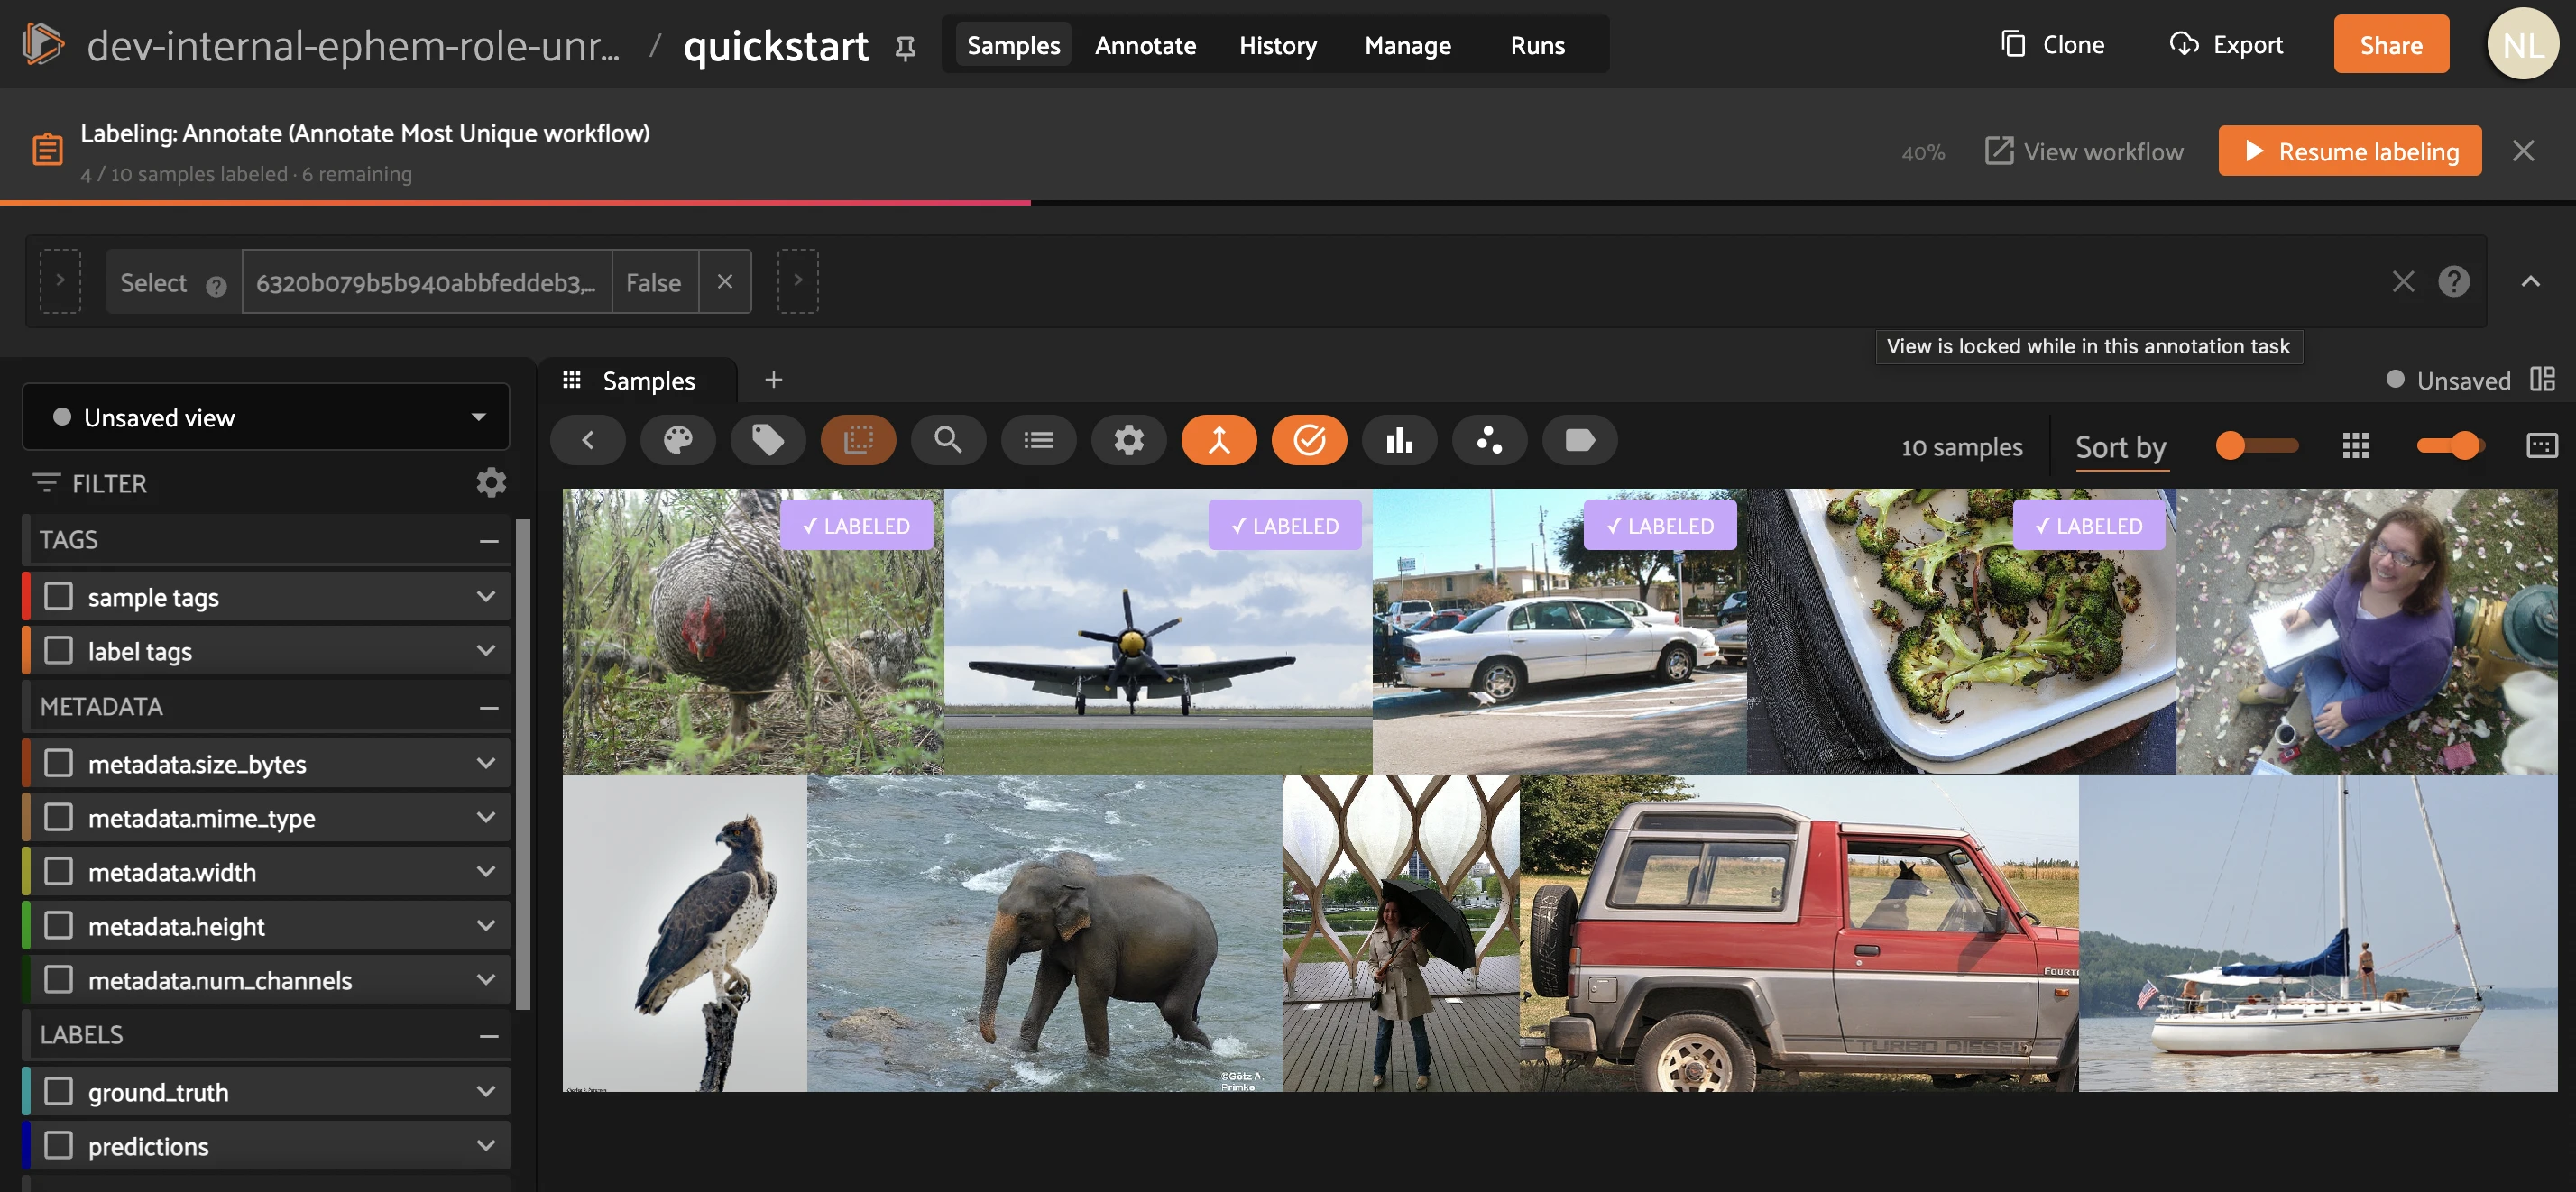
Step 5 — Label. Click Label next to the Annotate task. FiftyOne opens a locked labeling view of only your assigned samples. Draw labels against the ontology, then mark each finished sample Labeled — it gets a green LABELED badge and the progress bar advances. Use Resume labeling to pick up where you left off; close the task when the count reads 0 left.
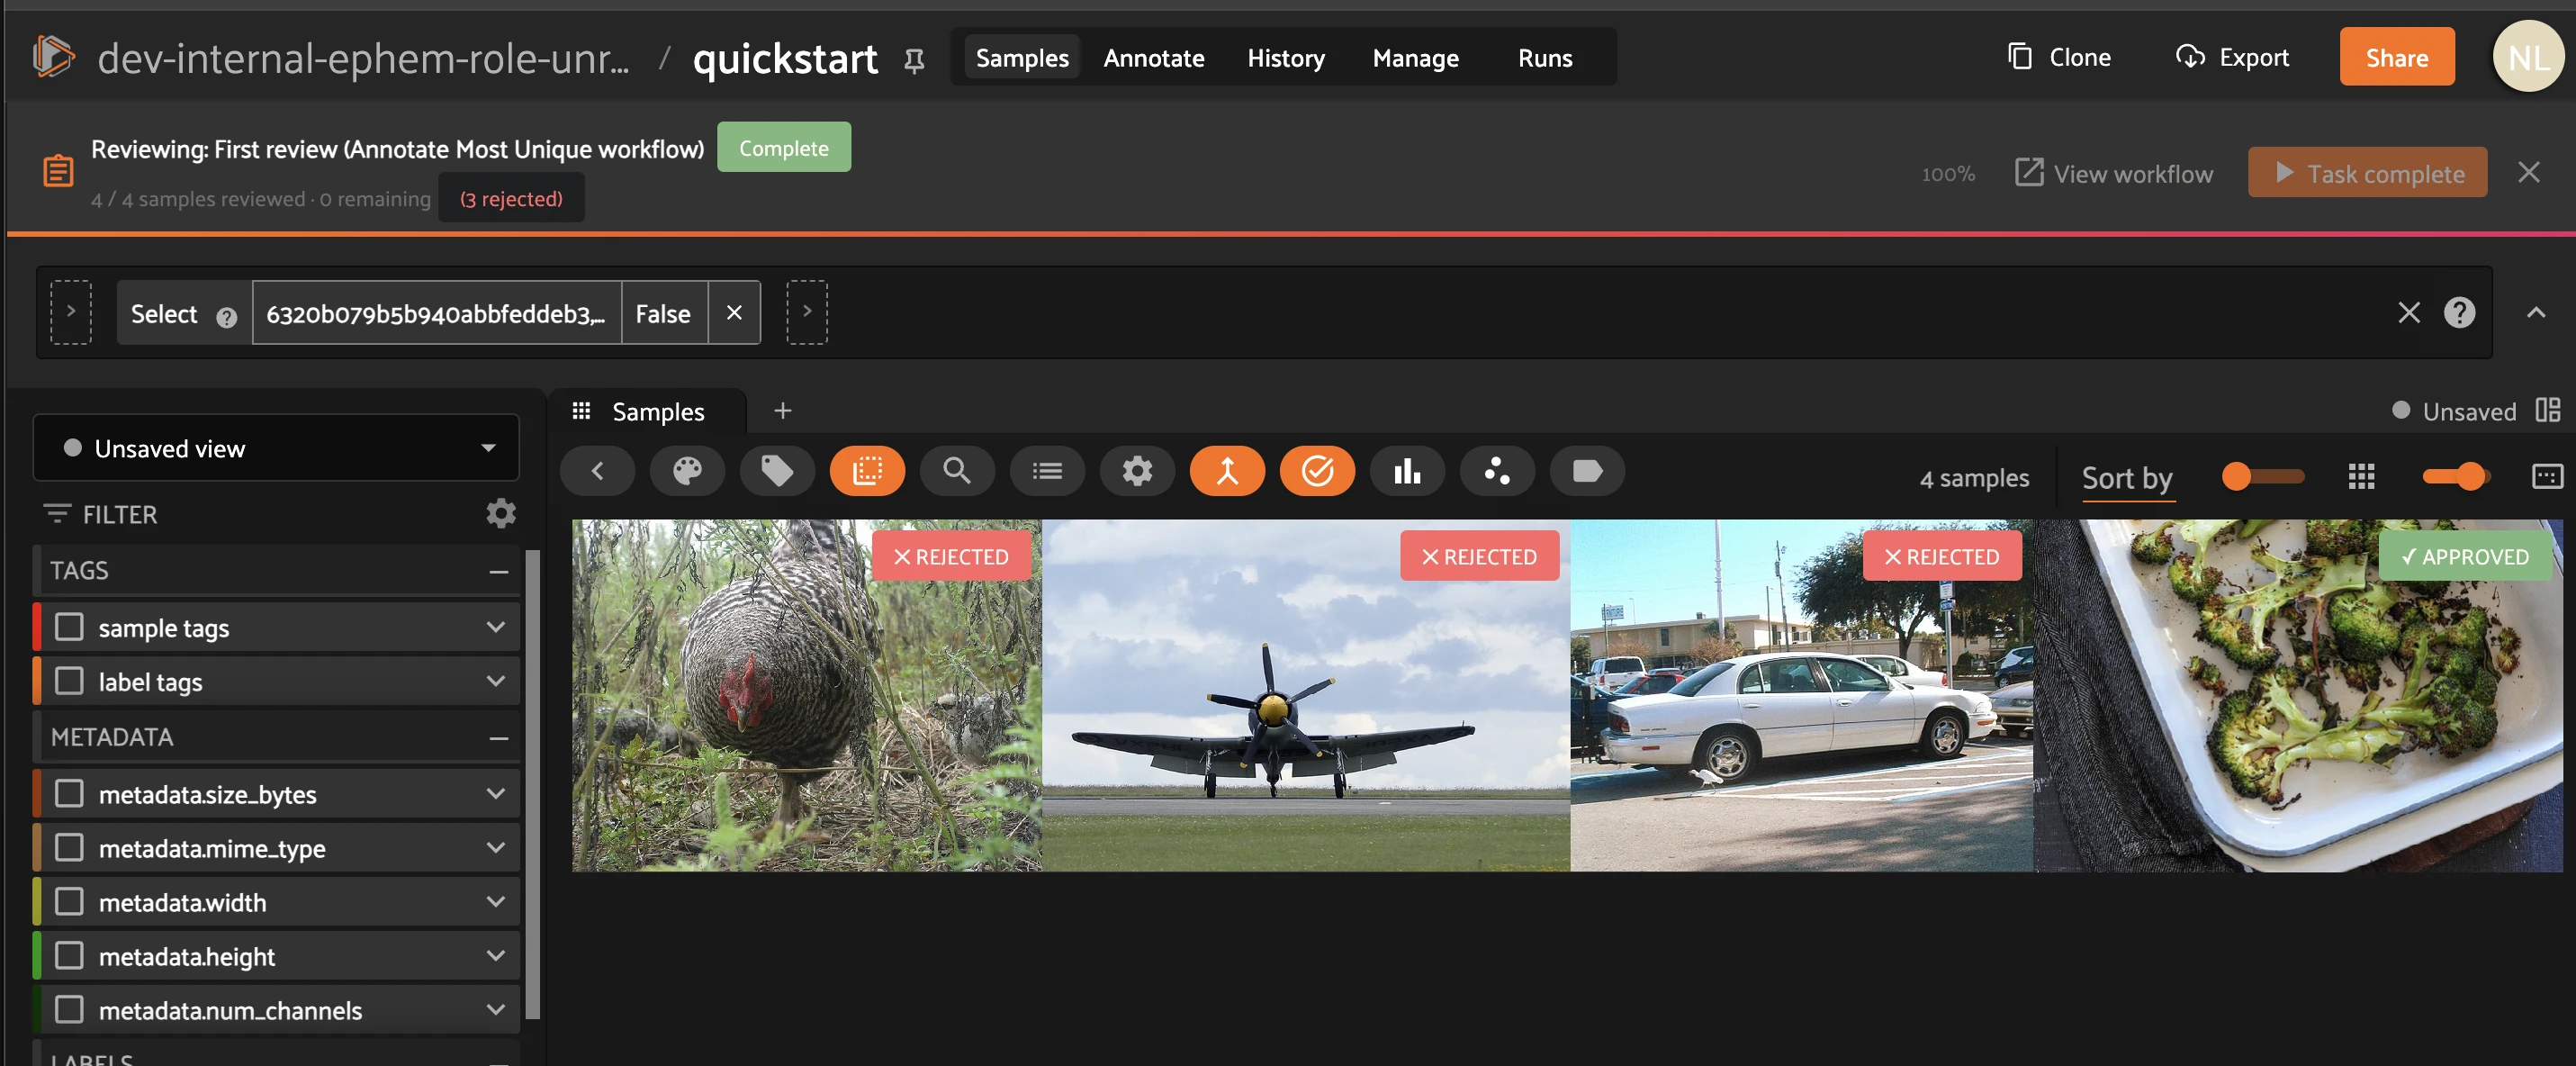
Step 6 — Review: approve or reject. Back on the Annotate tab, click Review next to the First review task. For each submitted sample, click Approve (✓) to accept it or Reject (✗) to send it back. Approved samples advance to Final review; rejected samples follow the Rejected edge back to the Annotate stage. Click Task complete when the queue is empty.
Step 7 — Close out the loop. Rejected samples reappear as new Annotate tasks (the remaining count grows back). Re-label them, send them through review again, and clear the Final review task. When every stage reads 0 left, the workflow flips to Complete — 10 / 10 samples at 100%.
Agentic labeling#
FiftyOne Enterprise. Agentic Labeling is a new annotation feature: train a labeling agent from a plain-language prompt plus a few example crops, test it, then run it across the dataset — so you can capture a concept that isn’t in your schema yet. Here we detect construction workers who are not wearing a hard hat.
Load the Voxel51 hard-hat detection dataset from the Hugging Face Hub. Its ground_truth field holds Helmet / Person / Head boxes, but there is no “worker without a hard hat” class — that is exactly what the agent will add.
[ ]:
import fiftyone.utils.huggingface as fouh

hardhat = fouh.load_from_hub(
    "Voxel51/hard-hat-detection",
    name="hard-hat-detection",
    max_samples=200,
    persistent=True,
)
session.dataset = hardhat  # point the running App at the hard-hat dataset
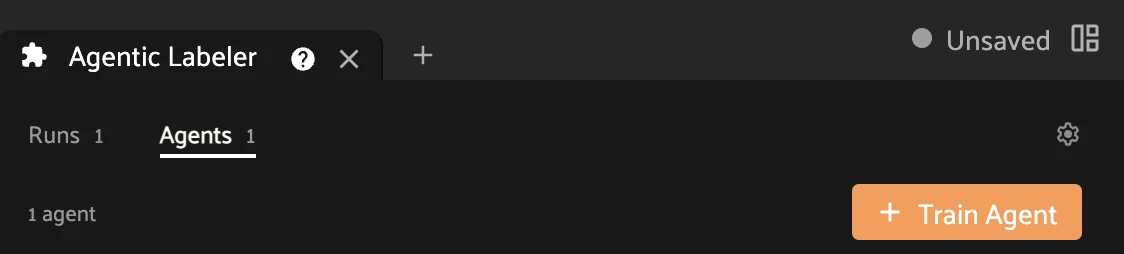
Step 1 — Open the Agentic Labeler. In the App, click the + beside the sample-grid tab and choose Agentic Labeler. The panel opens on the Runs / Agents tabs. Click + Train Agent.
Step 2 — Describe the labels. In the Train new agent form, type the instruction in the TEXT PROMPT box — here, Find site workers not wearing hard hats. Under SETTINGS → Task, click the Detection card (bounding boxes). In the Allowed classes box, type no_hardhat and press Enter so the agent assigns exactly that one label.

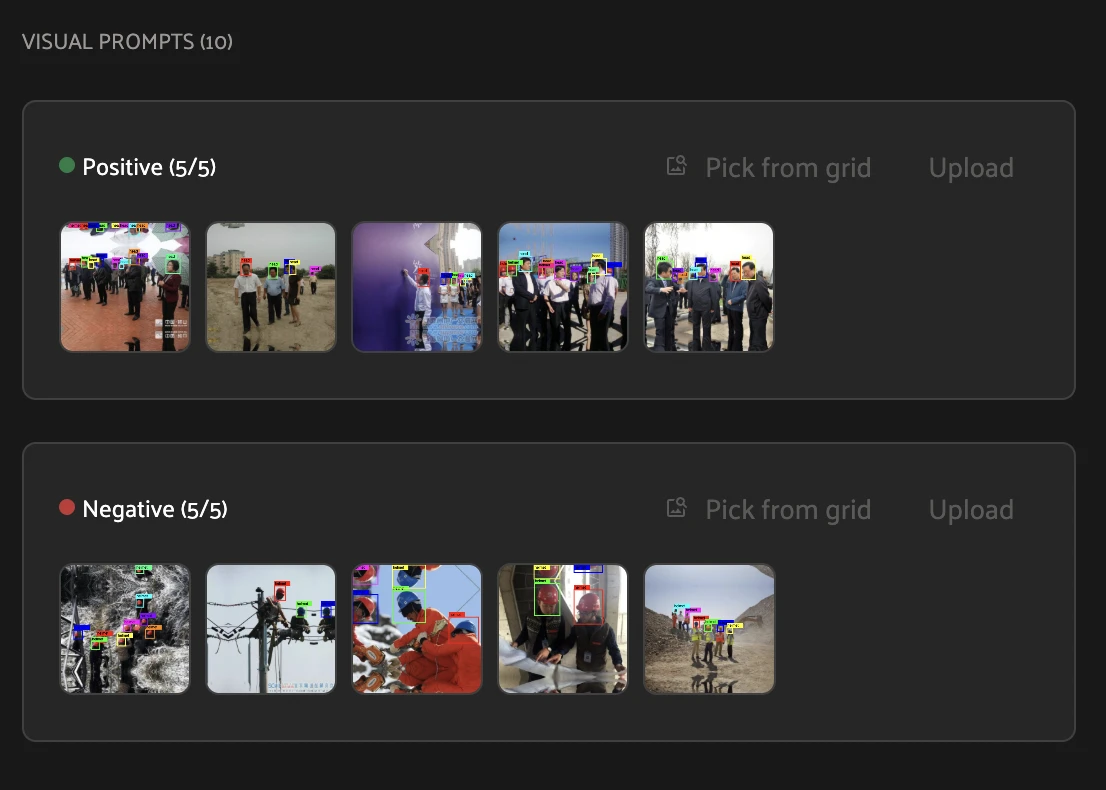
Step 3 — Add visual prompts. Scroll to VISUAL PROMPTS and give the agent examples. Under Positive, click Pick from grid and select five crops that do show the concept (workers with no hard hat). Under Negative, select five crops that do not (workers wearing one).
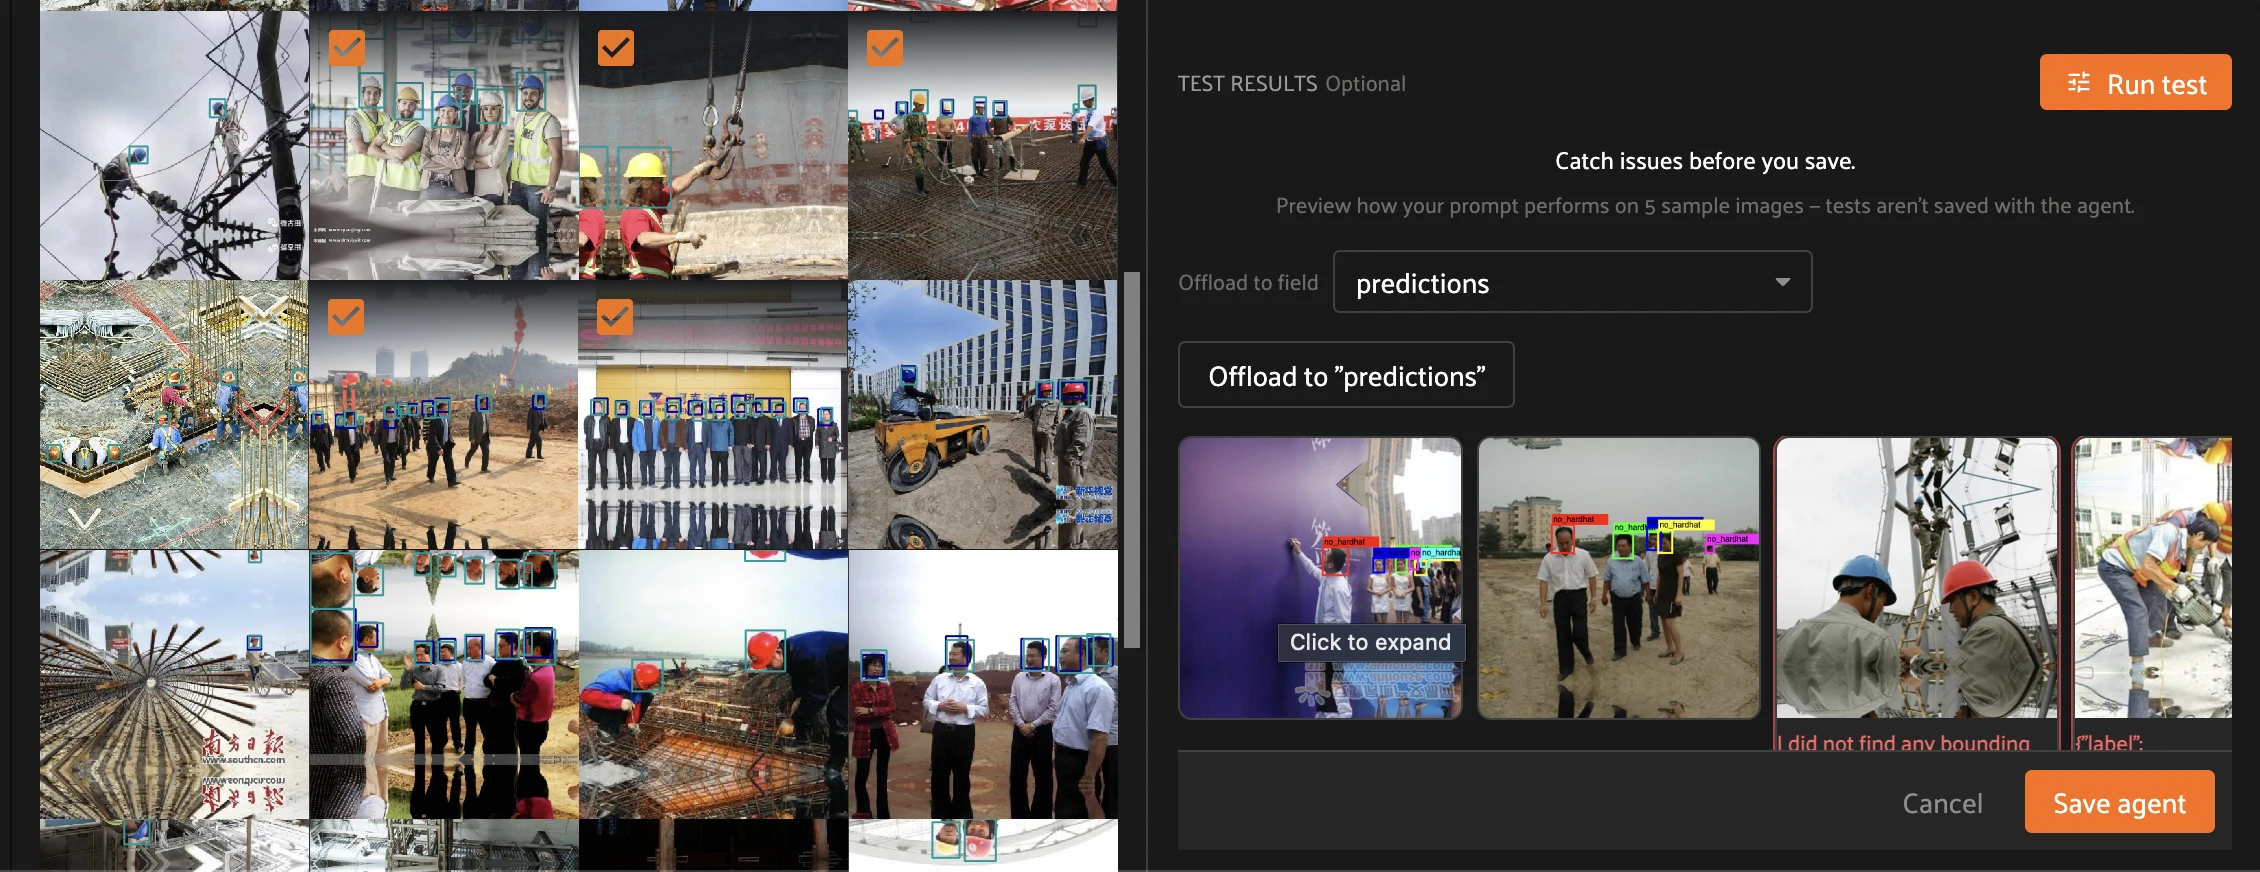
Step 4 — Test, then save. Click Run test to preview the prompt on five sample images. Set Offload to field to predictions (where the labels will land) and inspect the thumbnails — no_hardhat boxes where the agent fired, and I did not find any bounding boxes where it correctly abstained. When the previews look right, click Save agent.
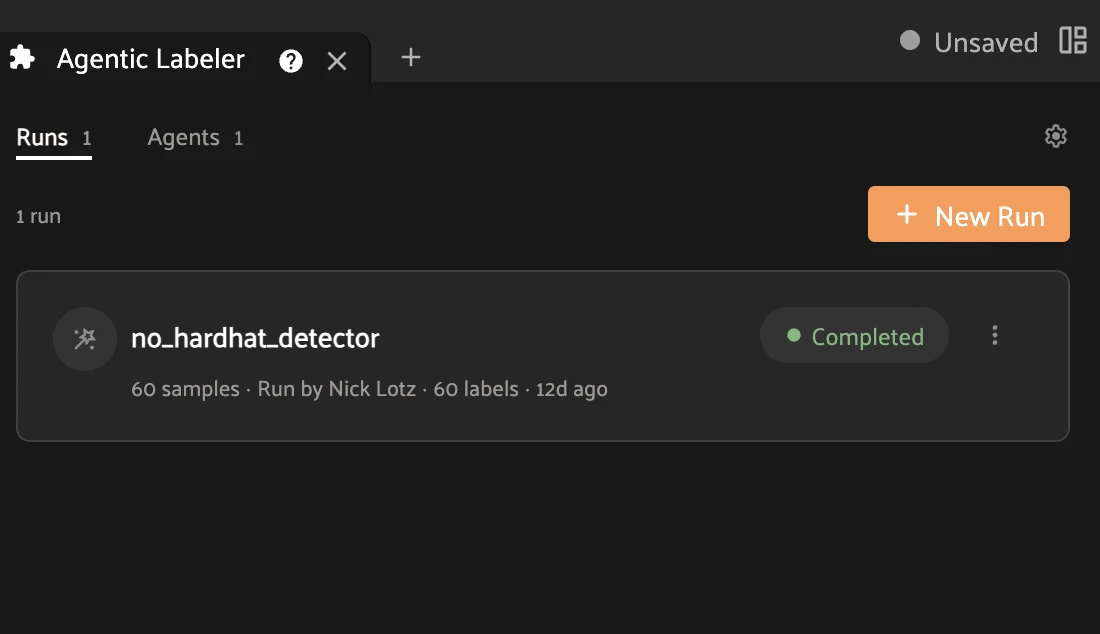
Step 5 — Run the agent. Back on the Runs tab, click New Run, choose the saved agent and the samples to label, and start it. The run card reports progress and flips to Completed — here no_hardhat_detector labeled 60 samples with 60 labels.
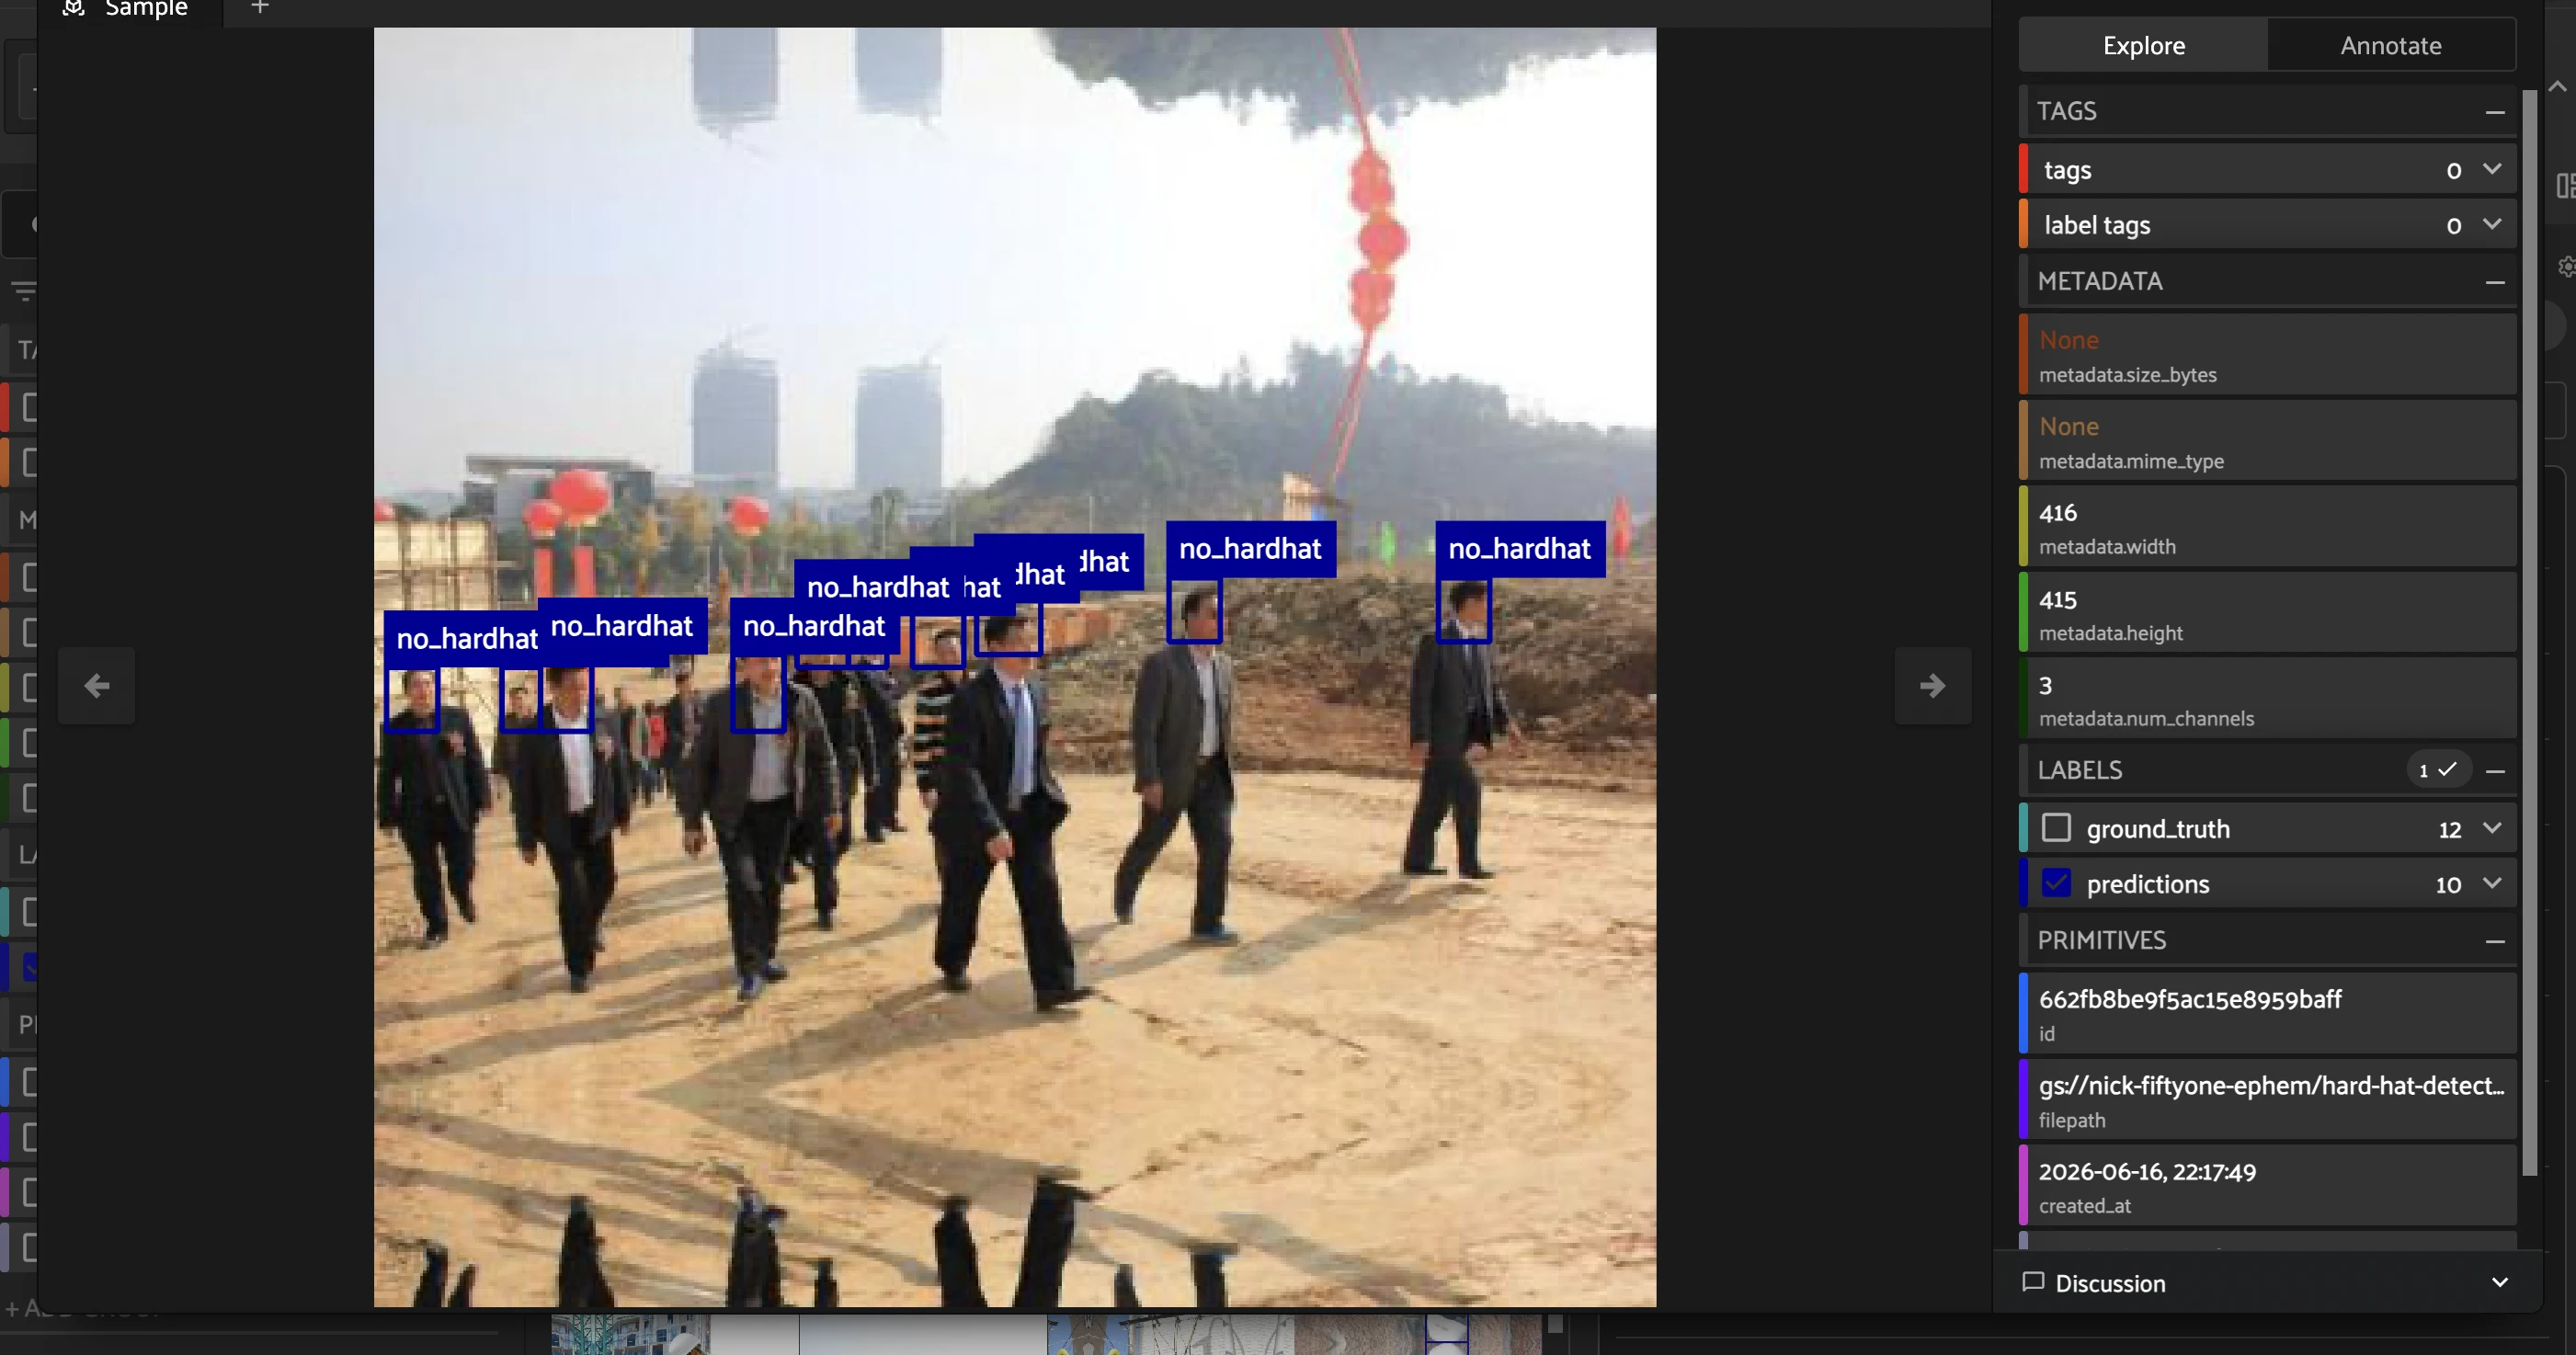
Step 6 — Review the agent’s labels. Open a sample to see the agent’s predictions (the blue no_hardhat boxes) alongside the original ground_truth. Toggle either field in the right sidebar, filter by confidence, and bulk-approve or correct — the same review loop you built above.
[ ]:
# Done with the agentic detour — point the App back to the quickstart dataset
session.dataset = dataset
A scriptable first pass (open source)#
Draft labels from the SDK with zoo models: YOLO-World for open-vocabulary detection, SAM2 for masks.
[ ]:
# Open-vocabulary detection — pass the classes you care about at load time
yolo_world = foz.load_zoo_model(
    "yolov8l-world-torch",
    classes=["car", "truck", "person", "traffic light", "stop sign"],
)
dataset.apply_model(yolo_world, label_field="auto_labels")
[ ]:
# Pixel-accurate masks from the boxes above with SAM2
sam2 = foz.load_zoo_model("segment-anything-2.1-hiera-base-plus-image-torch")
dataset.apply_model(sam2, label_field="auto_masks", prompt_field="auto_labels")
Stage 3 — Review: find label mistakes#
Rank labels by estimated error so you review the exceptions, not everything.
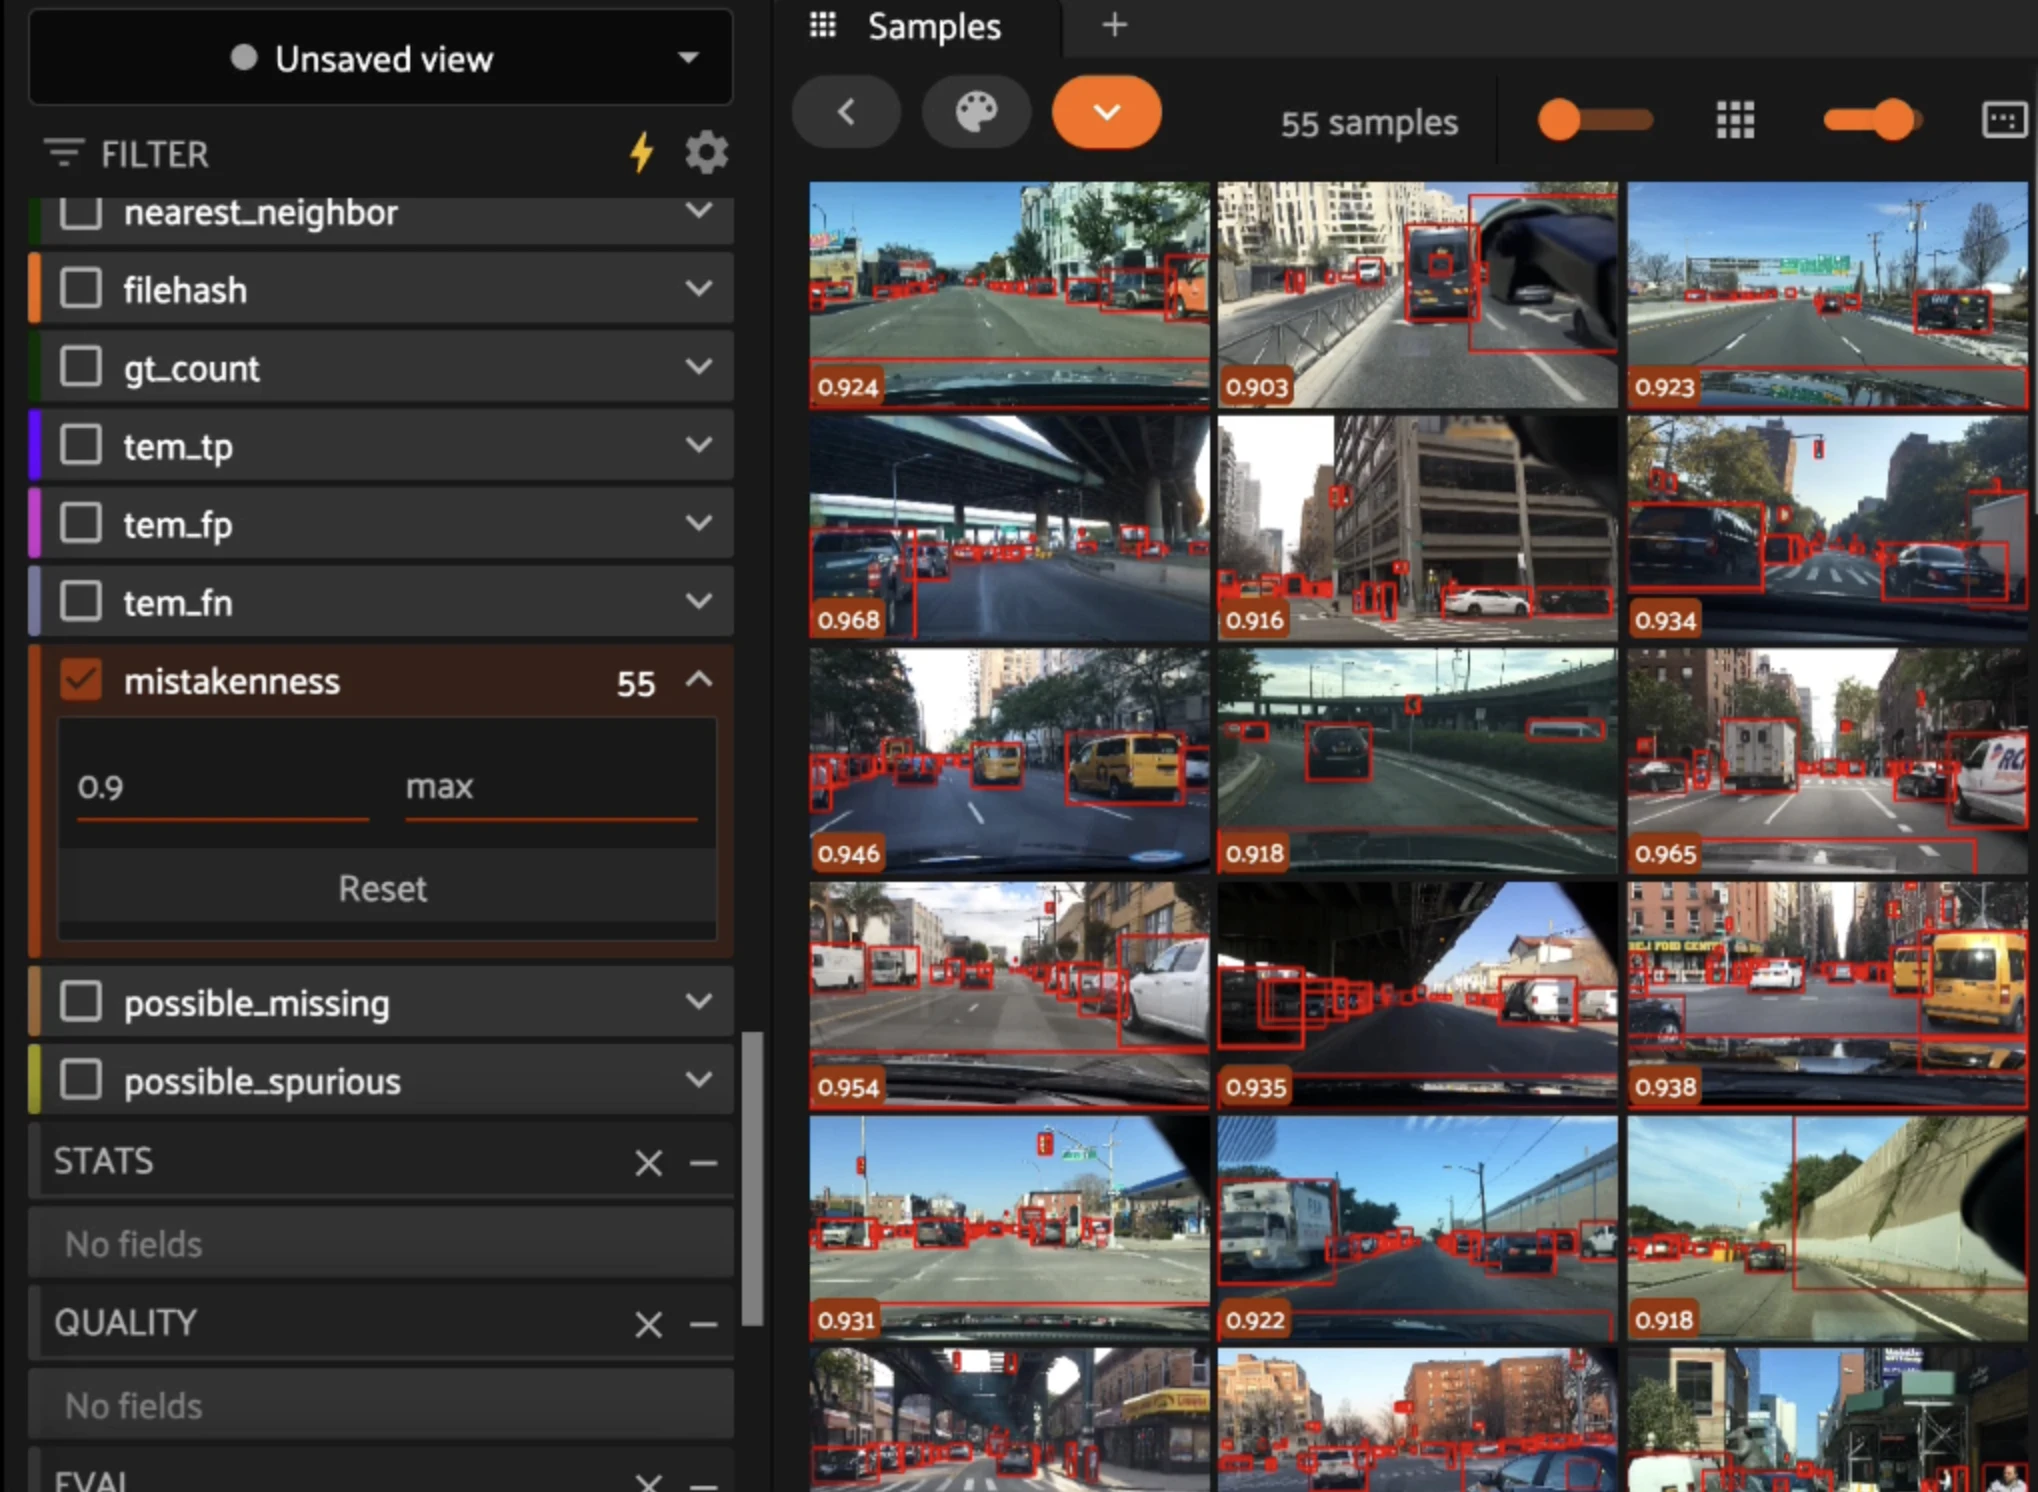
Rank by mistakenness#
The Brain’s mistakenness score (compute_mistakenness()) uses model predictions to flag how likely each label is to be wrong.
[ ]:
fob.compute_mistakenness(dataset, "predictions", label_field="ground_truth")

# Triage queue: most-likely mistakes first
needs_review = dataset.sort_by("mistakenness", reverse=True)
dataset.save_view("needs_review", needs_review, overwrite=True)

# Objects most likely to be mislabeled
worst = dataset.filter_labels("ground_truth", F("mistakenness") > 0.7)
print(worst.count("ground_truth.detections"), "suspect labels")
Mistakenness covers detections and classifications. For semantic segmentation, rank by per-sample mIoU from evaluate_segmentations().
Embedding-based review#
In the Embeddings panel, lasso outliers that sit far from their class cluster and send just those samples to the review queue.
Compare against a reference model#
Where predictions and labels disagree, one is likely wrong. Evaluate and sort by unmatched ground truth; the Enterprise AI Insights panel automates this.
[ ]:
# Audit ground truth against a trusted model: many false negatives on a sample
# often means missing or incorrect labels there
results = dataset.evaluate_detections(
    "predictions", gt_field="ground_truth", eval_key="gt_audit"
)
audit_view = dataset.sort_by("gt_audit_fn", reverse=True)
print(audit_view.first().gt_audit_fn, "unmatched ground-truth objects")
Fix mistakes#
Correct labels in the App, or tag suspects from the SDK and route them back through the workflow.
[ ]:
# Tag suspect labels for rework
high_mistakenness = dataset.filter_labels("ground_truth", F("mistakenness") > 0.7)
for s in high_mistakenness.iter_samples(autosave=True):
    for det in s.ground_truth.detections:
        if det.mistakenness and det.mistakenness > 0.7:
            det.tags.append("needs_rework")

rework = dataset.select_labels(tags="needs_rework")
print(rework.count("ground_truth.detections"), "labels queued for rework")
# rework.annotate("rework_round", backend="cvat", label_field="ground_truth", ...)
Stage 4 — Train and evaluate: close the loop#
Train on the verified set, evaluate by scenario, and feed the weakest slice back into curation.
Export and train#
Export training-ready labels in YOLOv5 format. In Enterprise, run training as a delegated operation on GPU.
[ ]:
train_view = dataset.load_saved_view("to_annotate")
train_view.export(
    export_dir="/tmp/data_engine_yolo",
    dataset_type=fo.types.YOLOv5Dataset,
    label_field="ground_truth",
)

# Train with Ultralytics (uncomment to run):
# from ultralytics import YOLO
# model = YOLO("yolov8n.pt")
# model.train(data="/tmp/data_engine_yolo/dataset.yaml", epochs=50)
#
# Then load predictions back in to evaluate:
# dataset.apply_model(model, label_field="predictions")
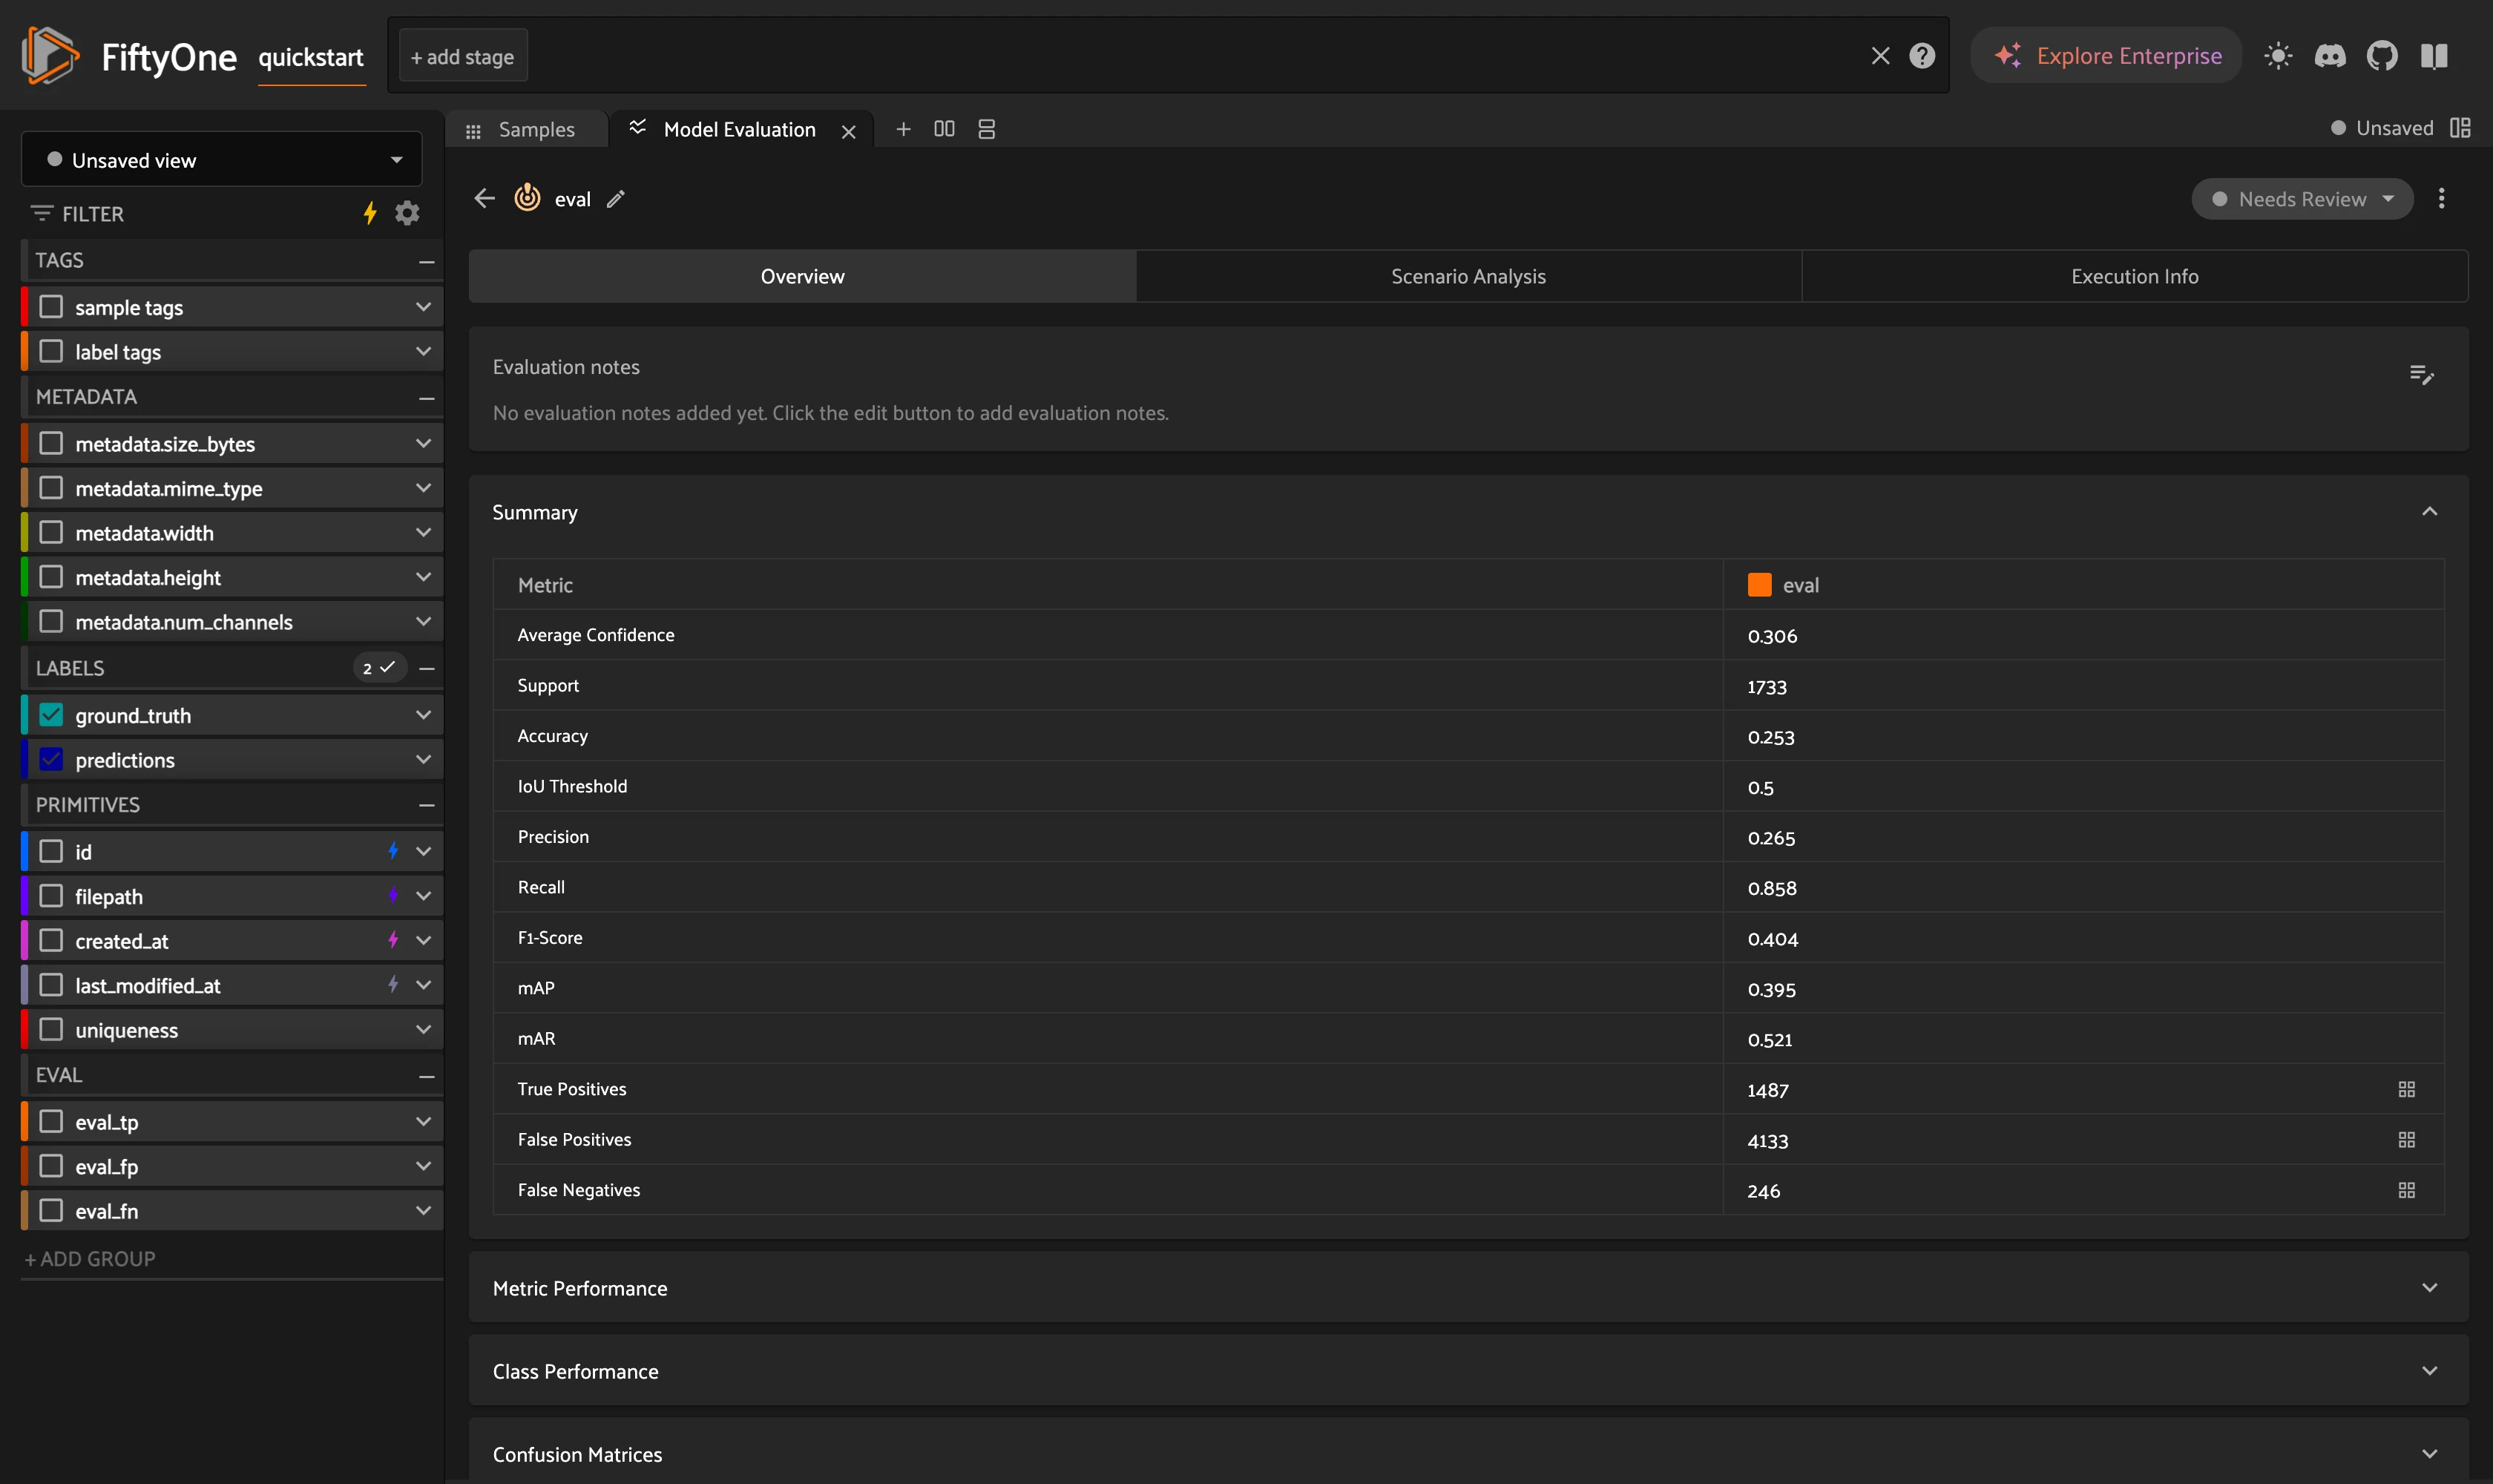
Evaluate by scenario#
Compute COCO mAP overall and per scene type to find the weakest slice. The Enterprise Model Evaluation panel does this interactively.
[ ]:
results = dataset.evaluate_detections(
    "predictions",
    gt_field="ground_truth",
    eval_key="eval",
    method="coco",
    compute_mAP=True,
)
results.print_report()
print("Overall mAP:", round(results.mAP(), 3))

# Scenario analysis: mAP per scene type to find the weakest slice
for scene in dataset.distinct("scene.label"):
    subset = dataset.match(F("scene.label") == scene)
    r = subset.evaluate_detections(
        "predictions", gt_field="ground_truth", method="coco", compute_mAP=True
    )
    print(f"{scene:>16}: mAP = {r.mAP():.3f}")
Close the loop#
Mine more of the weakest scenario and save it as the next batch to annotate.
[ ]:
# Suppose evaluation showed "an indoor scene" is the weakest slice. Mine more
# images like it from the embedding space for the next annotation round.
next_batch = dataset.sort_by_similarity(
    "an indoor scene", k=50, brain_key="img_sim"
)
dataset.save_view("next_to_annotate", next_batch, overwrite=True)
print("Queued", len(next_batch), "samples for the next annotation round")
Summary#
The loop, end to end:
Curate — embeddings, uniqueness, similarity, and zero-shot tagging picked the subset to label.
Annotate — an ontology fixed the schema; a multi-stage workflow moved samples through label → review → send-back; an agent and zoo models drafted the first pass.
Review — mistakenness, embedding outliers, and model comparison surfaced bad labels to fix.
Evaluate — scenario analysis named the weakest slice and fed it back into curation.
Next steps#
[ ]:
session.freeze() # screenshot the active App for sharing