|
|
|
|
Step 2: Adding Object Detections to a FiftyOne Dataset#
In our first step, we will be covering how you can add object detections to your dataset. First we will go through how to add predictions using the FiftyOne Model Zoo and apply_model. In the second part, we will demonstrate how to add your detection predictions from your own custom model or labels. Feel free to skip ahead if you are interested in only adding object detections with your own model or labels!
Using the Model Zoo#
Let’s kick things off by loading in the MSCOCO 2017 validation split from the FiftyOne Dataset Zoo. We will cap it to a max of 1000 samples:
[ ]:
import fiftyone as fo
import fiftyone.zoo as foz

dataset = foz.load_zoo_dataset("coco-2017", split="validation", max_samples=1000)

session = fo.launch_app(dataset)
With FiftyOne, you have tons of pretrained models at your disposal to use via the FiftyOne Model Zoo or using one of our integrations such as HuggingFace! To get started using them, first load the model in and pass it into the apply_model function.
We will use retinanet-resnet50-fpn-coco-torch from the model zoo first!
[11]:
model = foz.load_zoo_model("retinanet-resnet50-fpn-coco-torch")
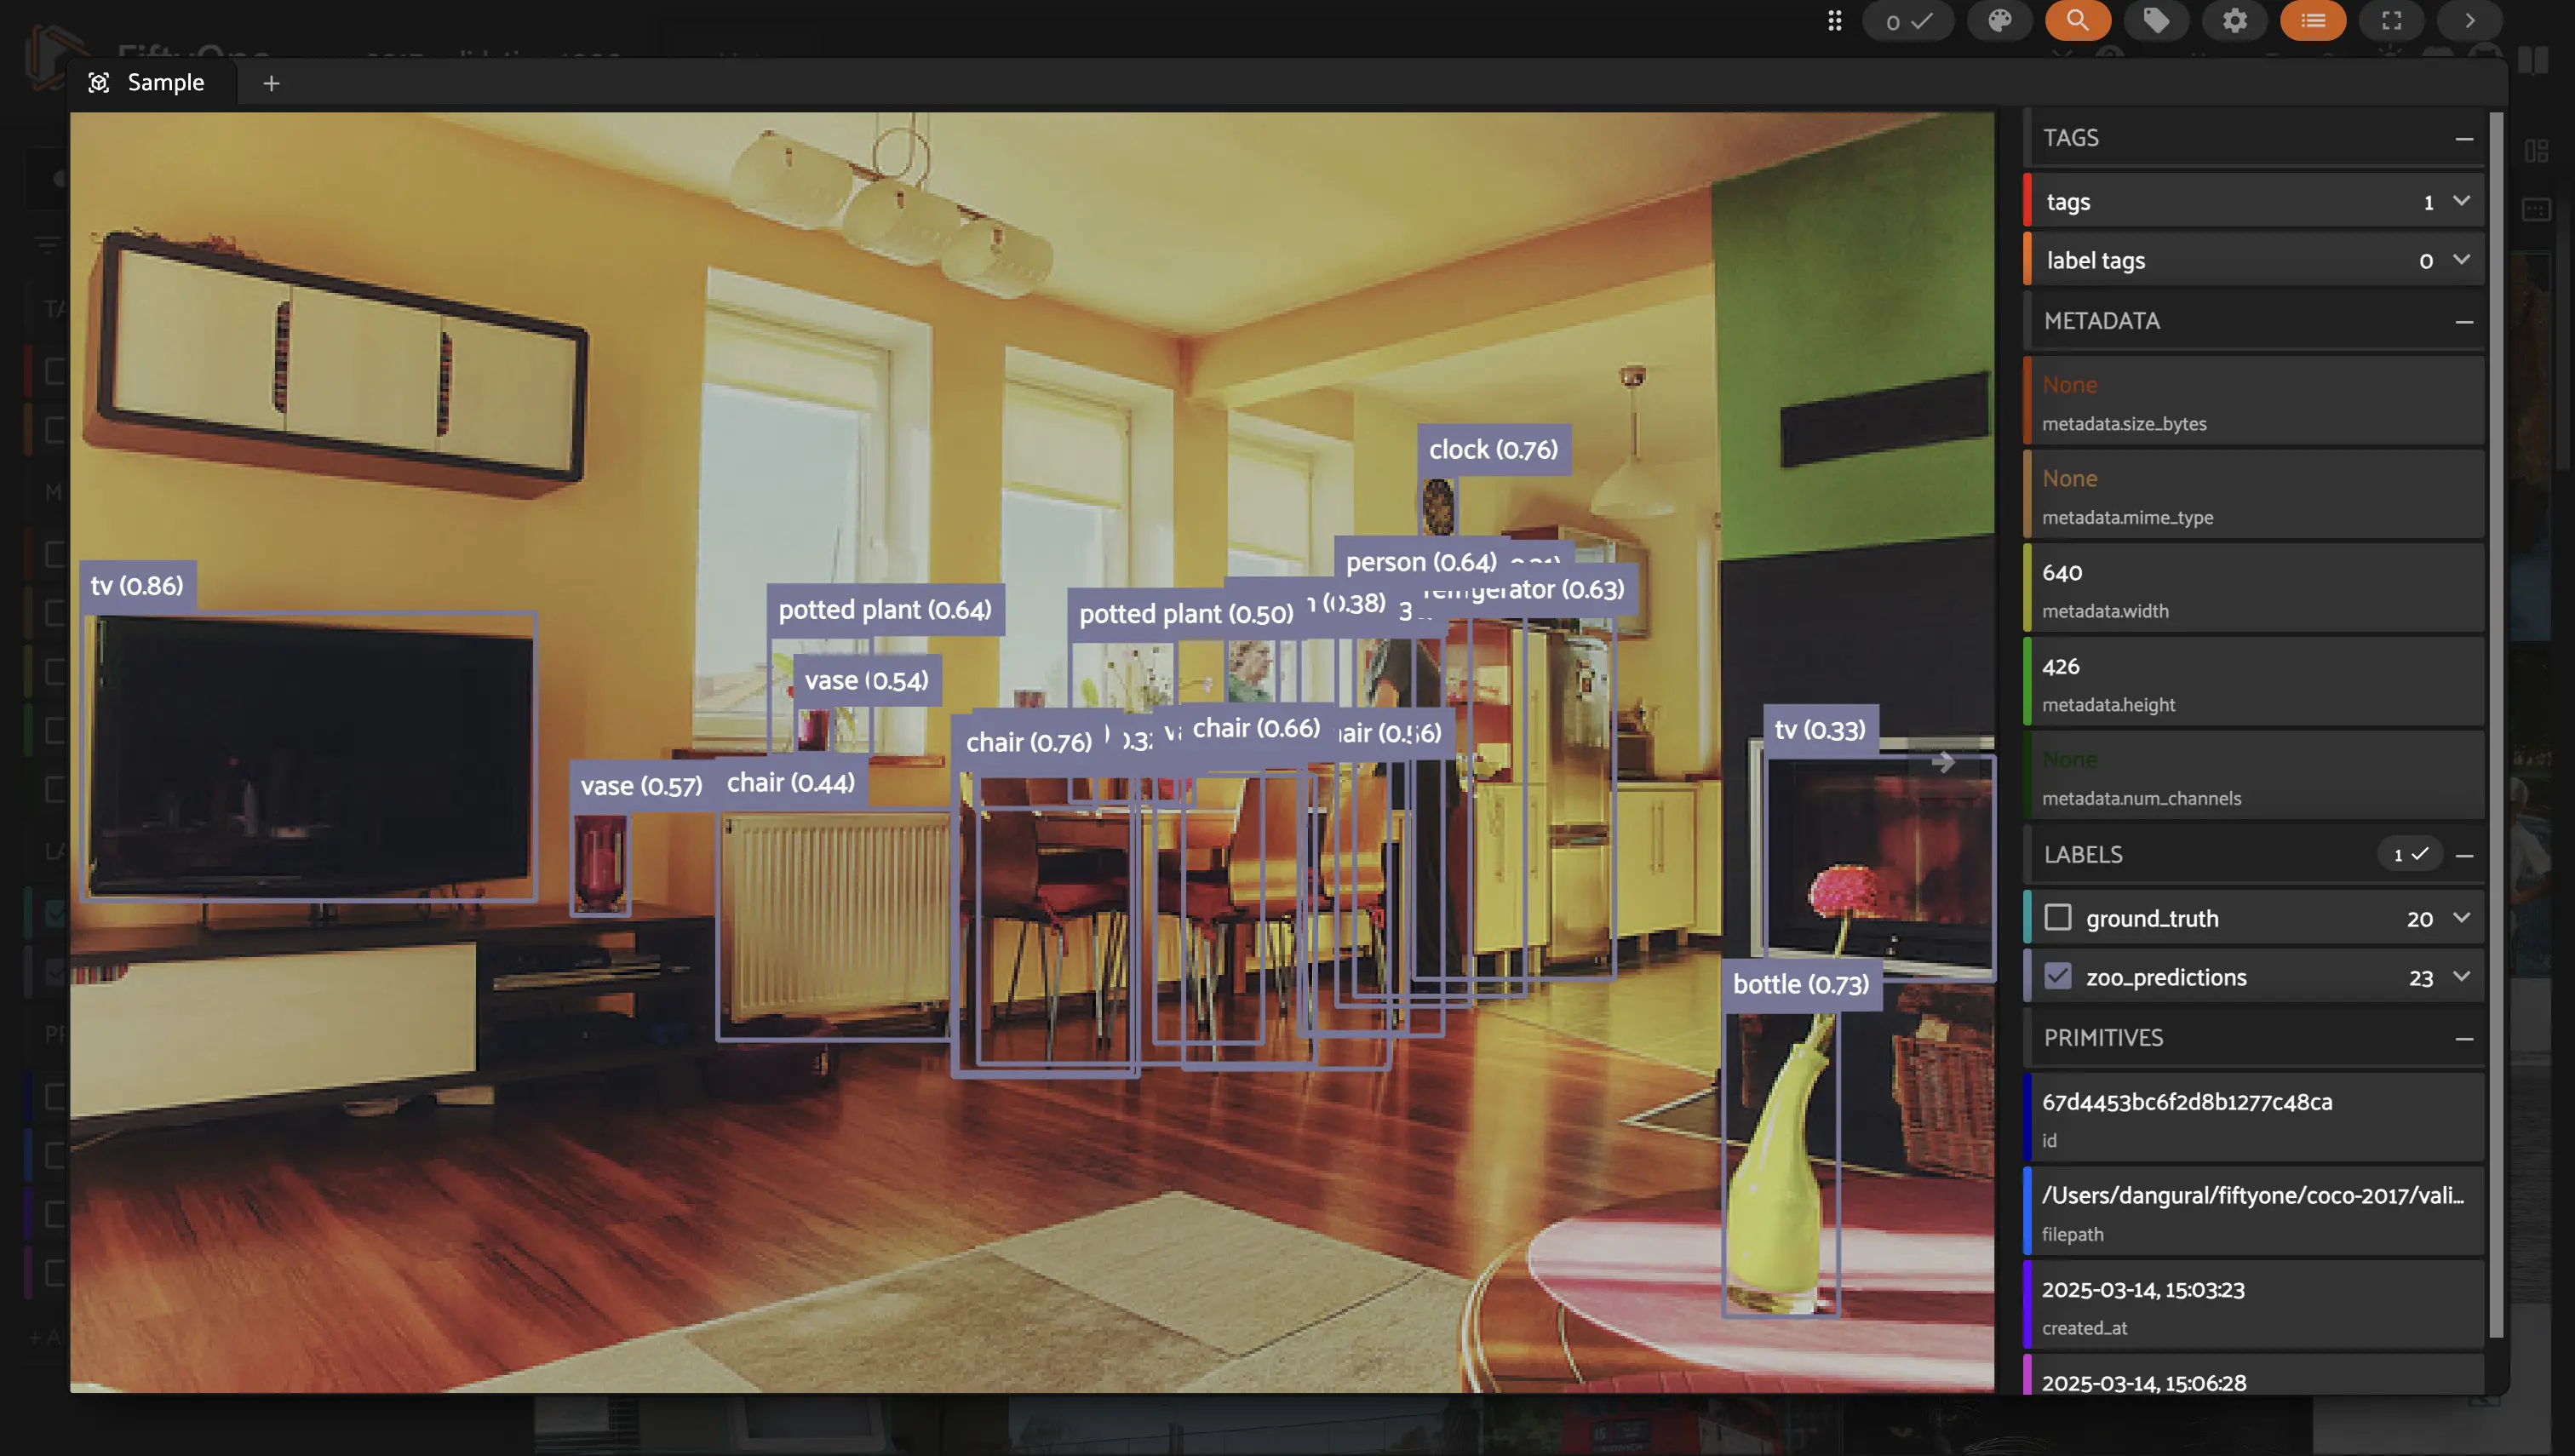
dataset.apply_model(model, label_field="zoo_predictions")
100% |███████████████| 1000/1000 [7.2m elapsed, 0s remaining, 2.3 samples/s]
Let’s visualize our results!
[ ]:
session.show()
Adding Predictions using Ultralytics#
Thanks to FiftyOne’s integration with Ultralytics, we can pass any Ultralytics YOLO model into apply_model as well!
[ ]:
!pip install ultralytics
[12]:
from ultralytics import YOLO
# YOLOv8
model = YOLO("yolov8s.pt")
# model = YOLO("yolov8m.pt")
# model = YOLO("yolov8l.pt")
# model = YOLO("yolov8x.pt")
# YOLOv5
# model = YOLO("yolov5s.pt")
# model = YOLO("yolov5m.pt")
# model = YOLO("yolov5l.pt")
# model = YOLO("yolov5x.pt")
# YOLOv9
# model = YOLO("yolov9c.pt")
# model = YOLO("yolov9e.pt")
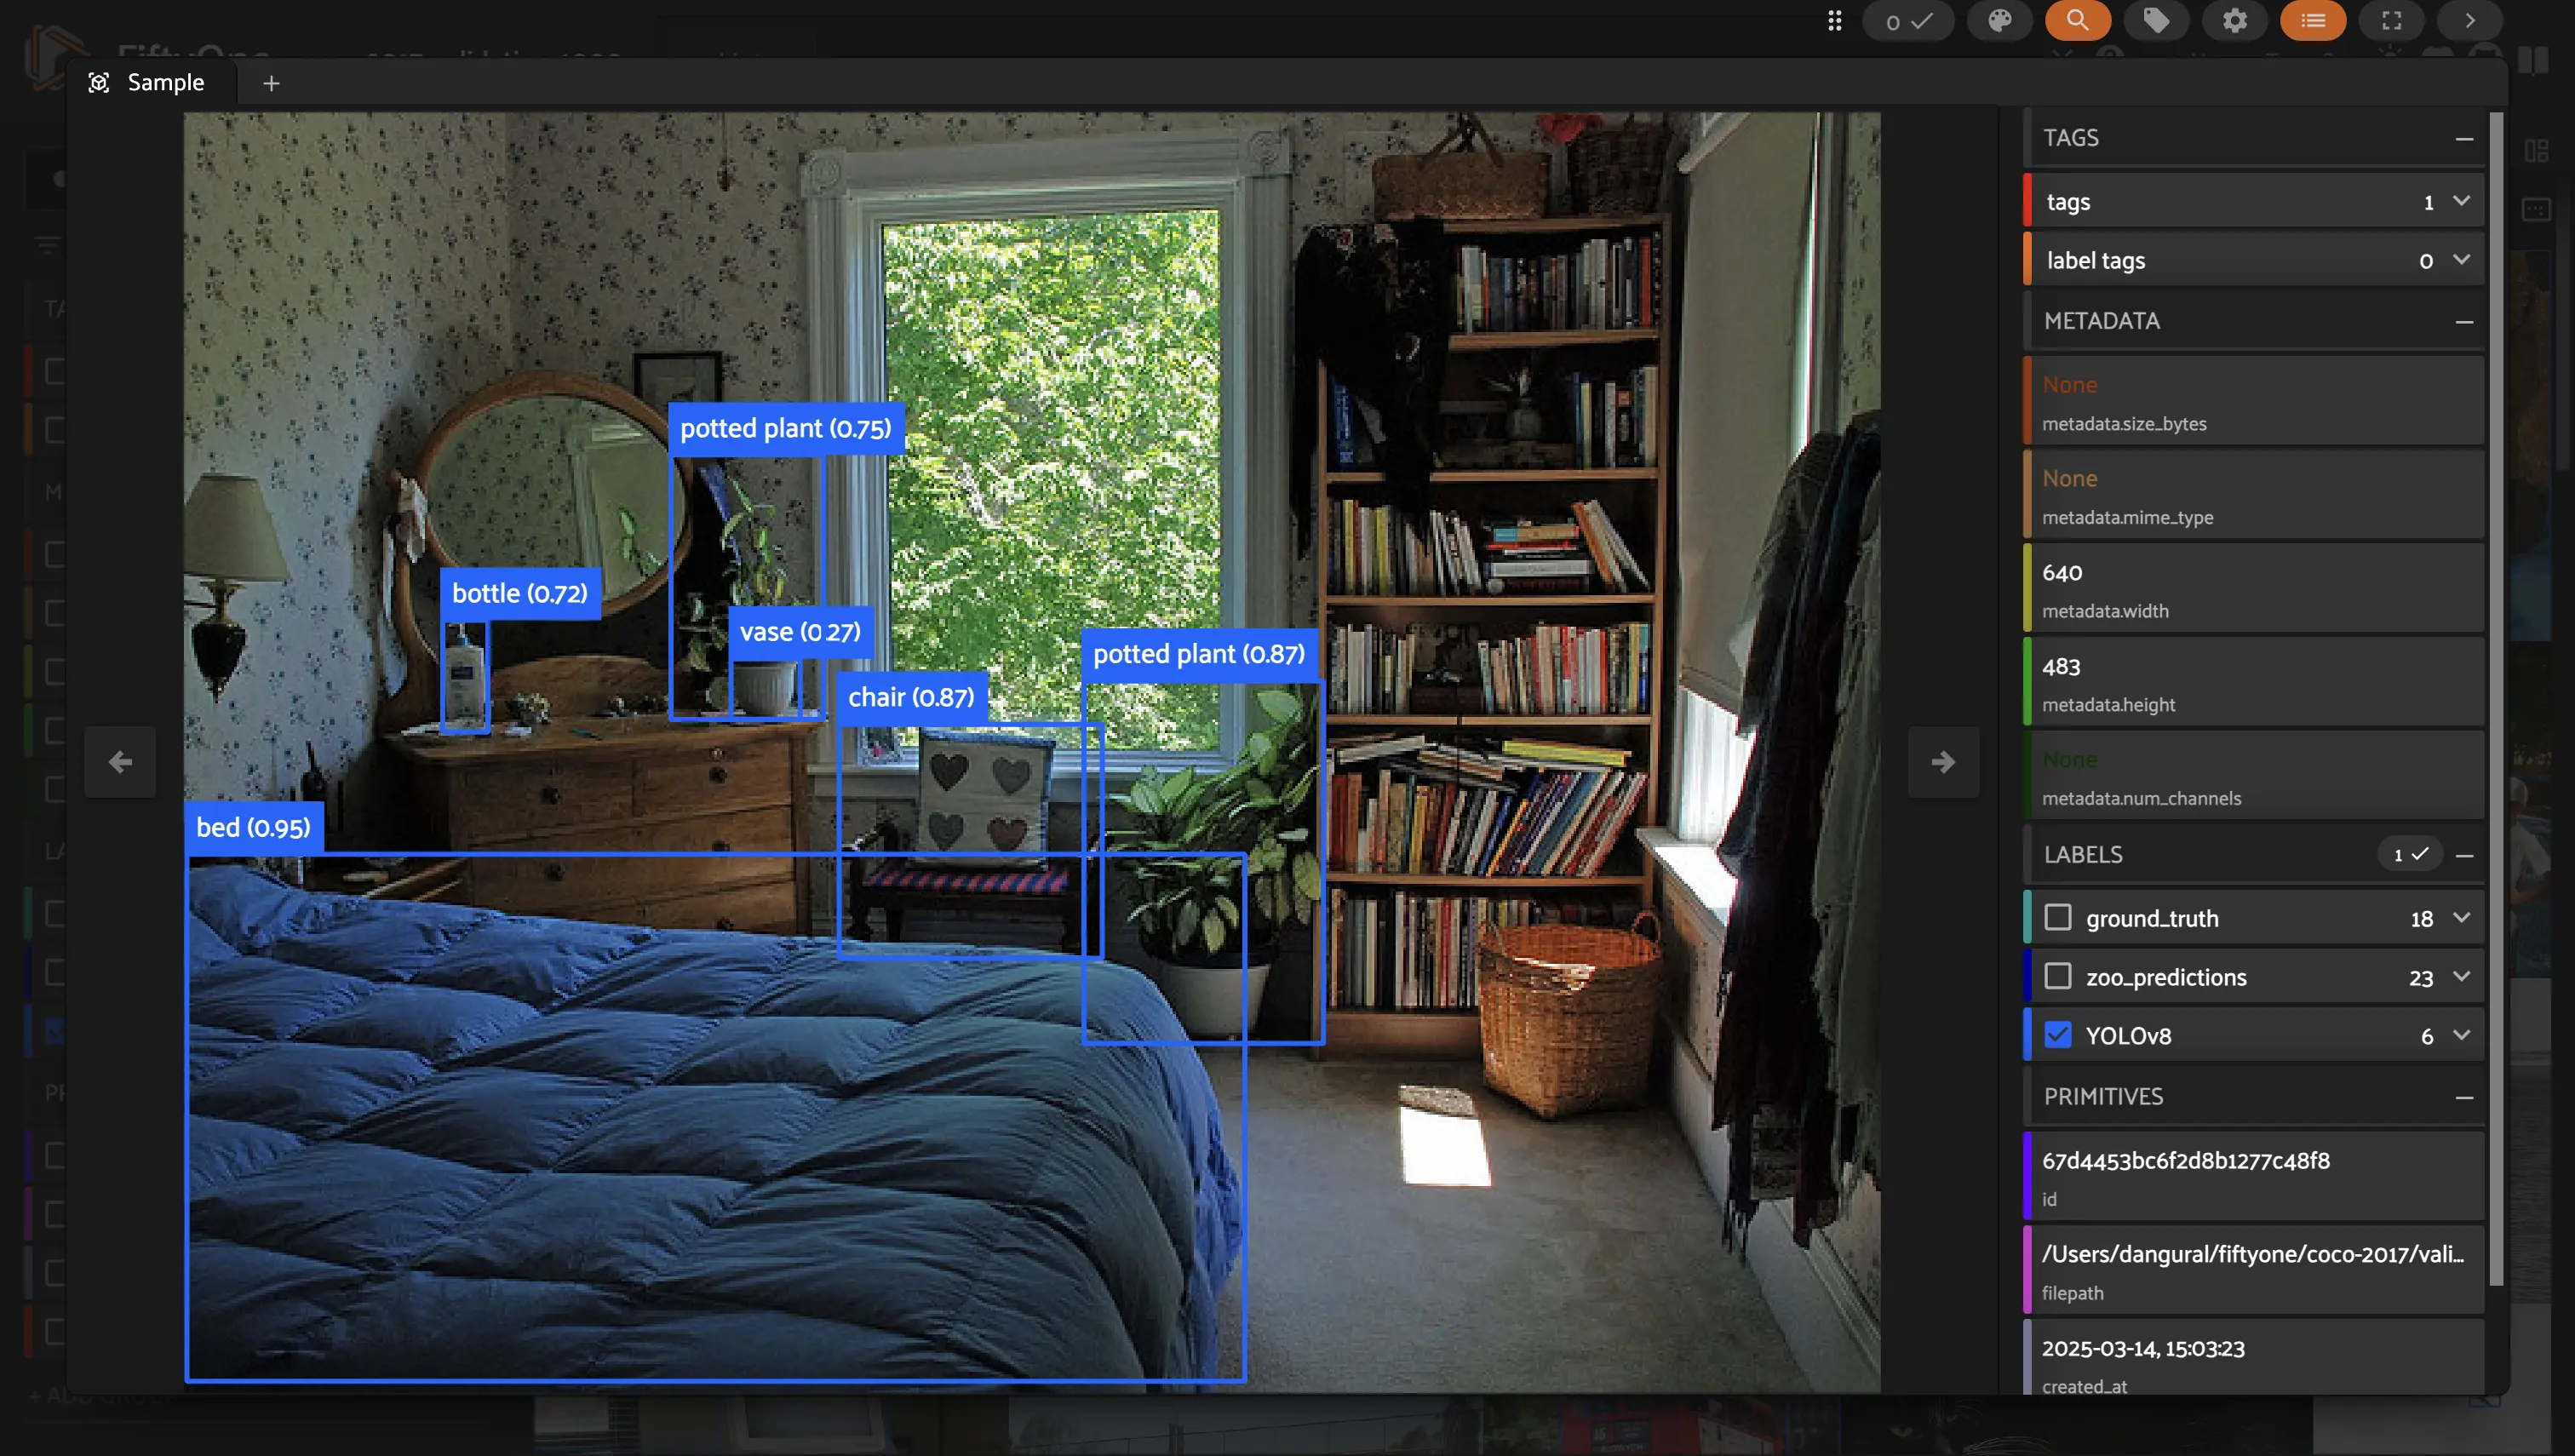
dataset.apply_model(model, label_field="YOLOv8")
100% |███████████████| 1000/1000 [46.5s elapsed, 0s remaining, 21.5 samples/s]
Adding Predictions from Custom Model#
When bringing your own model to add predictions to your dataset, you can add detection labels directly to each sample! The most important part to remember is that FiftyOne uses [nx, ny, nw, nh] bounding box format, or normalized x,y,w,h notation. This means that each value in the bounding box is between (0,1). Below is a sample function that converts an xyxy box to nxywh.
[13]:
def convert_xyxy_boxes(sample, boxes):
    new_boxes = []

    for box in boxes:

        # Normalize X and Y by width and height
        nx = box[0] / sample.metadata.width
        ny = box[1] / sample.metadata.height

        # Calculate width and height and normalize as well
        nw = (box[2] - box[0]) / sample.metadata.width
        nh = (box[3] - box[1]) / sample.metadata.height
        new_box = [nx, ny, nw, nh]
        new_boxes.append(new_box)

    return new_boxes
For our custom model in this example, we will be using torchvision FasterRCNN_Resnet50. The pattern for adding custom labels looks like this:
Load the sample image
Perform any necessary preprocessing
Inference on the image
Grab the prediction and confidence of the model_output
Adjust the bounding box if needed
Add the values as a label to your sample
Let’s walkthrough them below!
[ ]:
from torchvision.io.image import read_image
from torchvision.models.detection import fasterrcnn_resnet50_fpn_v2, FasterRCNN_ResNet50_FPN_V2_Weights
weights = FasterRCNN_ResNet50_FPN_V2_Weights.DEFAULT
model = fasterrcnn_resnet50_fpn_v2(weights=weights, box_score_thresh=0.9)
# Compute Metadata to collect each samples width and height
dataset.compute_metadata()
for sample in dataset:
# Step 1: Load the image
image = read_image(sample.filepath)
# Step 2: Preform preprocessing
preprocess = weights.transforms()
batch = [preprocess(image)]
# Step 3: Inference on the image
model.eval()
prediction = model(batch)[0]
# Step 4: Grab the prediction and confidence
labels = [weights.meta["categories"][i] for i in prediction["labels"]]
confs = prediction["scores"].tolist()
# Step 5: Convert the boxes to FiftyOne format
fo_boxes = convert_xyxy_boxes(sample, prediction["boxes"].tolist())
detections = []
# Step 6: Add to your sample
for cls, box, conf in zip(labels, fo_boxes, confs):
det = fo.Detection(label=cls, bounding_box=box, confidence=conf)
detections.append(det)
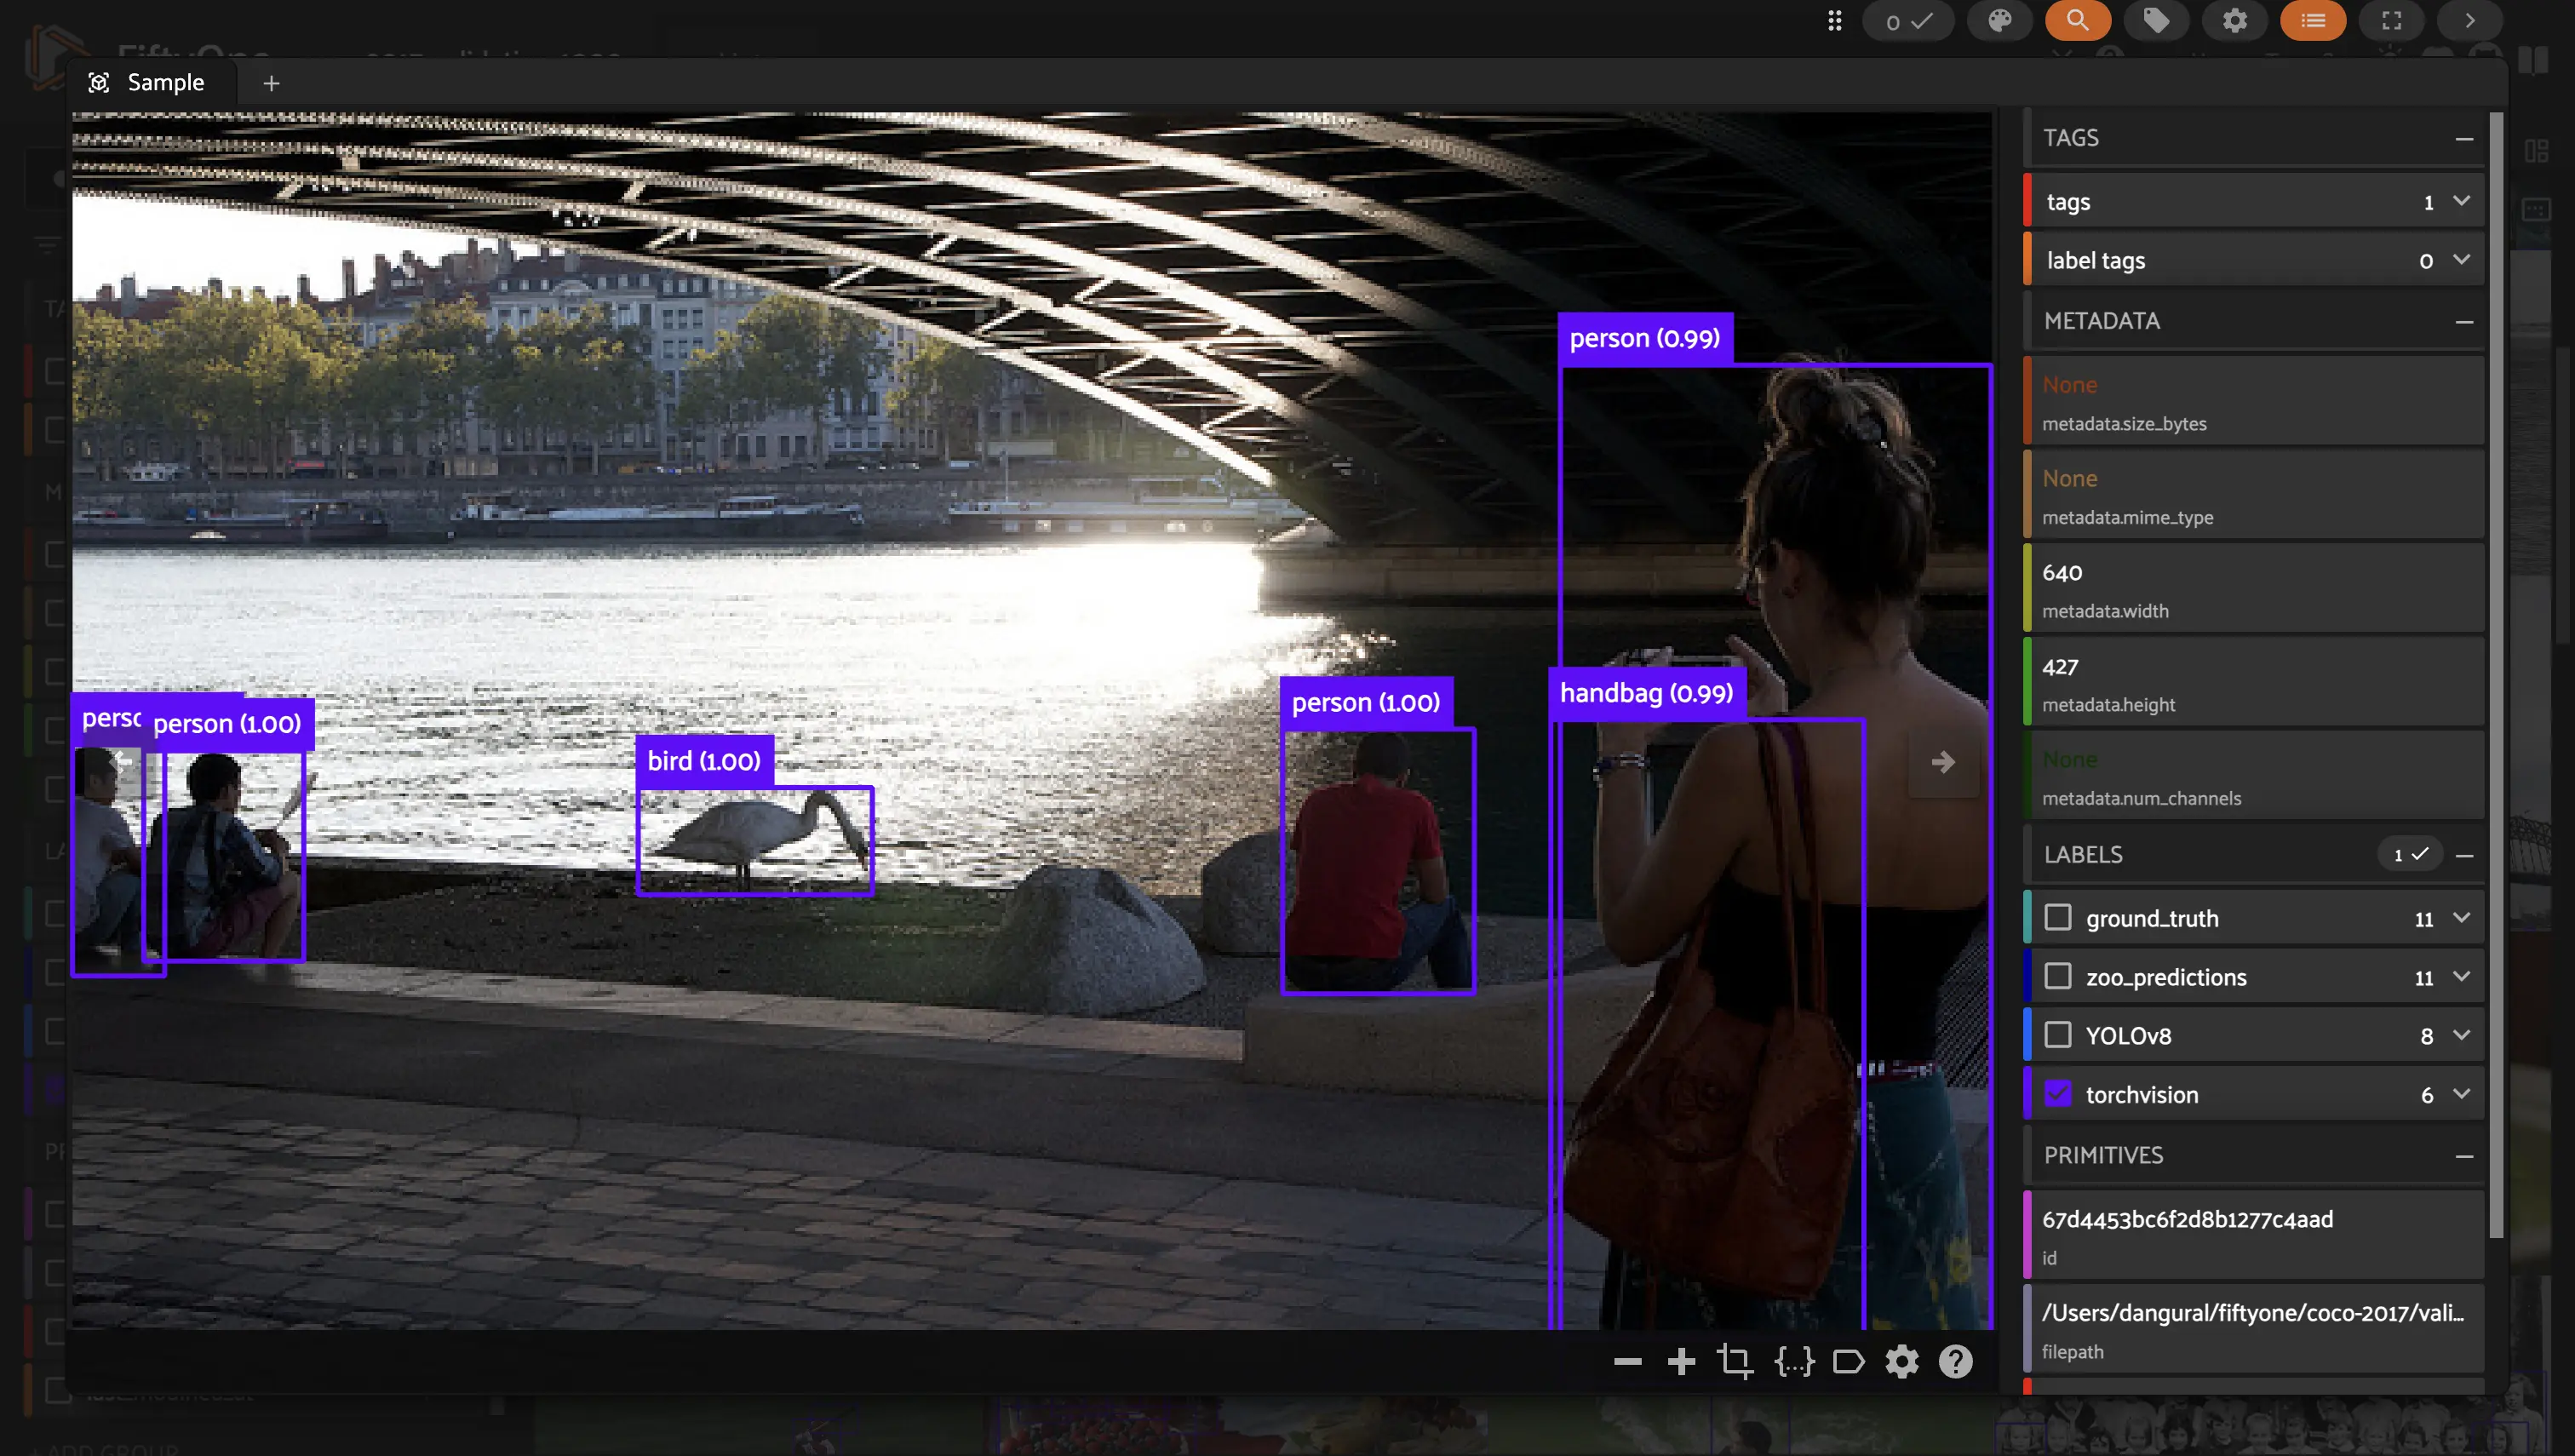
sample["torchvision"] = fo.Detections(detections=detections)
sample.save()
Finally, we can see all of our results in the FiftyOne App!
[ ]:
session.show()
Summary#
You’ve added object detections using Model Zoo models, Ultralytics YOLO, and custom models. Remember: FiftyOne uses normalized [nx, ny, nw, nh] bounding box format.
Next up: Step 3 covers finding detection mistakes